Custom Cyanotype Blue and Gold Telecaster Partscaster DIY Kit Build Documentation
Part 1 - First try cyanotyping a guitar body.
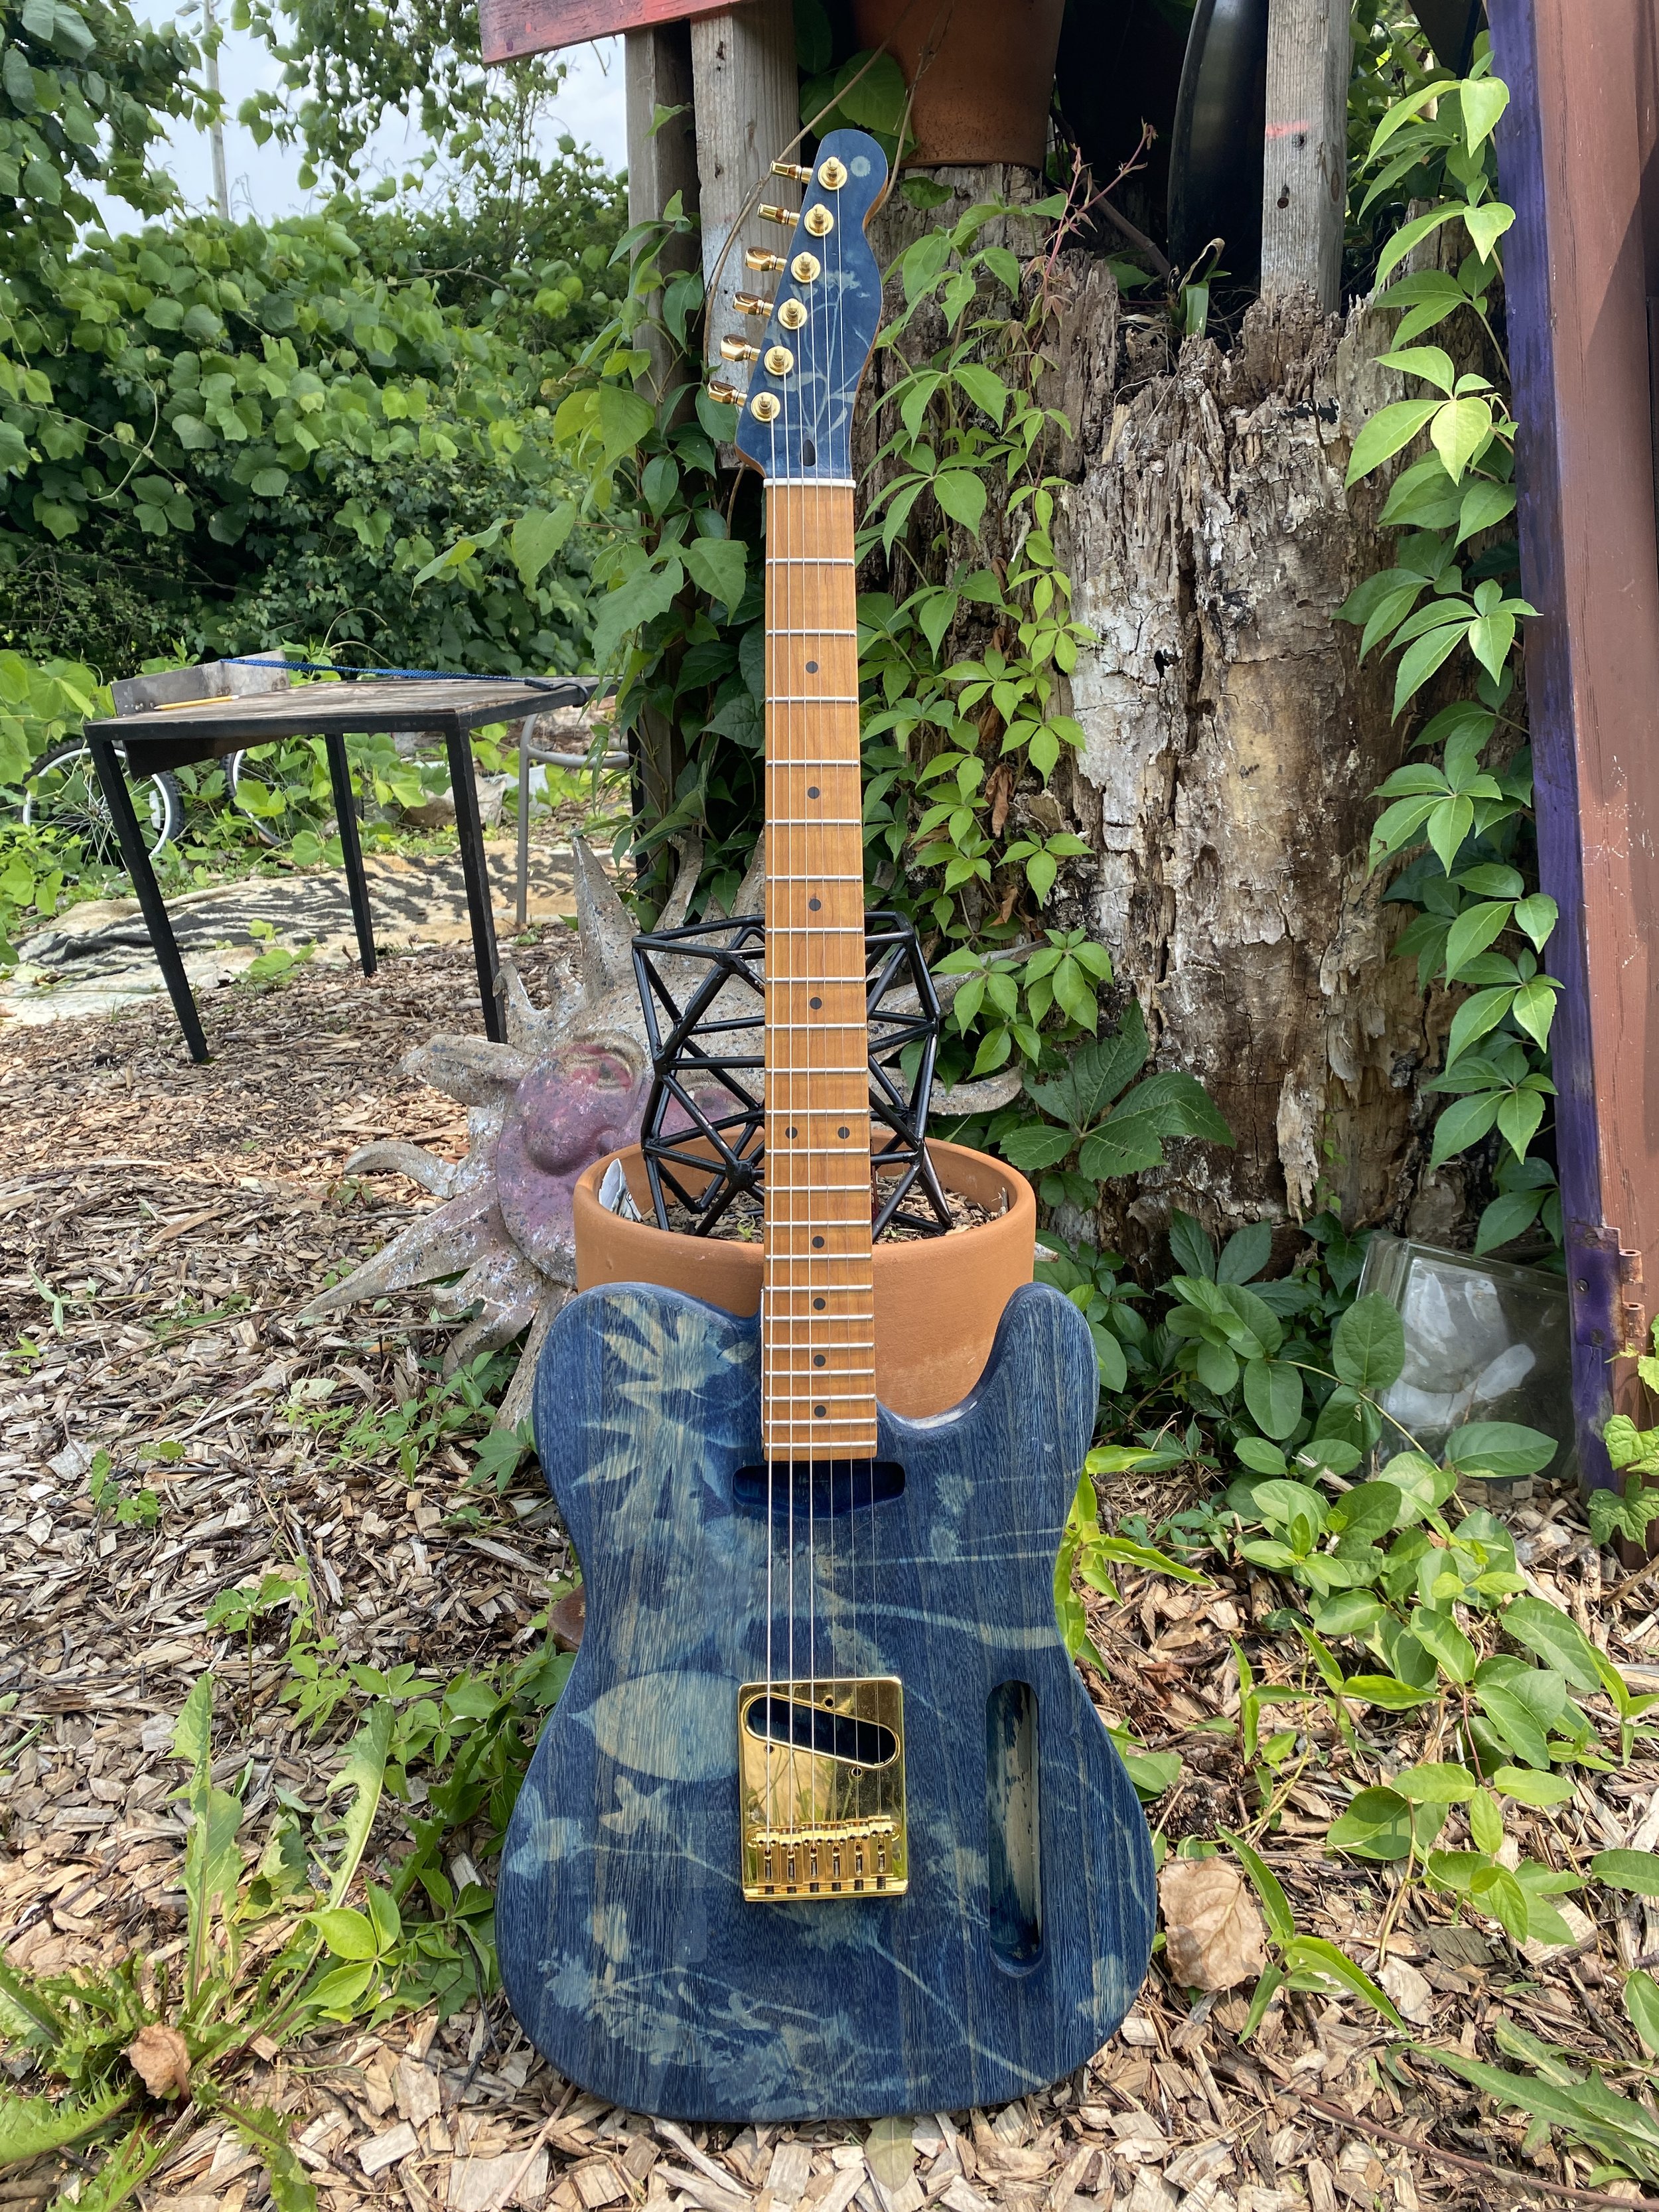
I had a vision.
A vision of a cyanotype guitar with gold hardware and a clear pick-guard, so I started my journey to make one. I’ve built plenty of things and used many tools, but never a guitar. So here we go!
What is a Cyanotype? A cyanotype is an alternative photographic process popularized by botanist and photographer Anna Atkins in the 19th Century. The process was developed by Sir John Herschel, inventor of the silver gelatin process in analog photography. He considered cyanotypes to be ‘sophomoric’ to his silver gelatin process. Anna Atkins would go to produce Photographs of British Algae: Cyanotype Impressions. You can read more on her Wikipedia.

Cyanotype process works best on organic, cellulose materials (paper, wood, cotton, ect.). With this in mind, I was convinced I could cyanotype a raw, unfinished guitar body.
I chose to buy pre built parts as this (and all my work) is an experiment.
Below are some affiliate material links:
- Jaqcuard 2 Part Cyanotype Kit with Brush
- Unfinished Telecaster Body
(*note: this isn’t the exact body I used. I used a Paulownia Body from Guitar Fetish.com)


I didn’t document the first application of the cyanotype fluid, however, in the following posts there is more documentation for the back of the body and the headstock of the guitar neck.
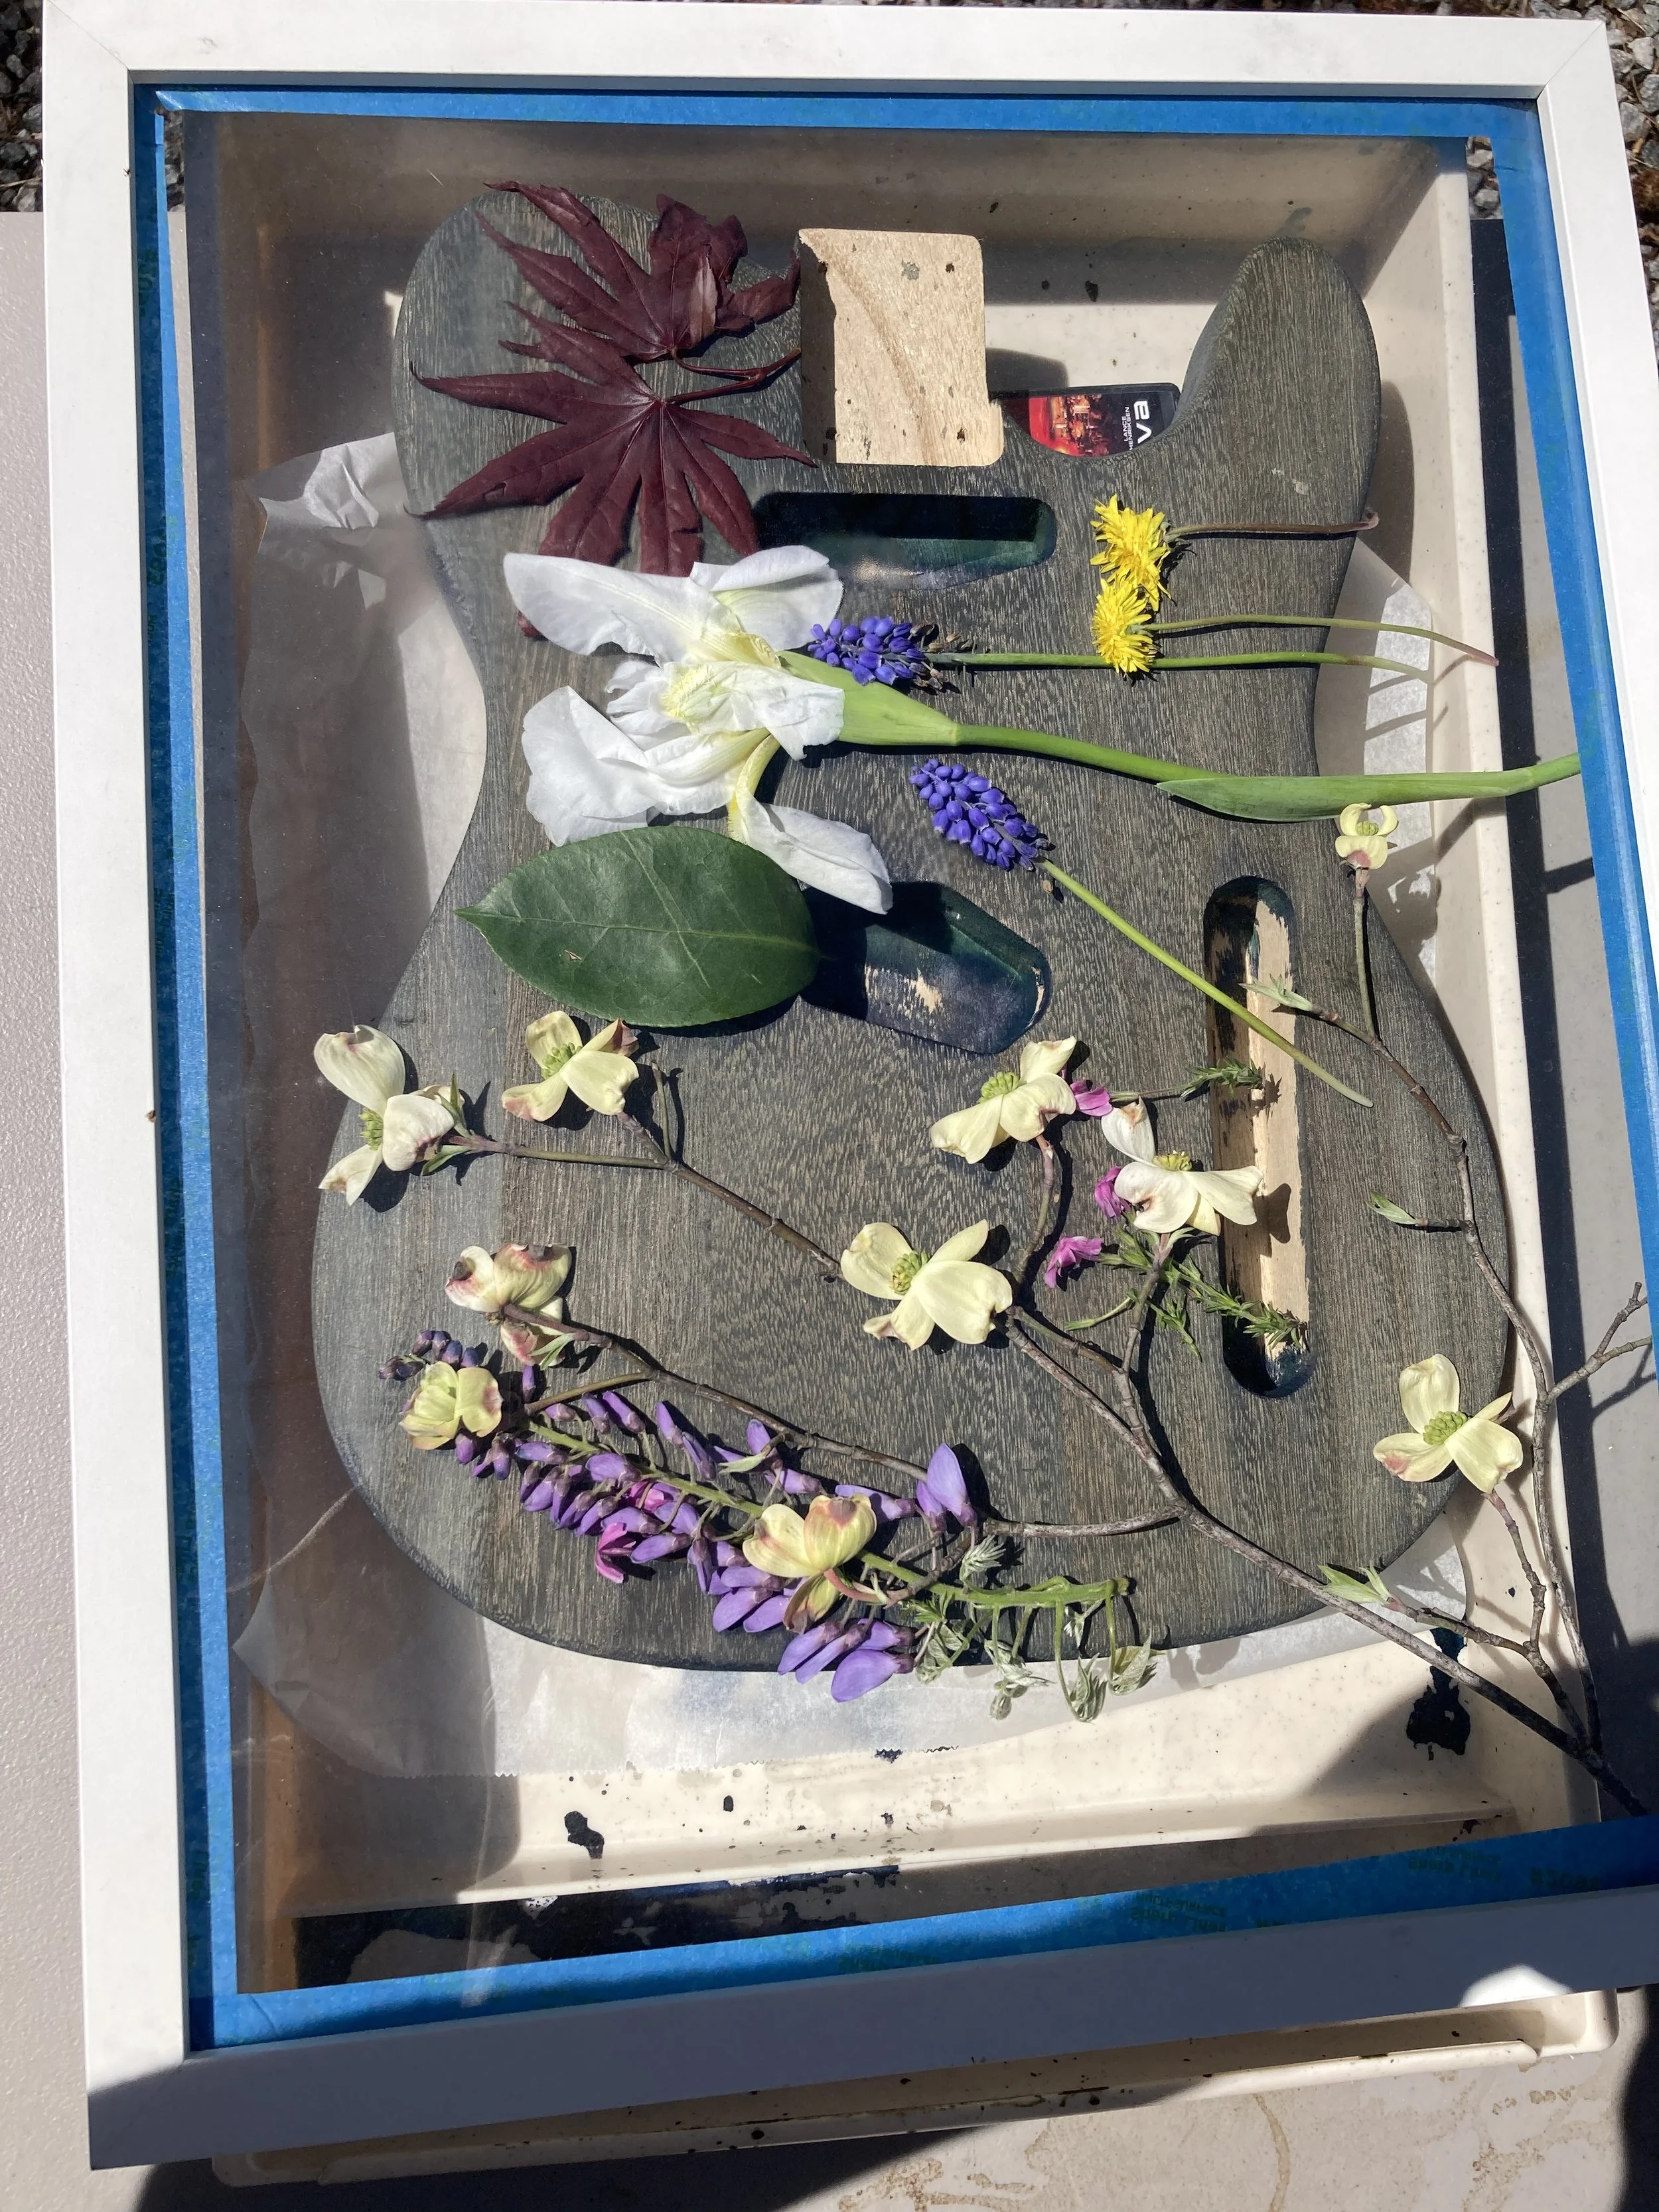
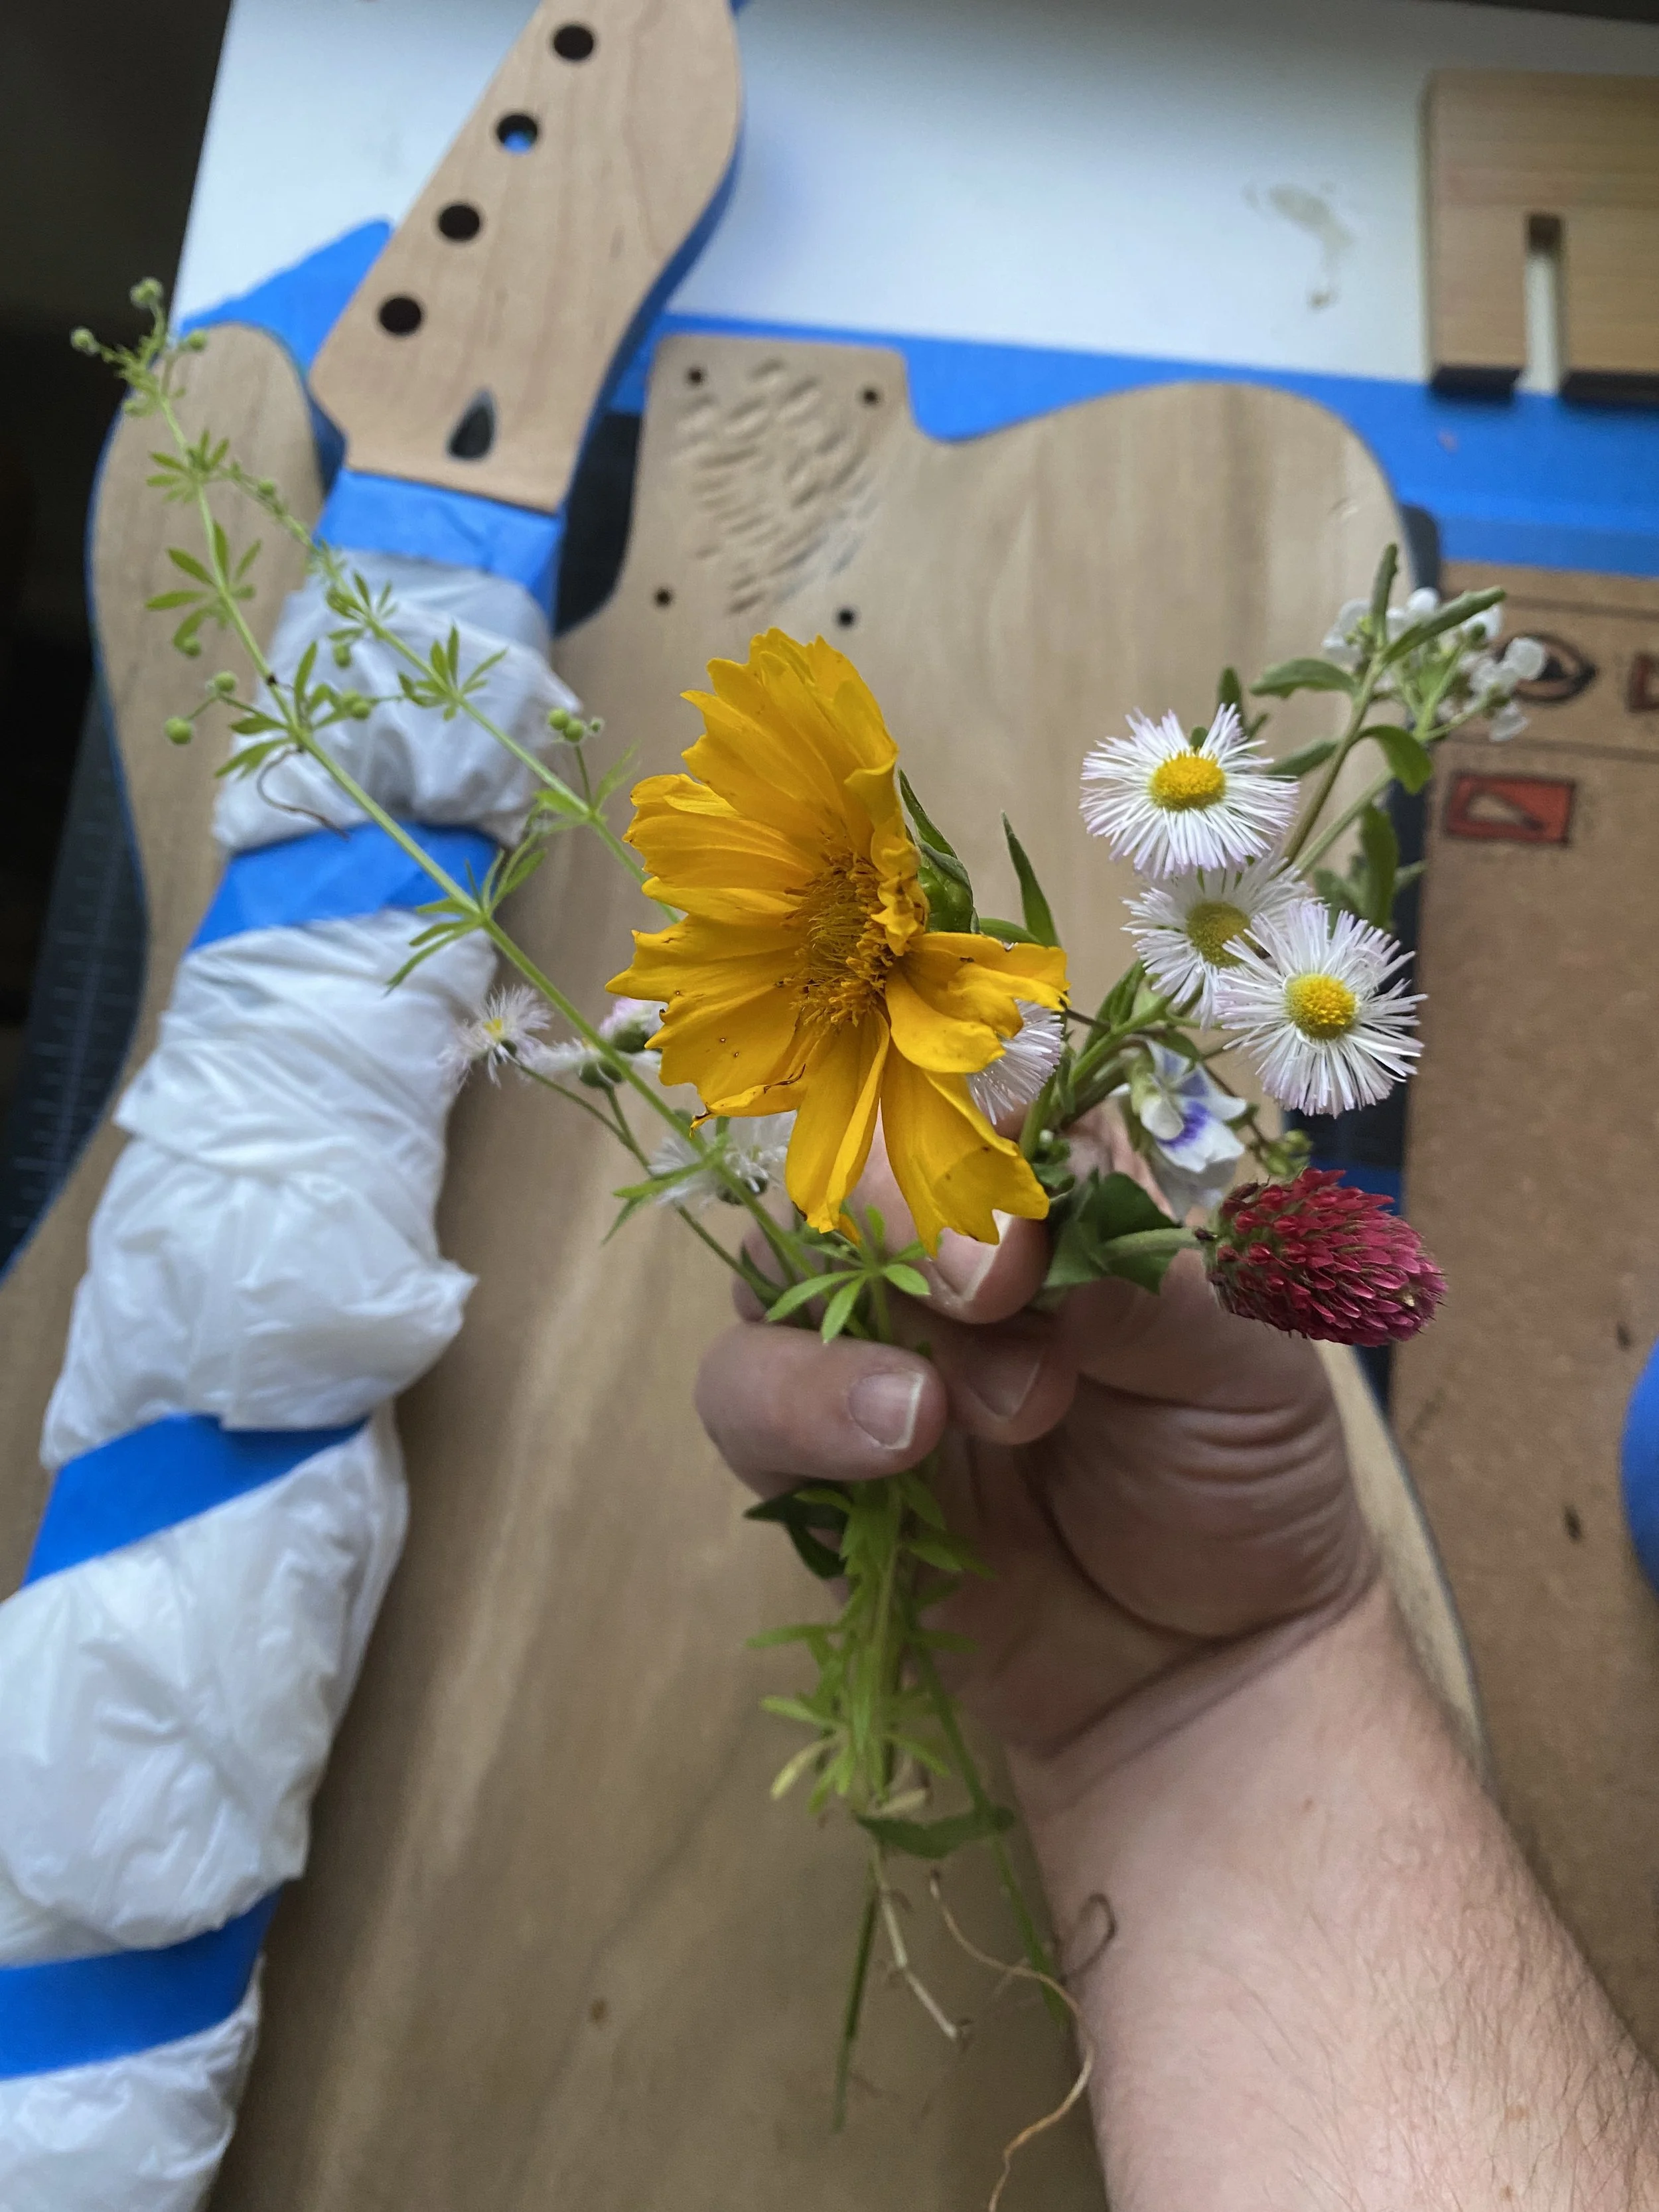
Once I applied the cyanotype fluid, I let it dry in my bathroom with the lights off for around an hour. During that hour, I went on a walk through my neighborhood and gather some local flowers and leaves. A few of these came from some very welcoming and supportive neighbors who allowed me to pick from their gardens to contribute to the project.
Part II - Cyanotyping the back of guitar body and headstock front and back.
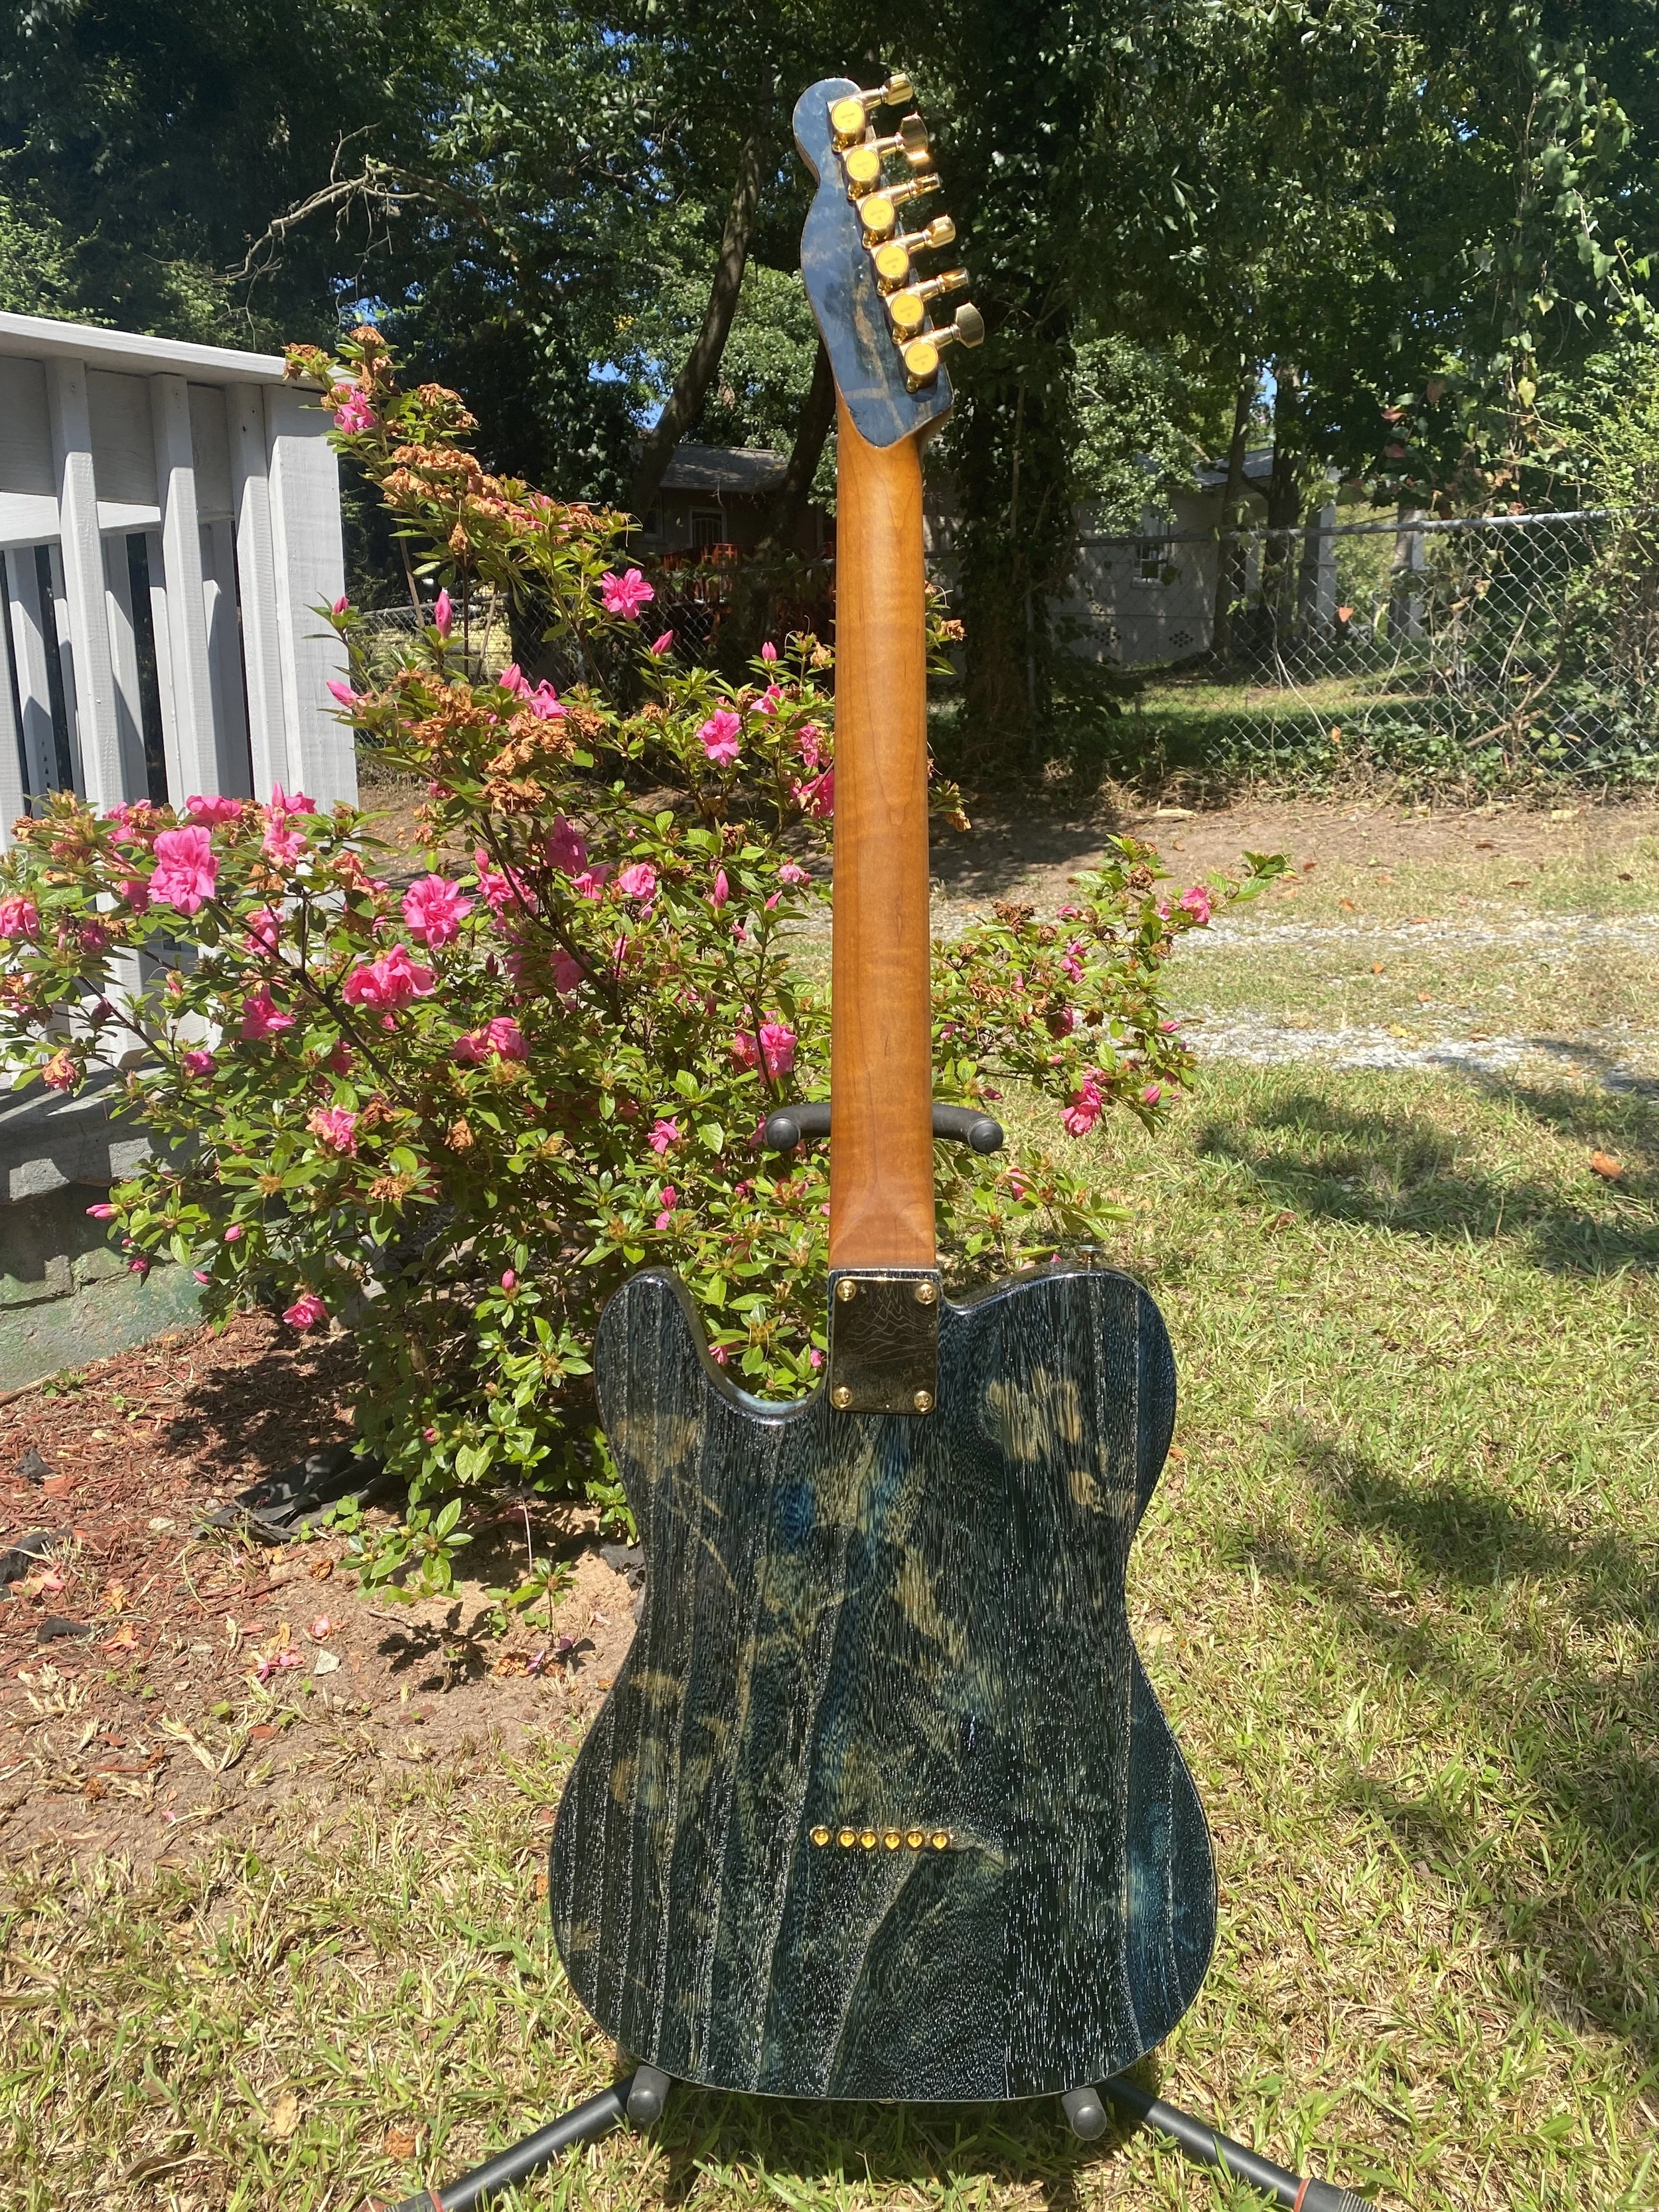
I eventually found a roasted maple fender telecaster style neck at a local Music Go Round. I though the warm roasted orange color of the neck would pair well with the coolness of the cyanotype blue.
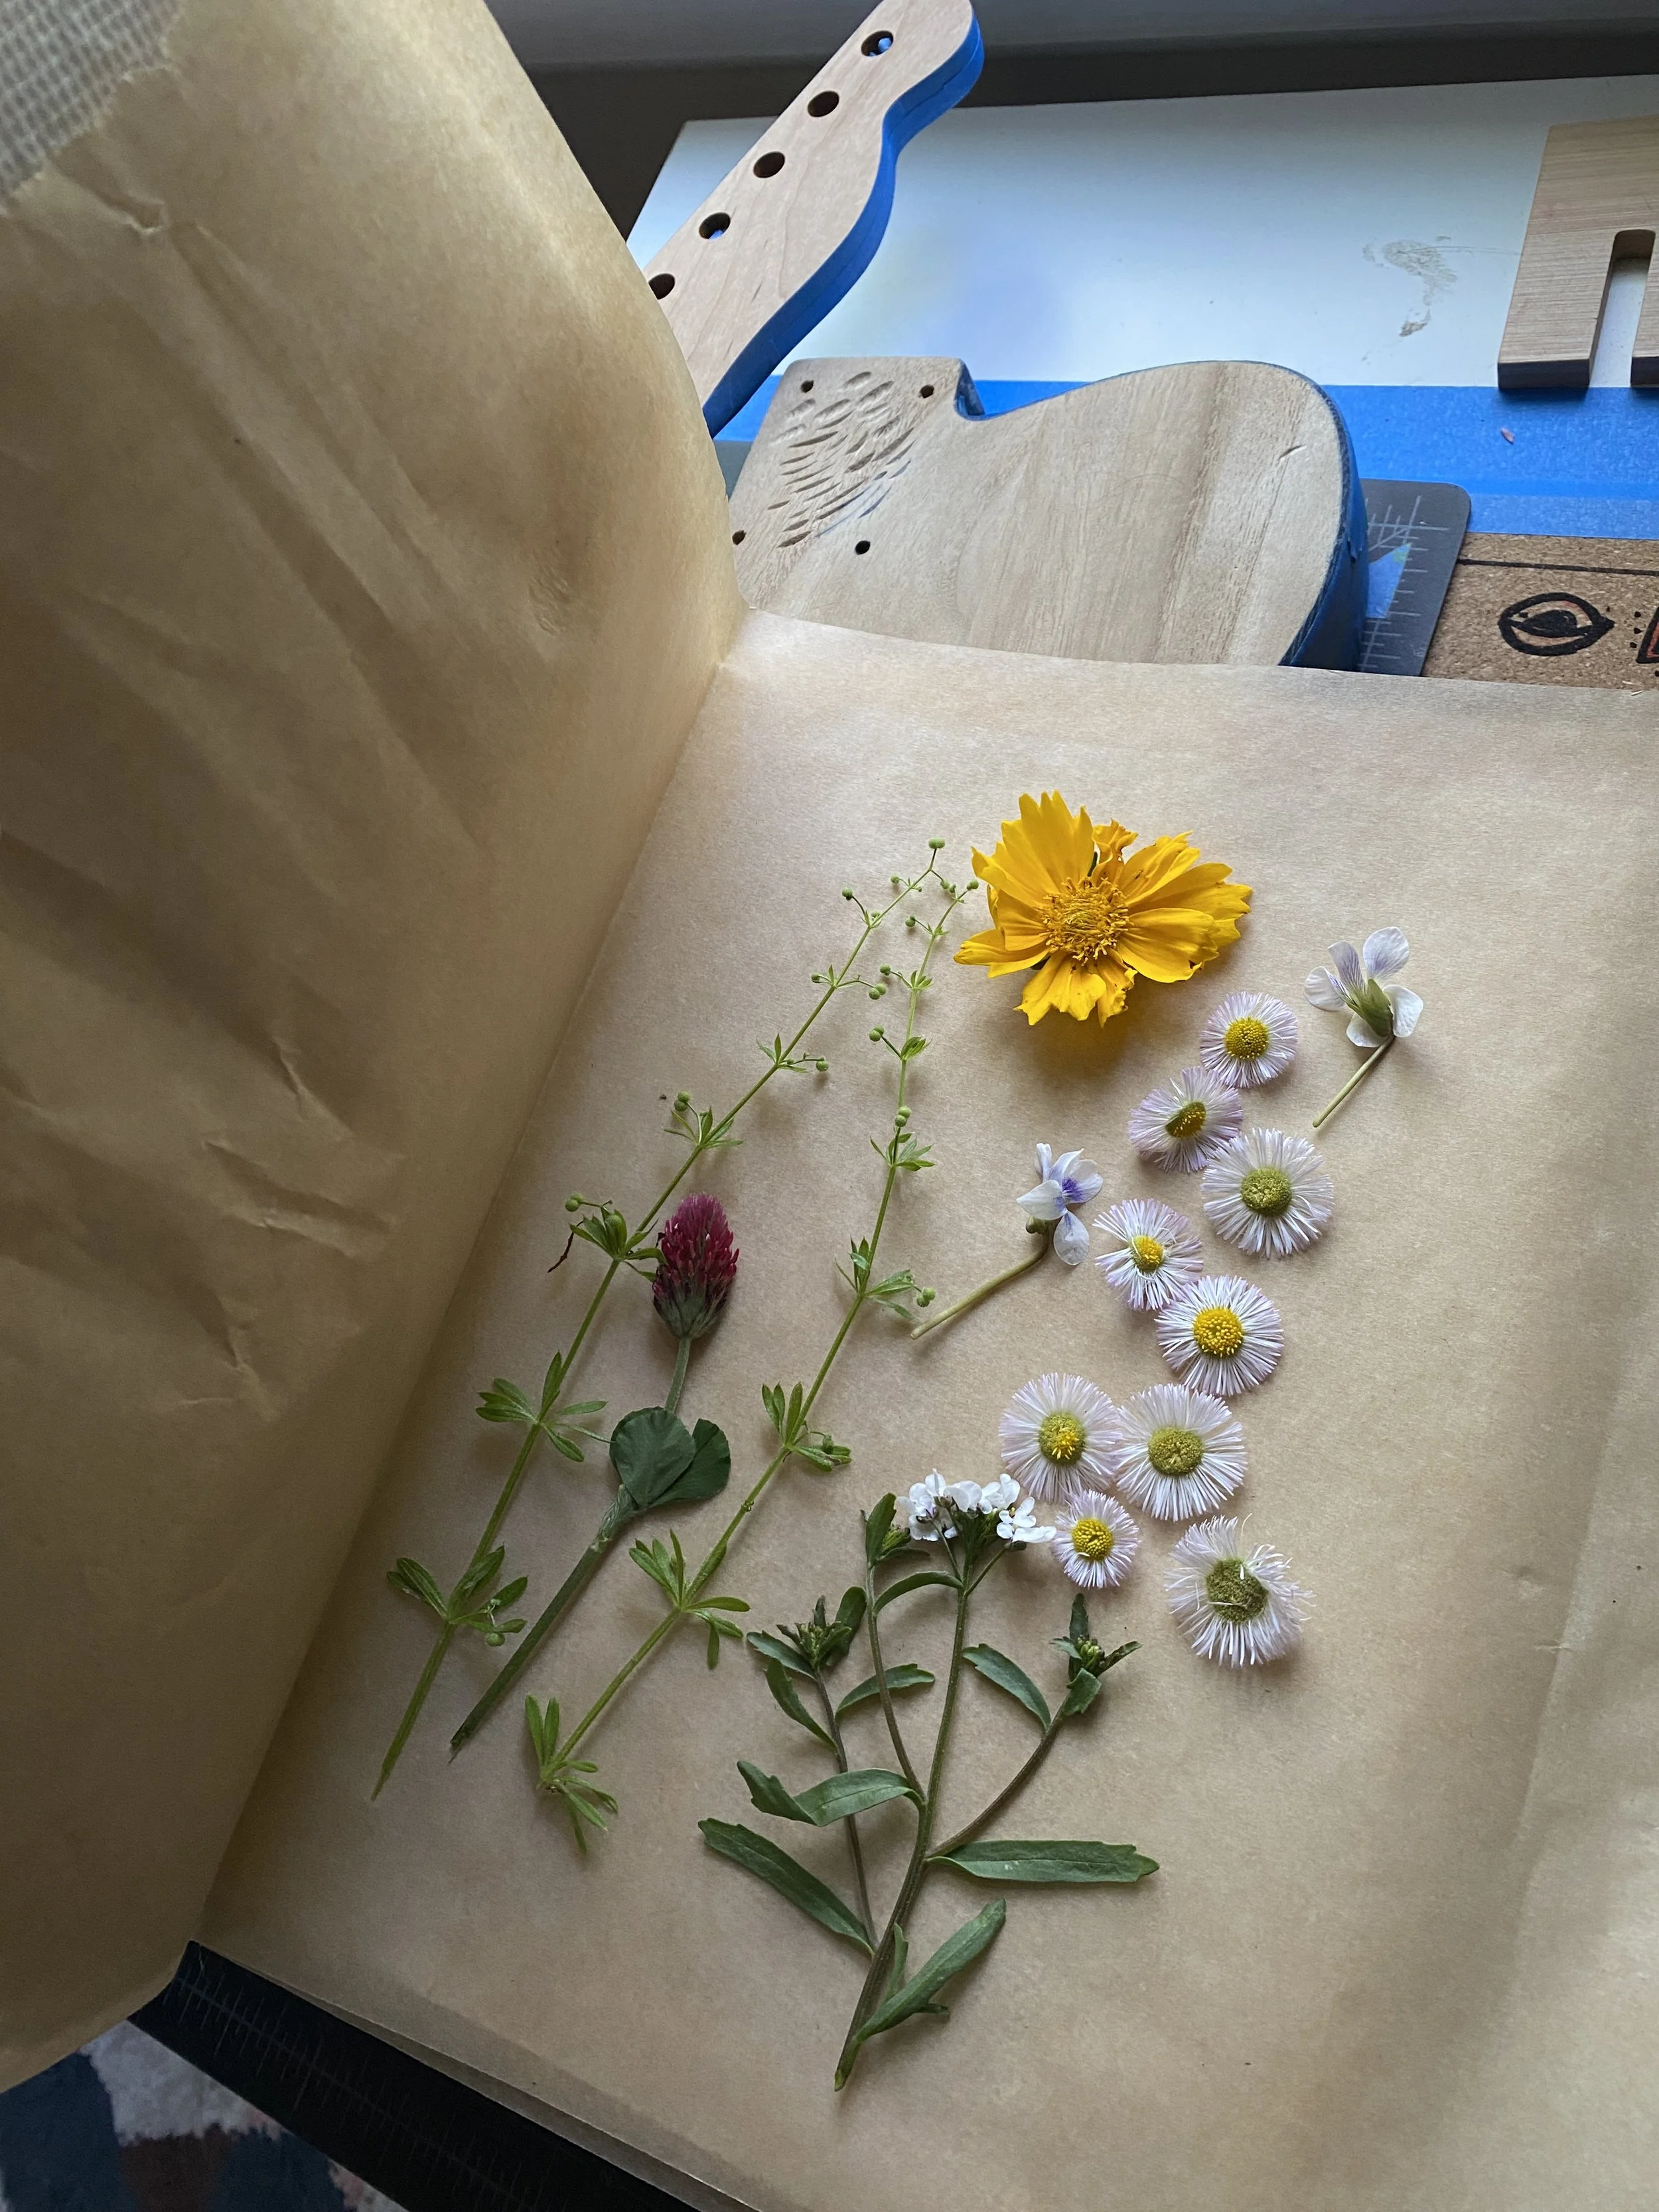
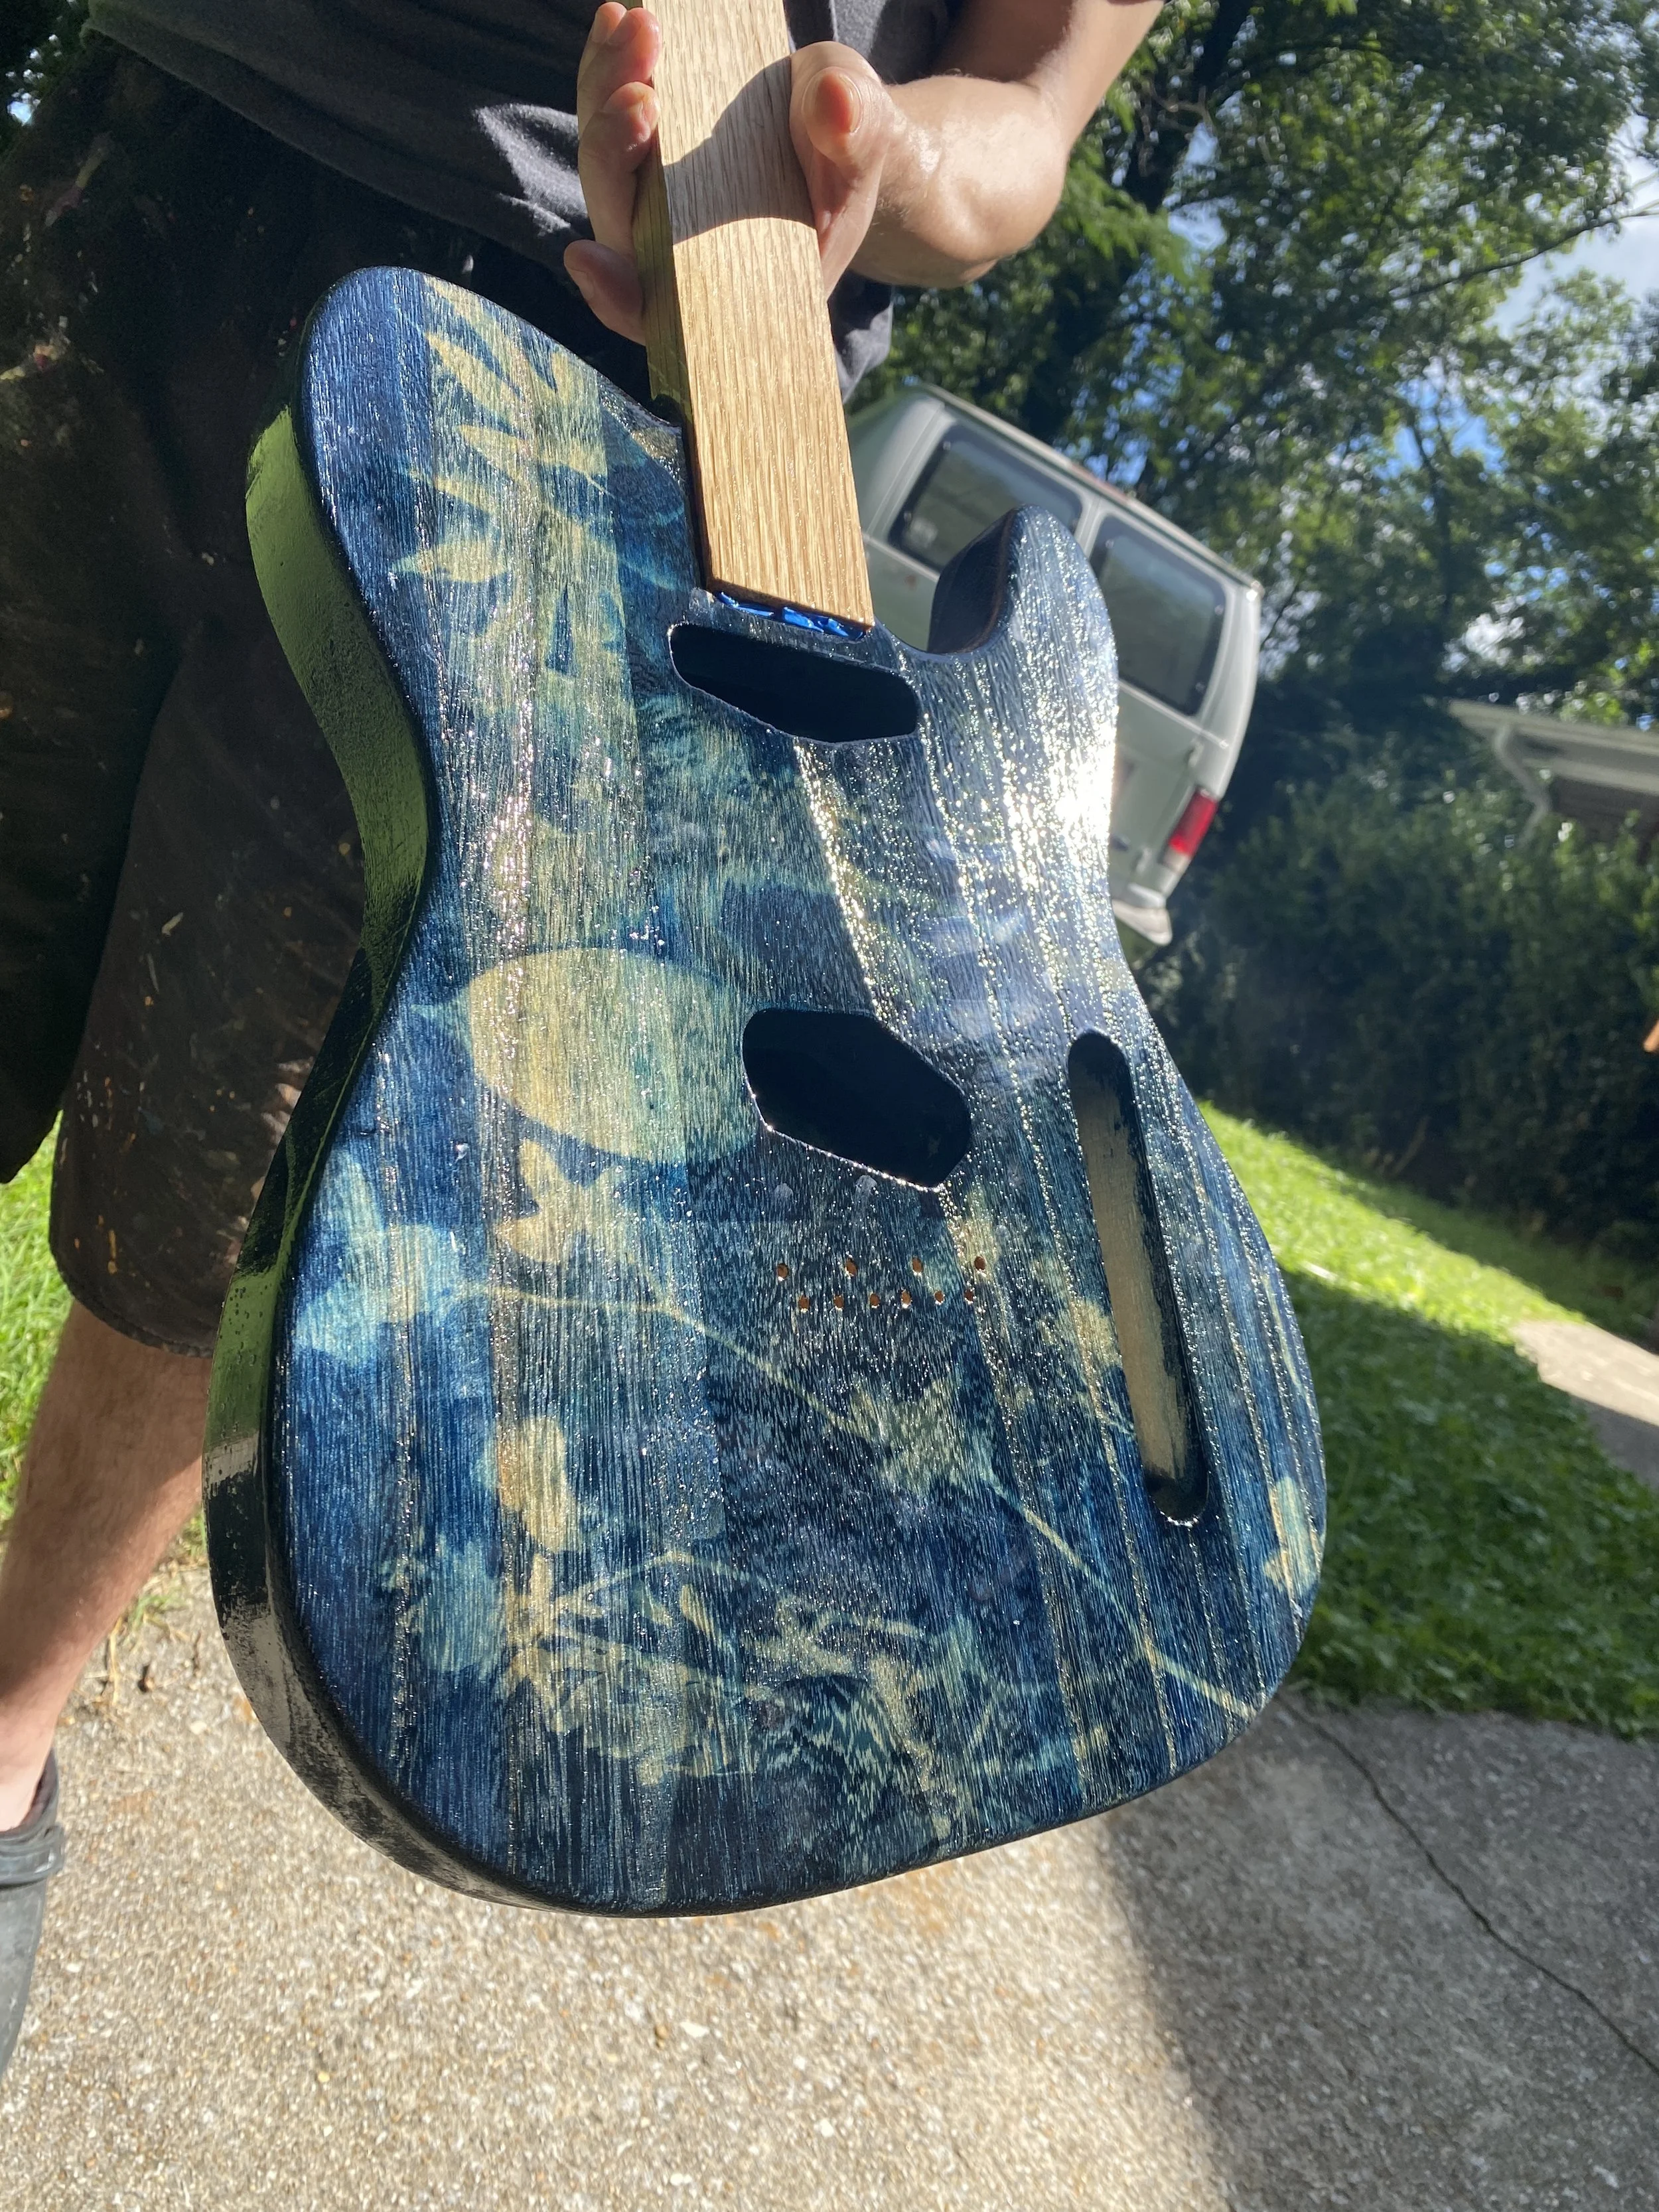
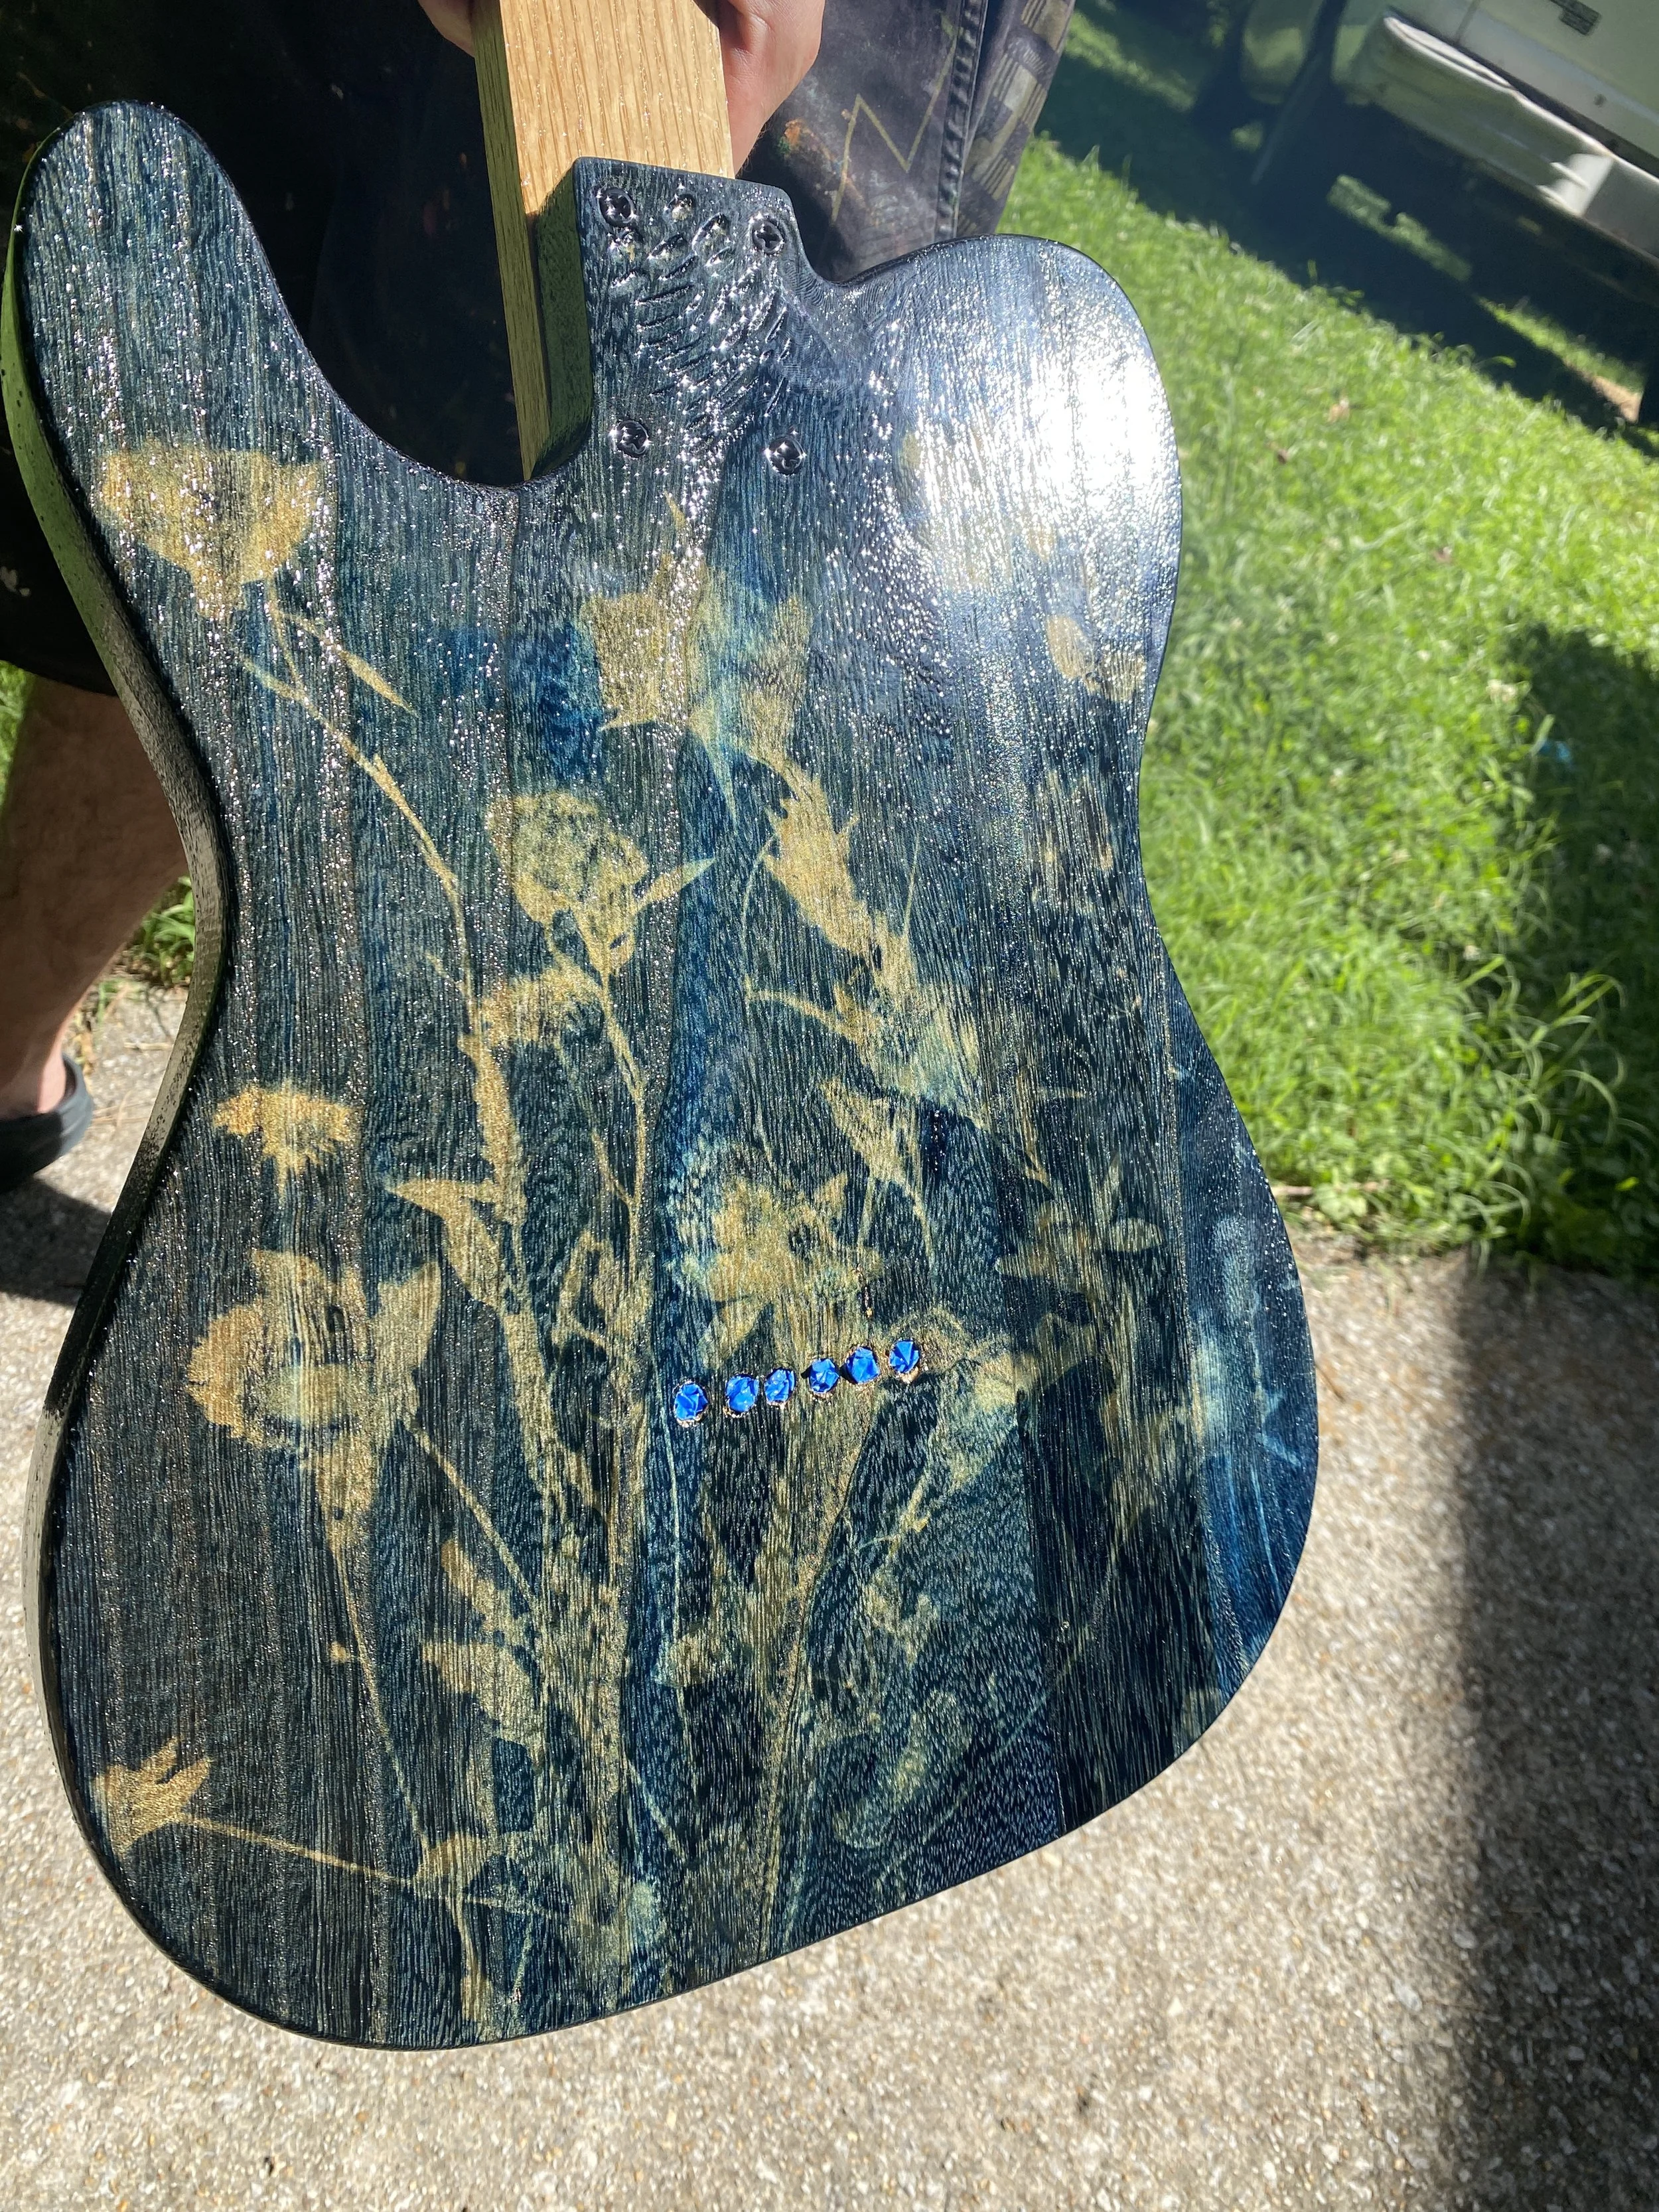
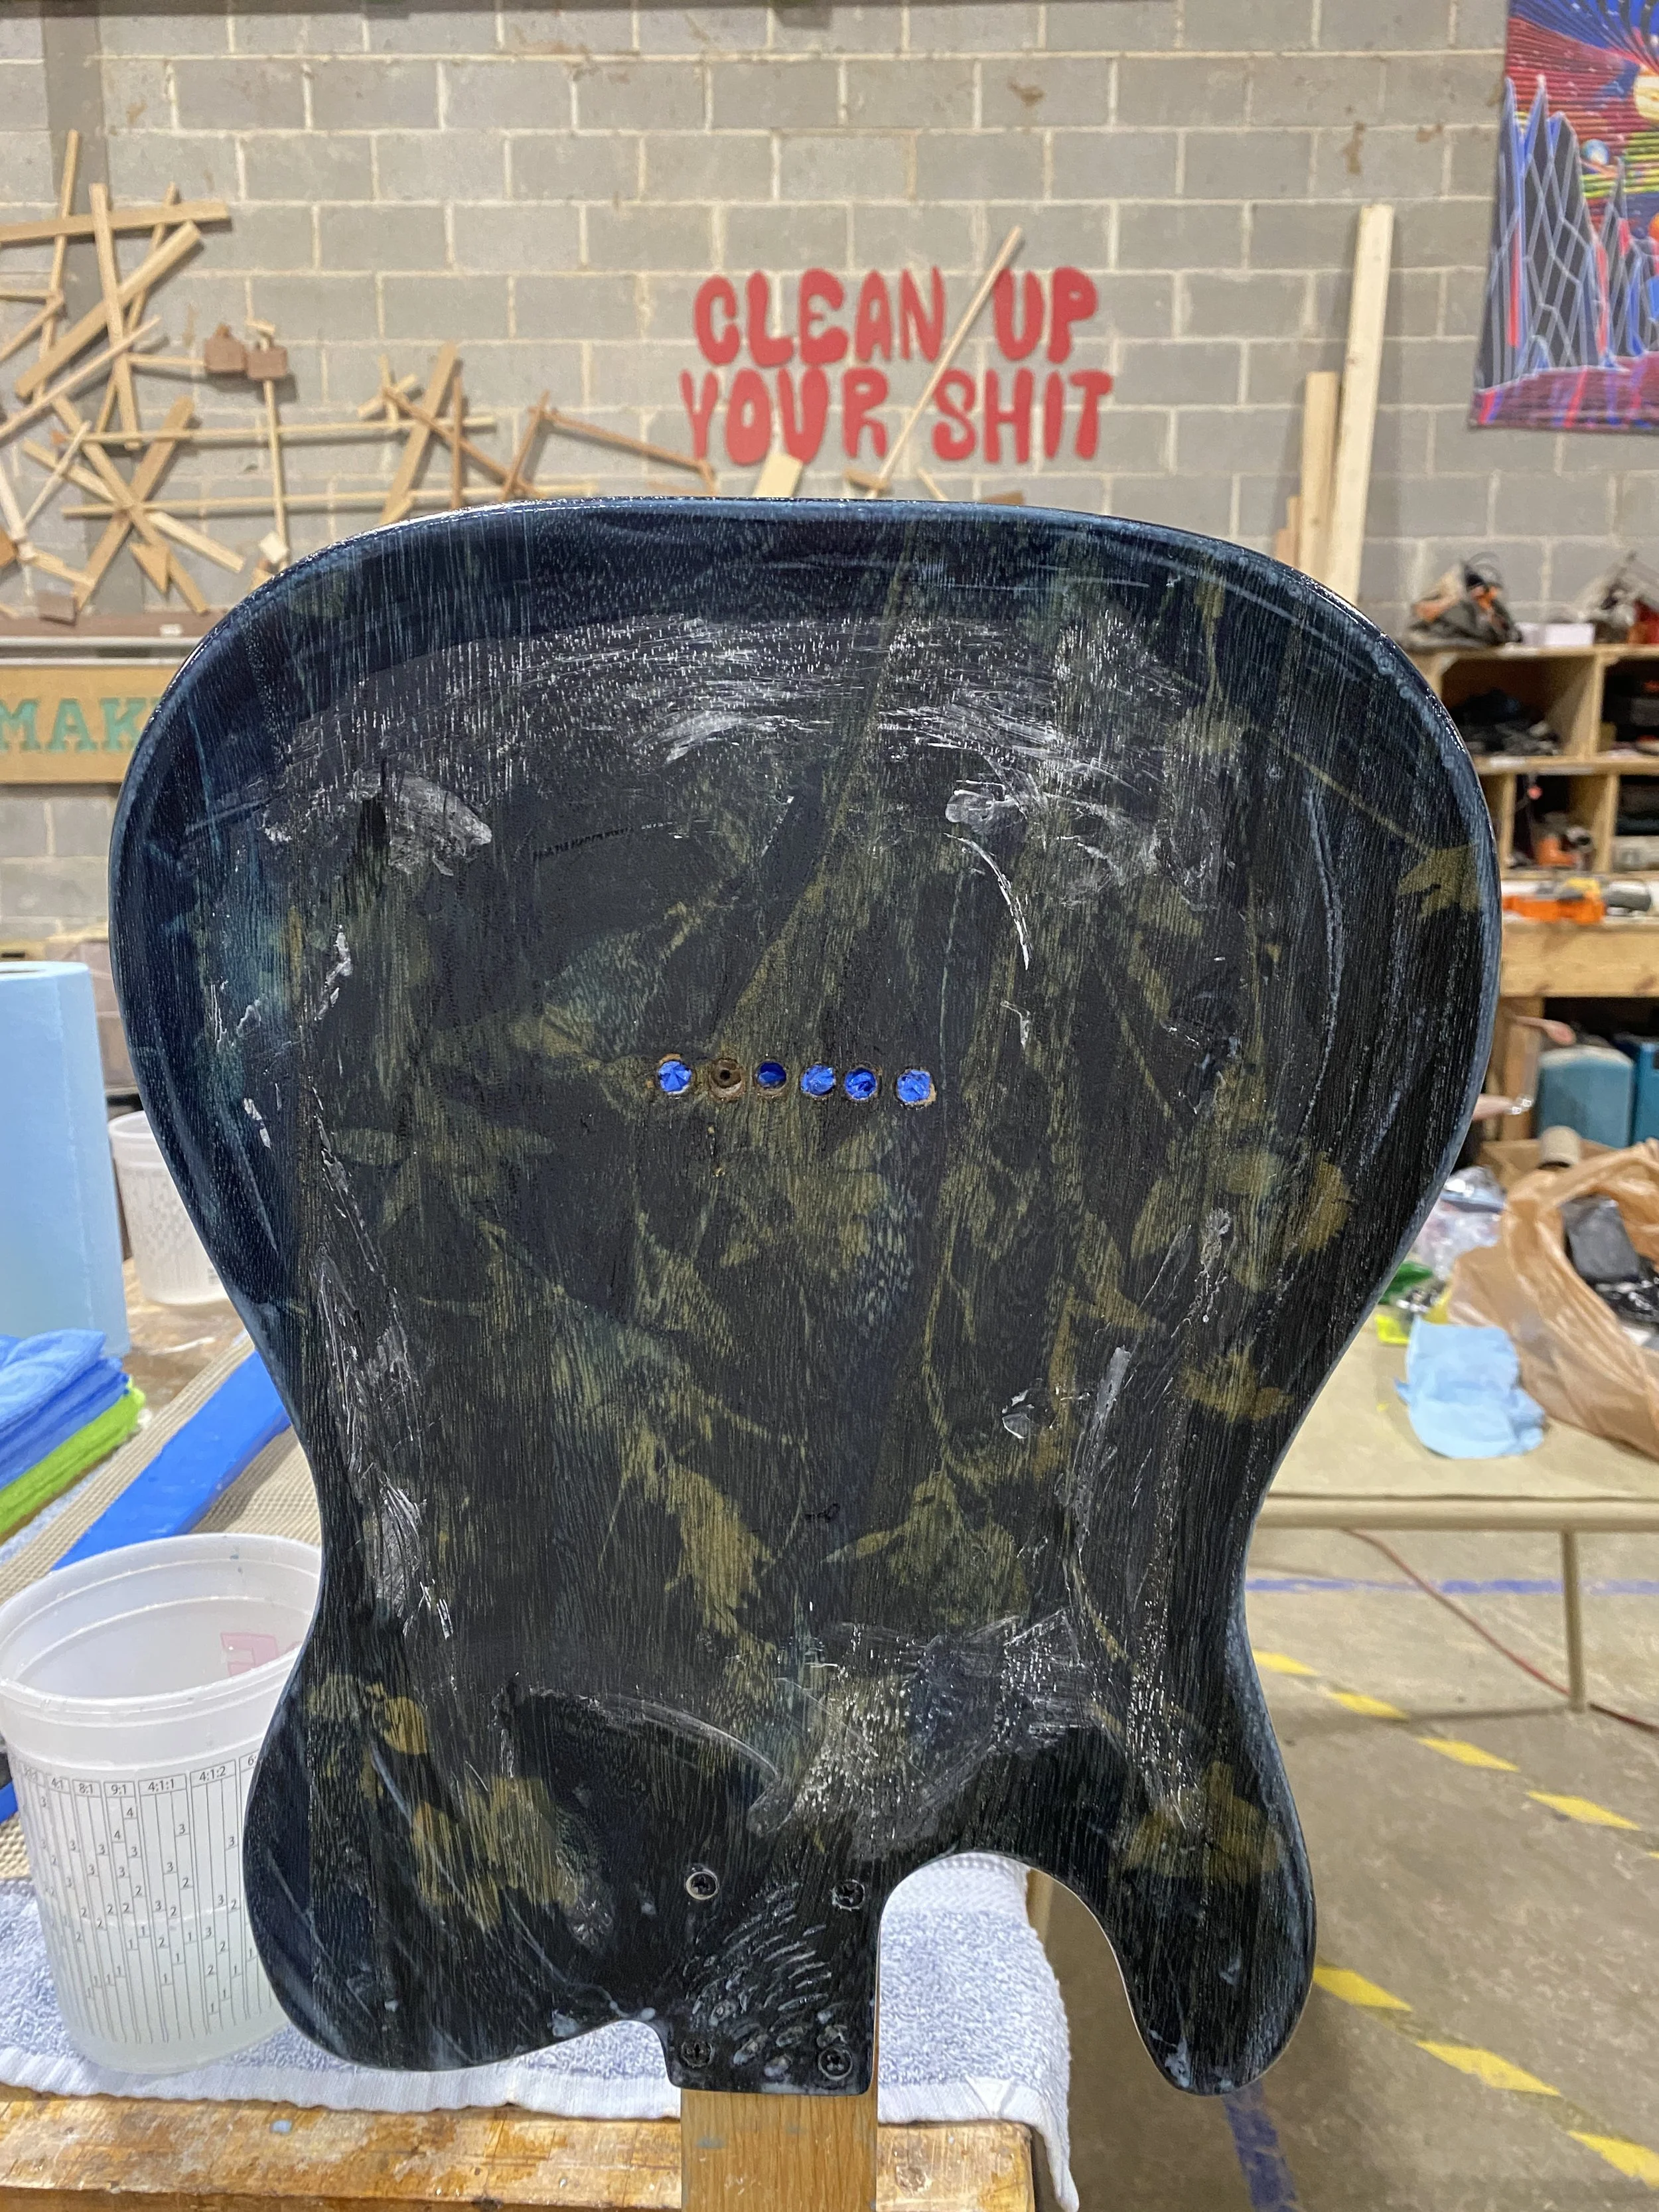
I sanded the back with 220 grit sandpaper and taped up the guitar body front and sides to prevent any cyanotype emulsion drip, as well as the front and back of the headstock. Again, a short trip through the neighborhood to grab some more flowers and plant life from the local fauna and willing neighbors. This time I pressed them between some parchment paper to flatten out a bit while I applied the coat of cyanotype emulsion to the backside of the guitar body and headstock front and back.


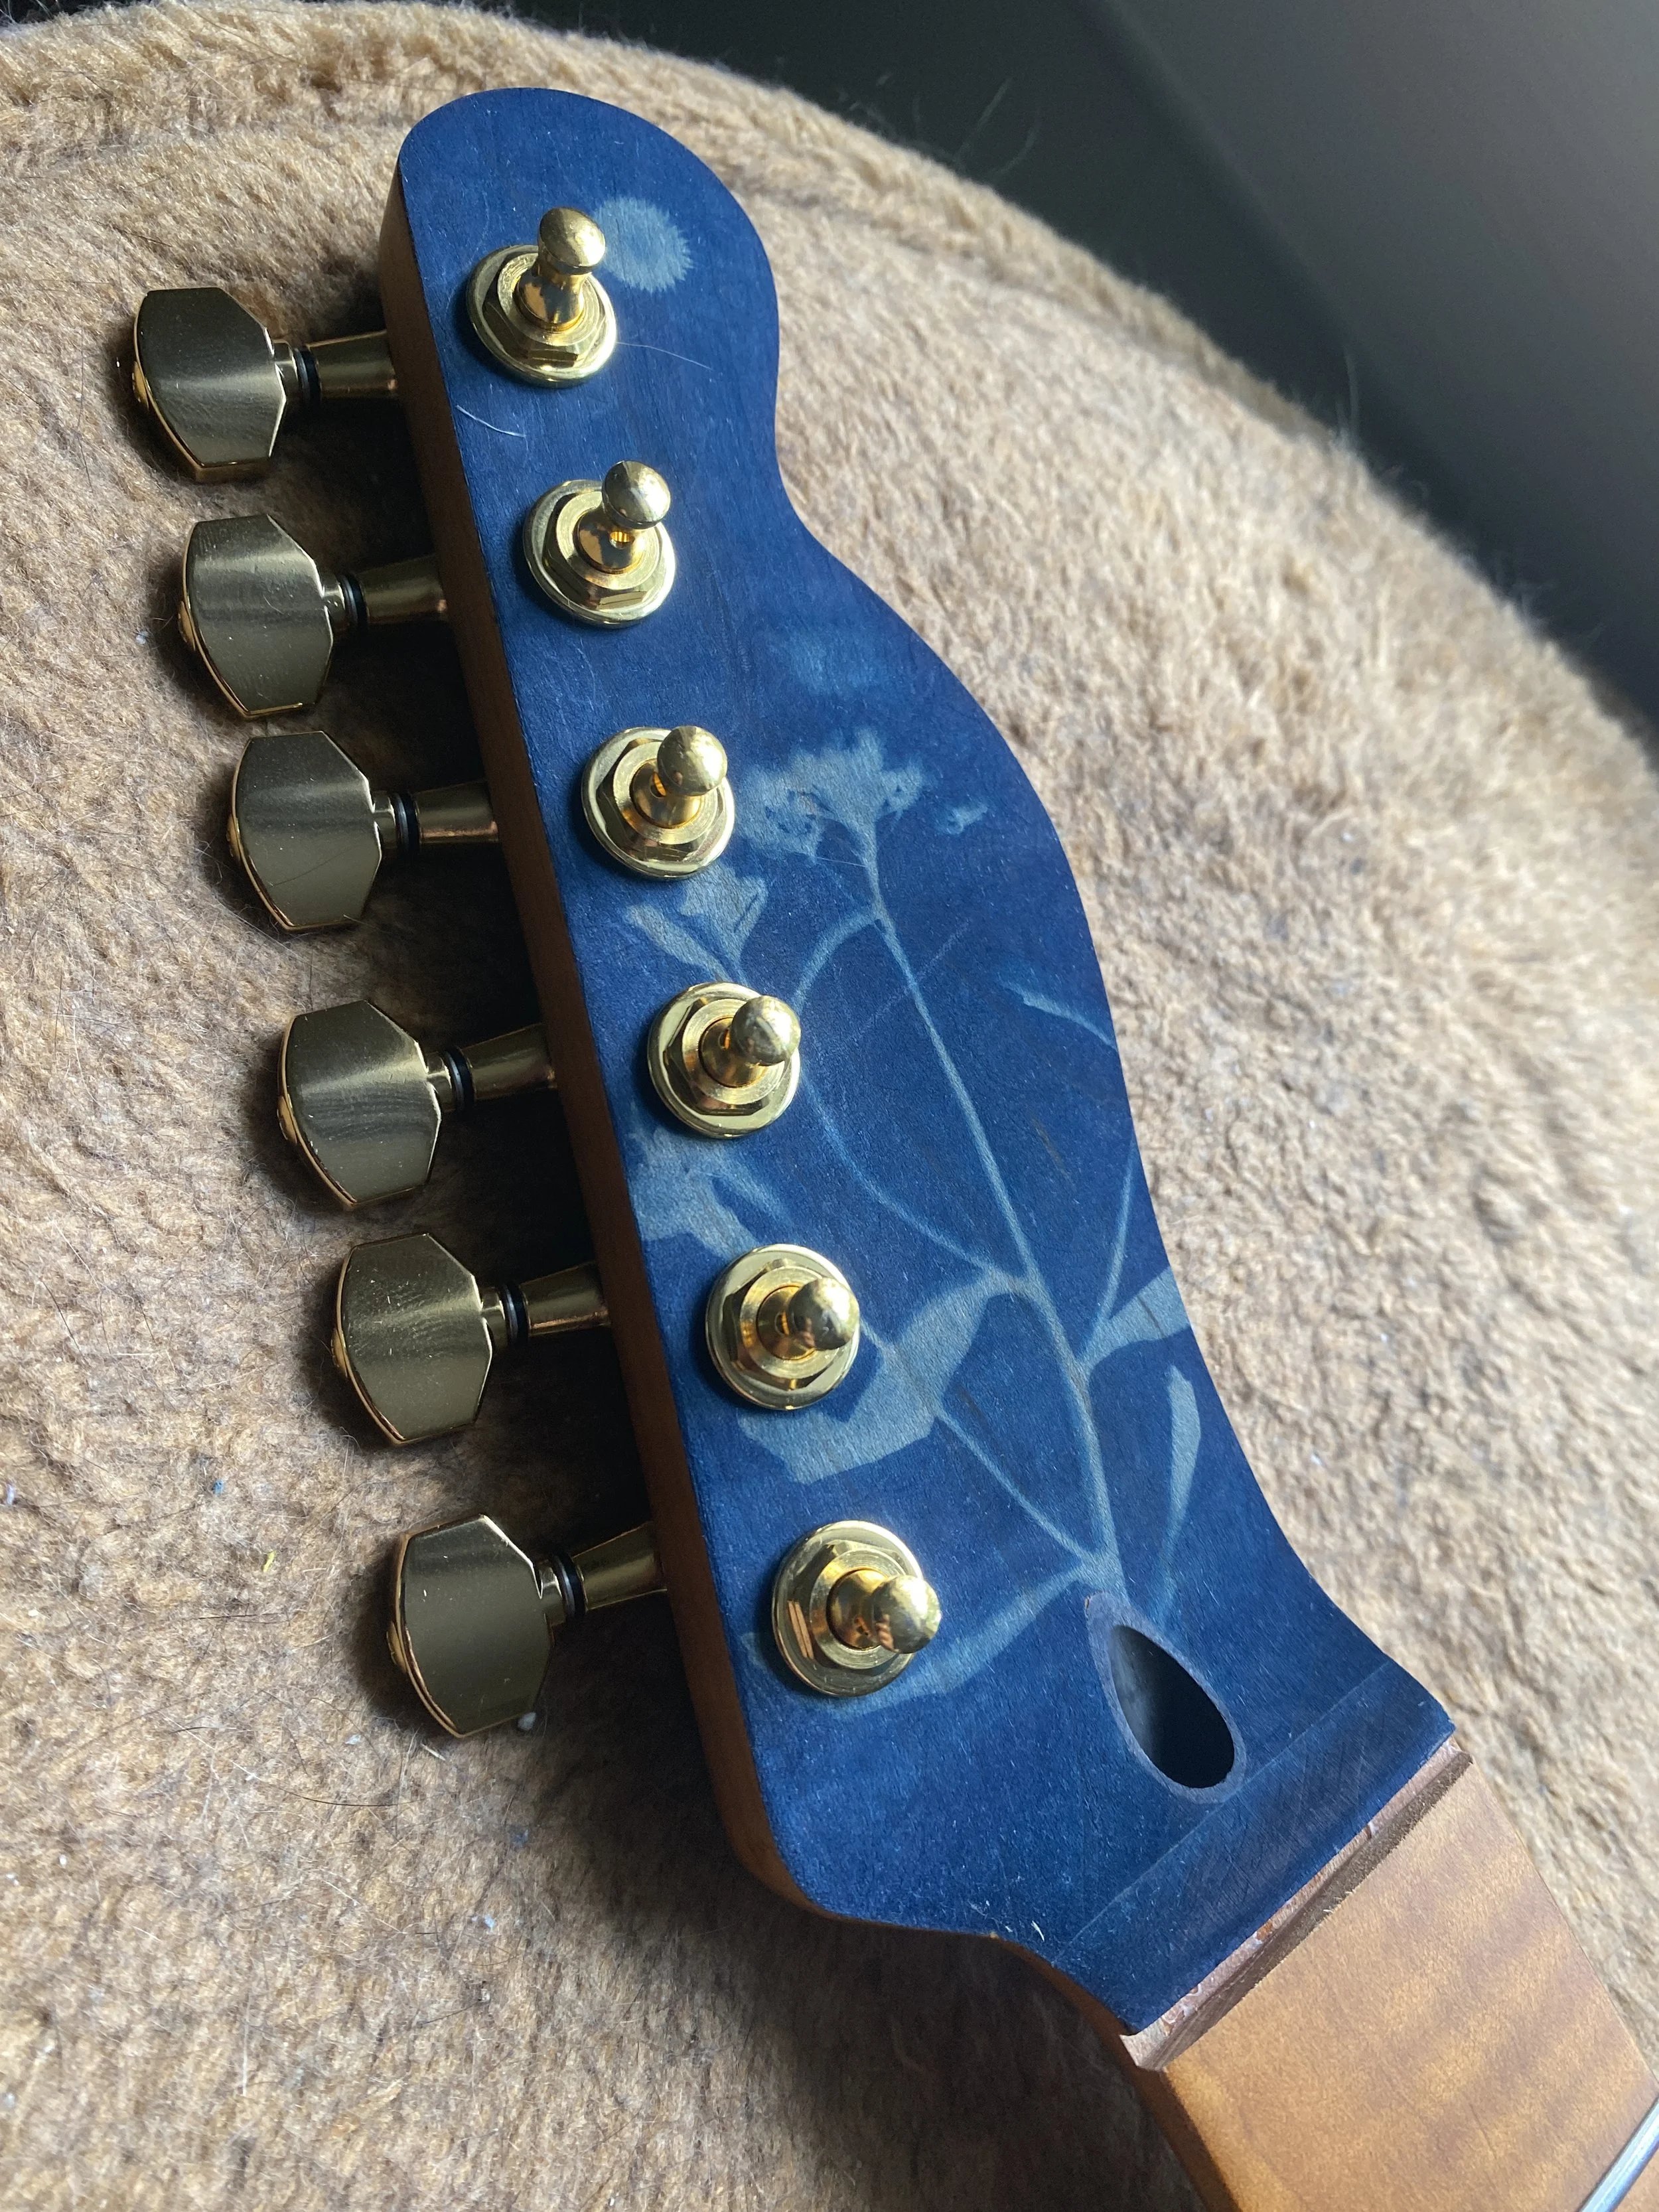
For the headstock, I used some UHU Petafix White Tack inside the tuner holes to affix some acetate to ensure the flowers I found stayed flat against the curved headstock. Last picture is the body coated with a heavy amount of Cyanotype emultion. I applied it in two layers, one right after the other. I first applied a coat (not too thin/not too heavy) and once I covered the whole area, I just did it again. Id rather have too much emulsion than not enough.
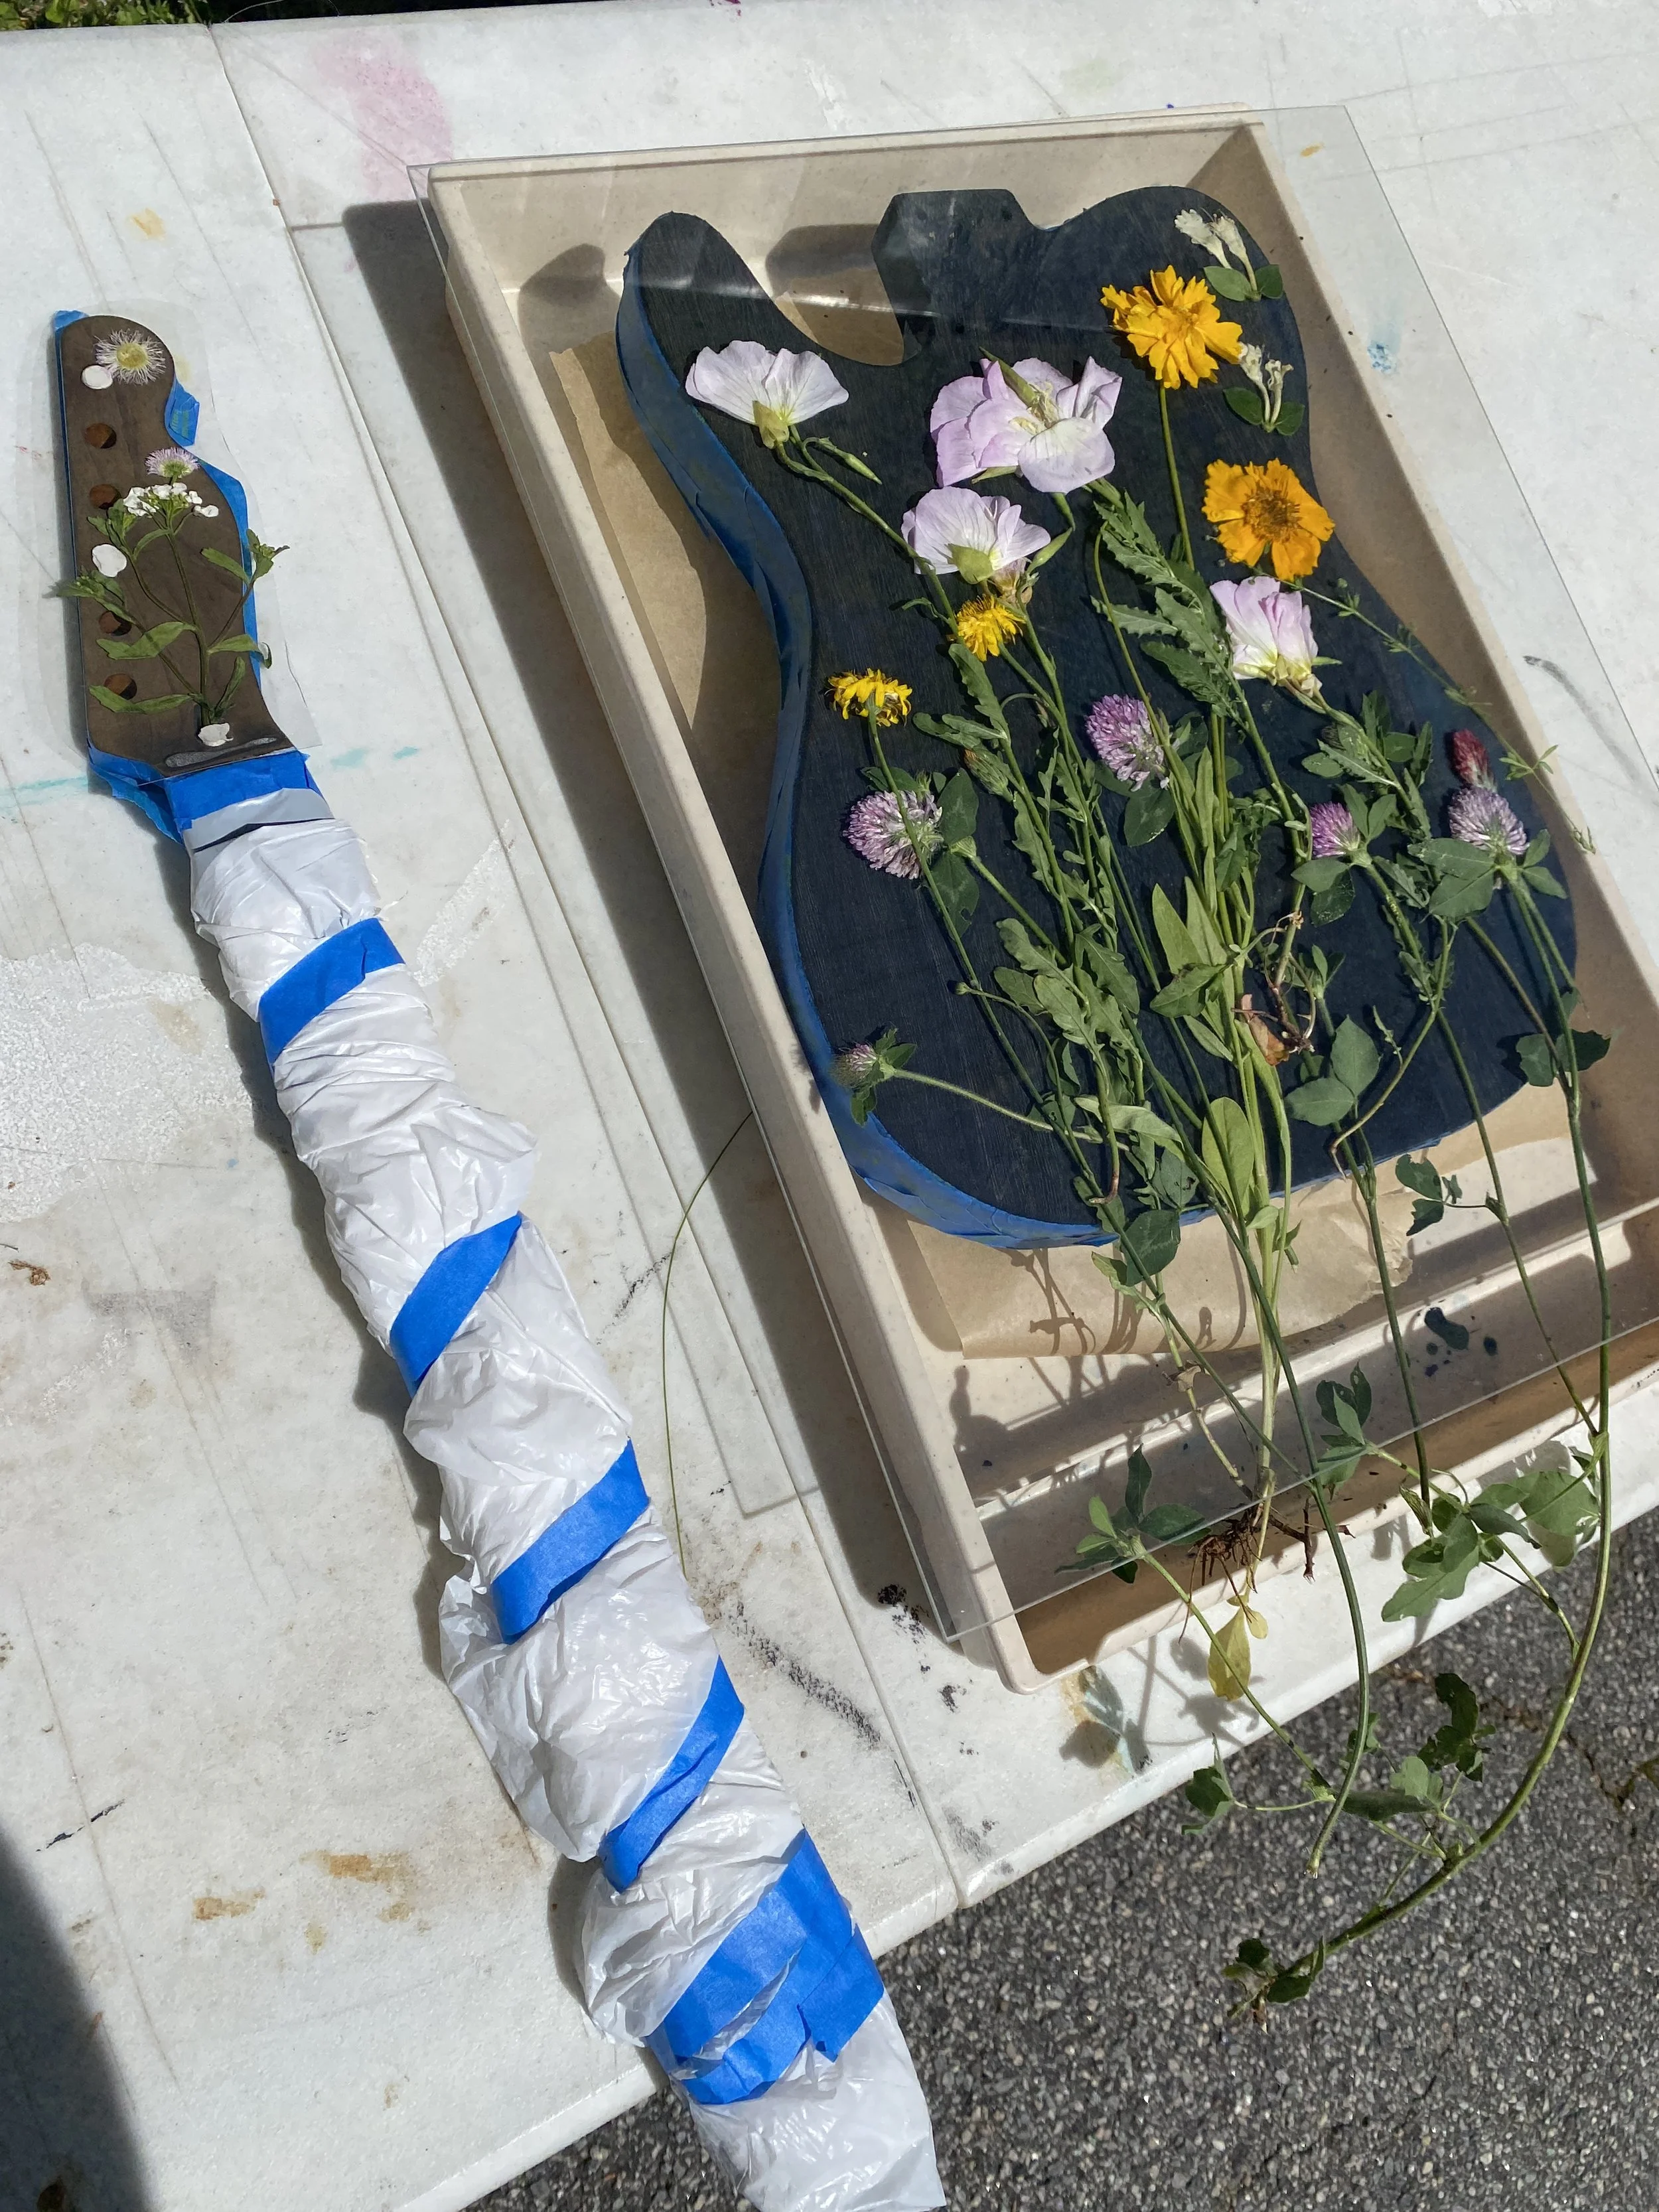


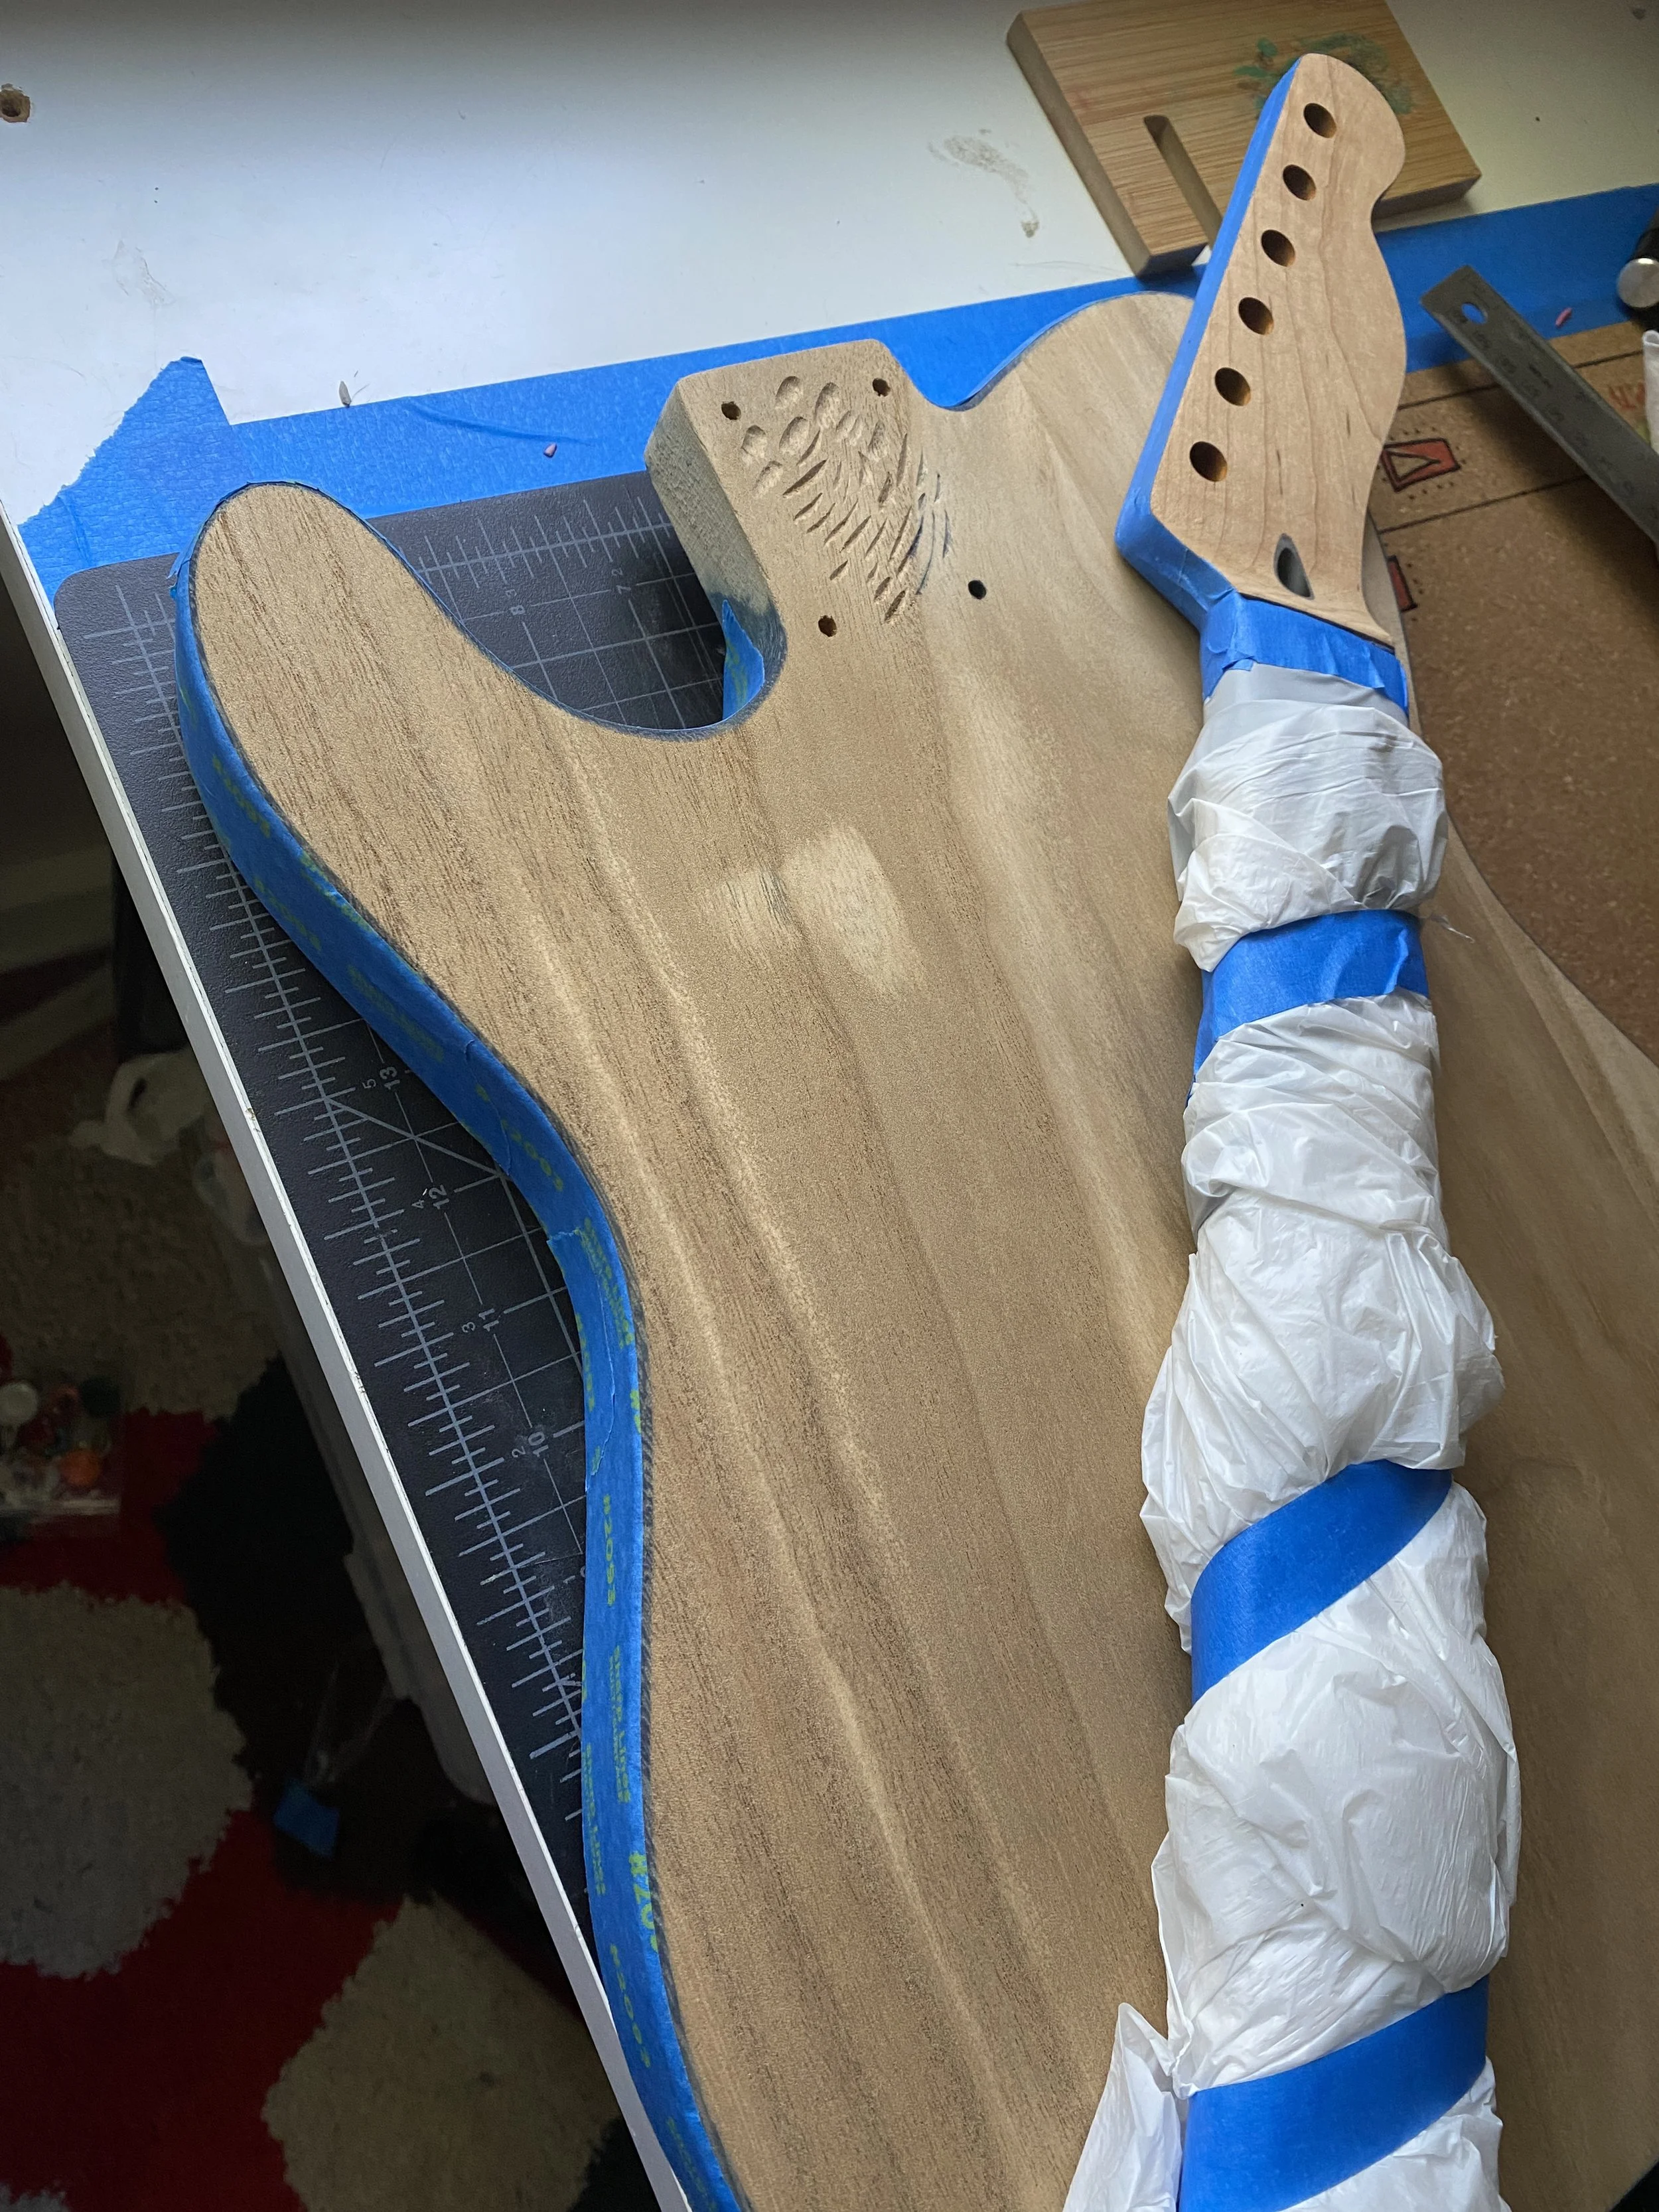
For the body, I placed it inside a shallow tray (I use this for washing out cyanotype paper pieces) and elevated them using some DVD cases. I approached this just like a standard cyanotype process: put the items on the emulsioned surface and put some heavy glass on top of it. I generally will leave cyanotypes paper out in the sun for around 25 minutes and get great results, but I chose 45 minutes for this session, just to be safe. Id rather over expose than underexpose. Even so, I could always sand down the surface and try again.

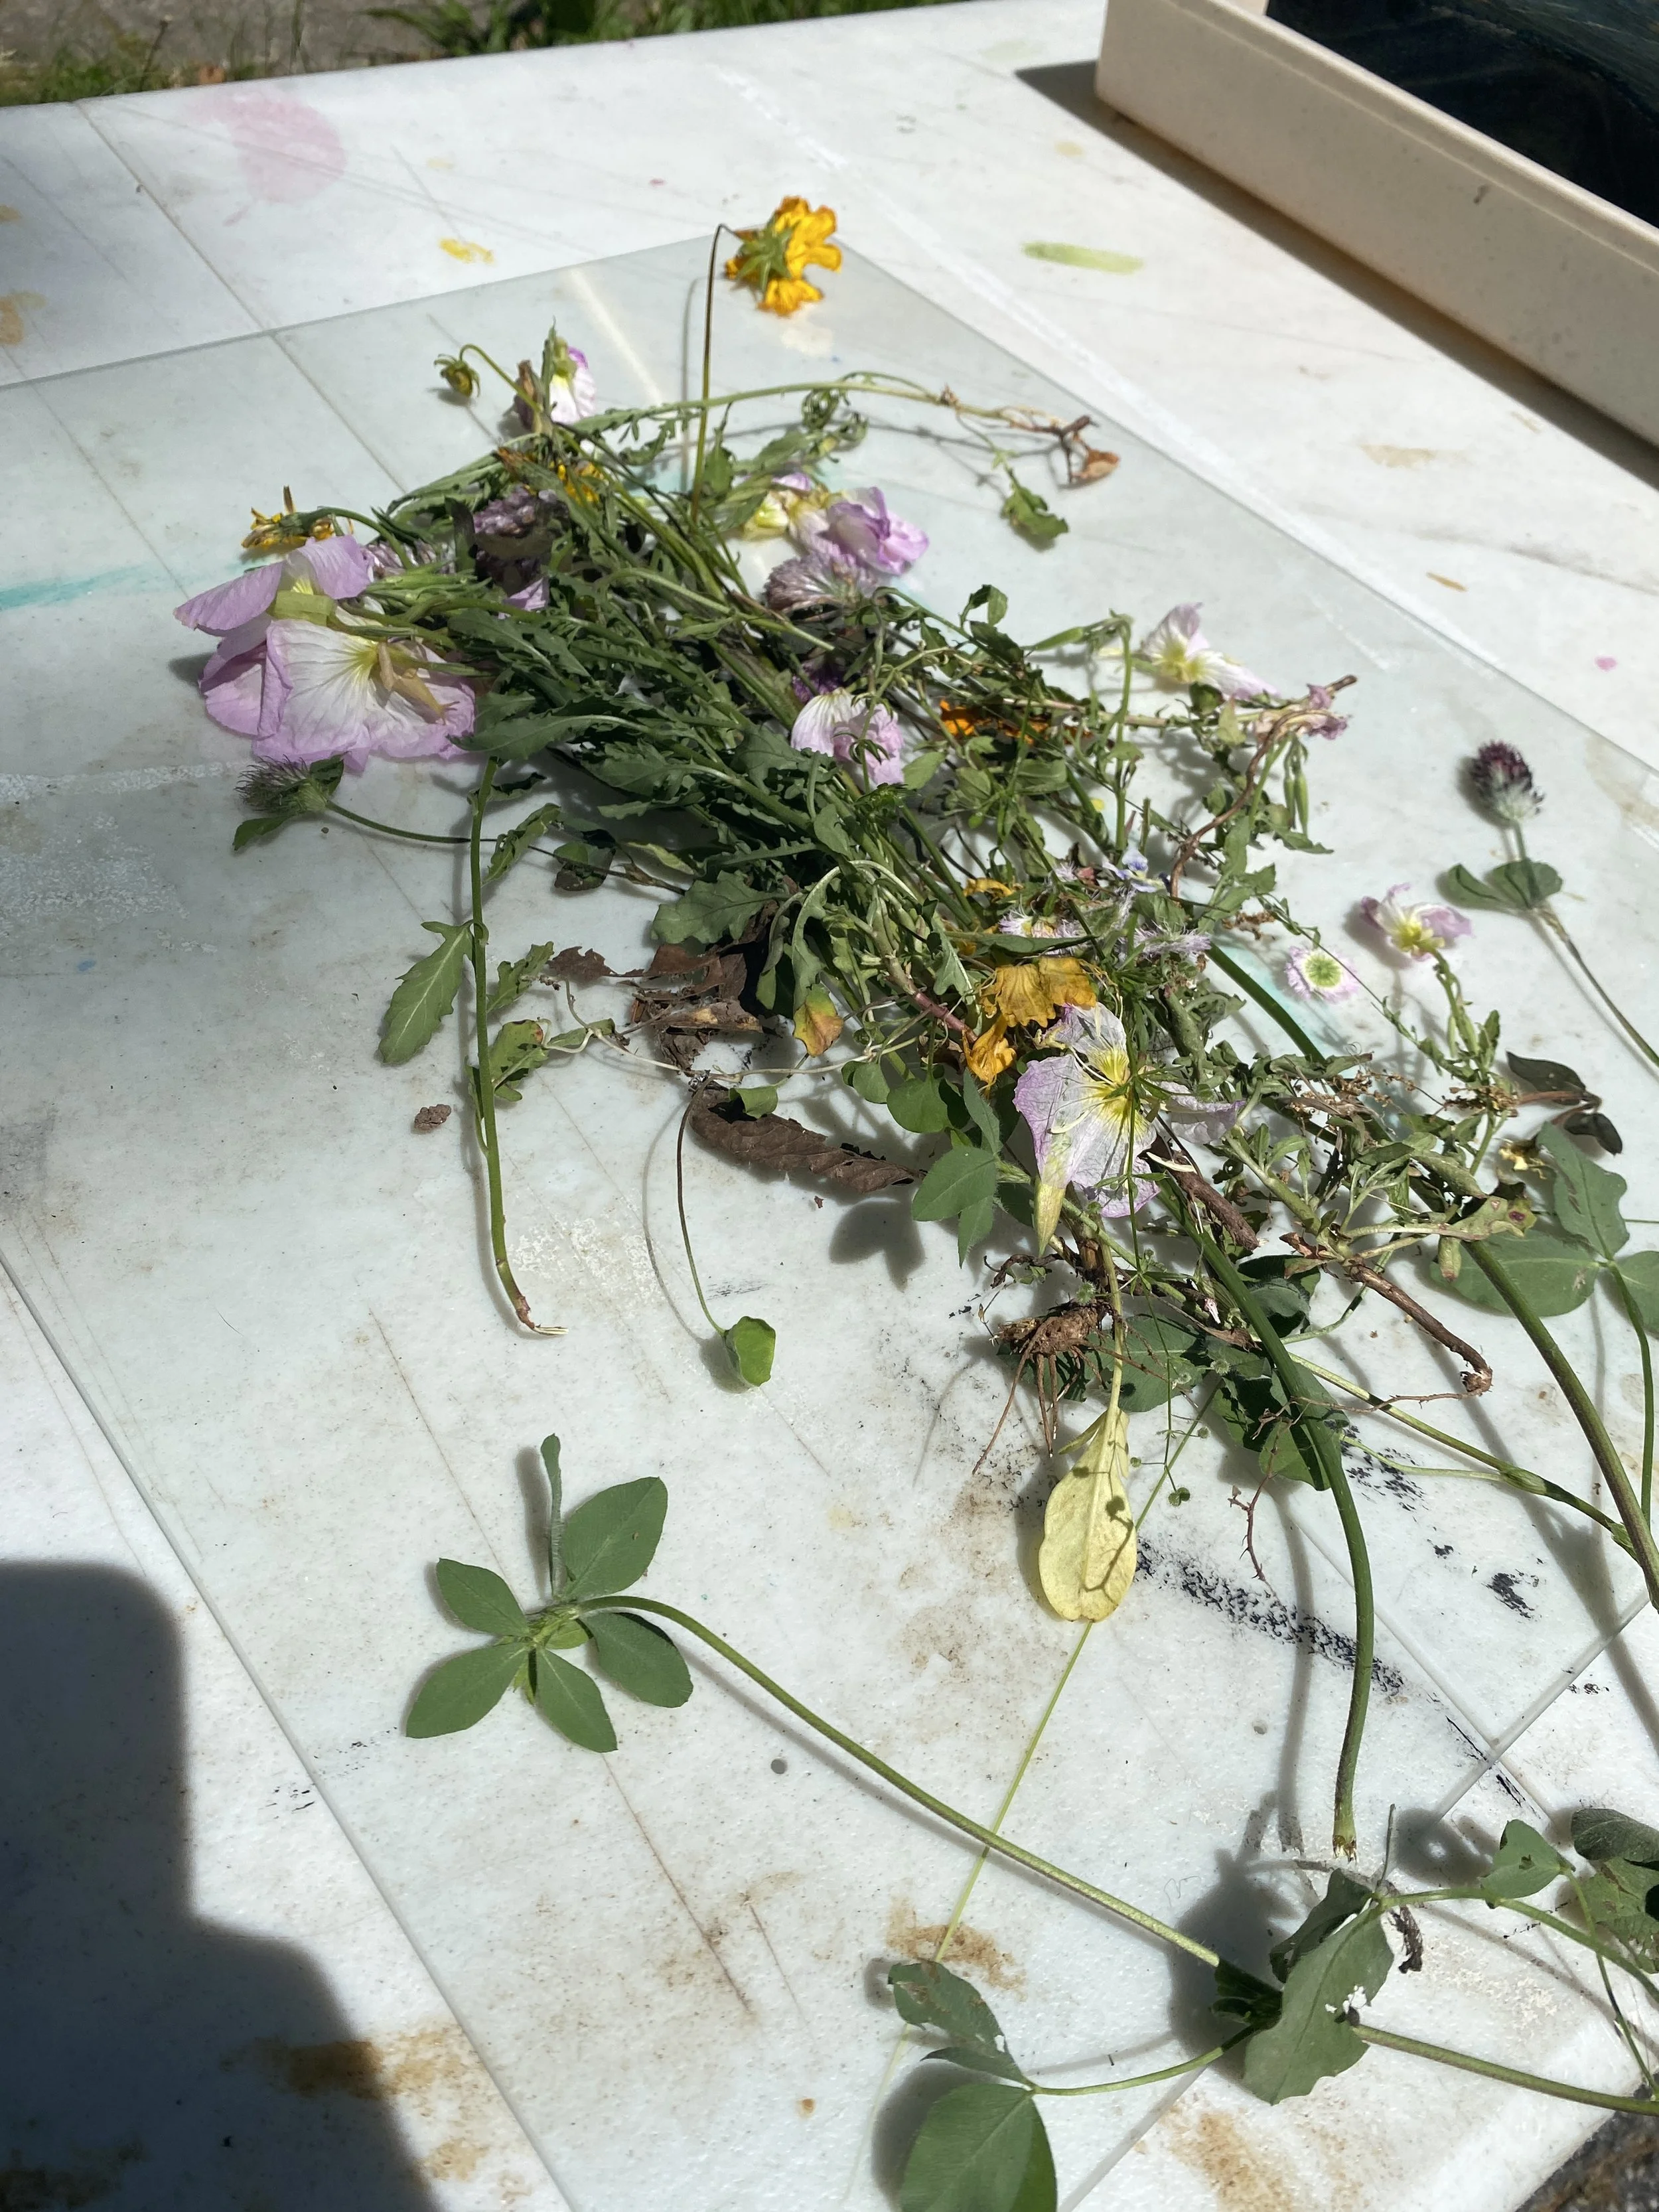

The washout process is the same as paper (for me at least). Put it in sink and wash it with cold water. Ill also spray it with Hydrogen Peroxide to help rush the oxidation process and make those blues real dark like.


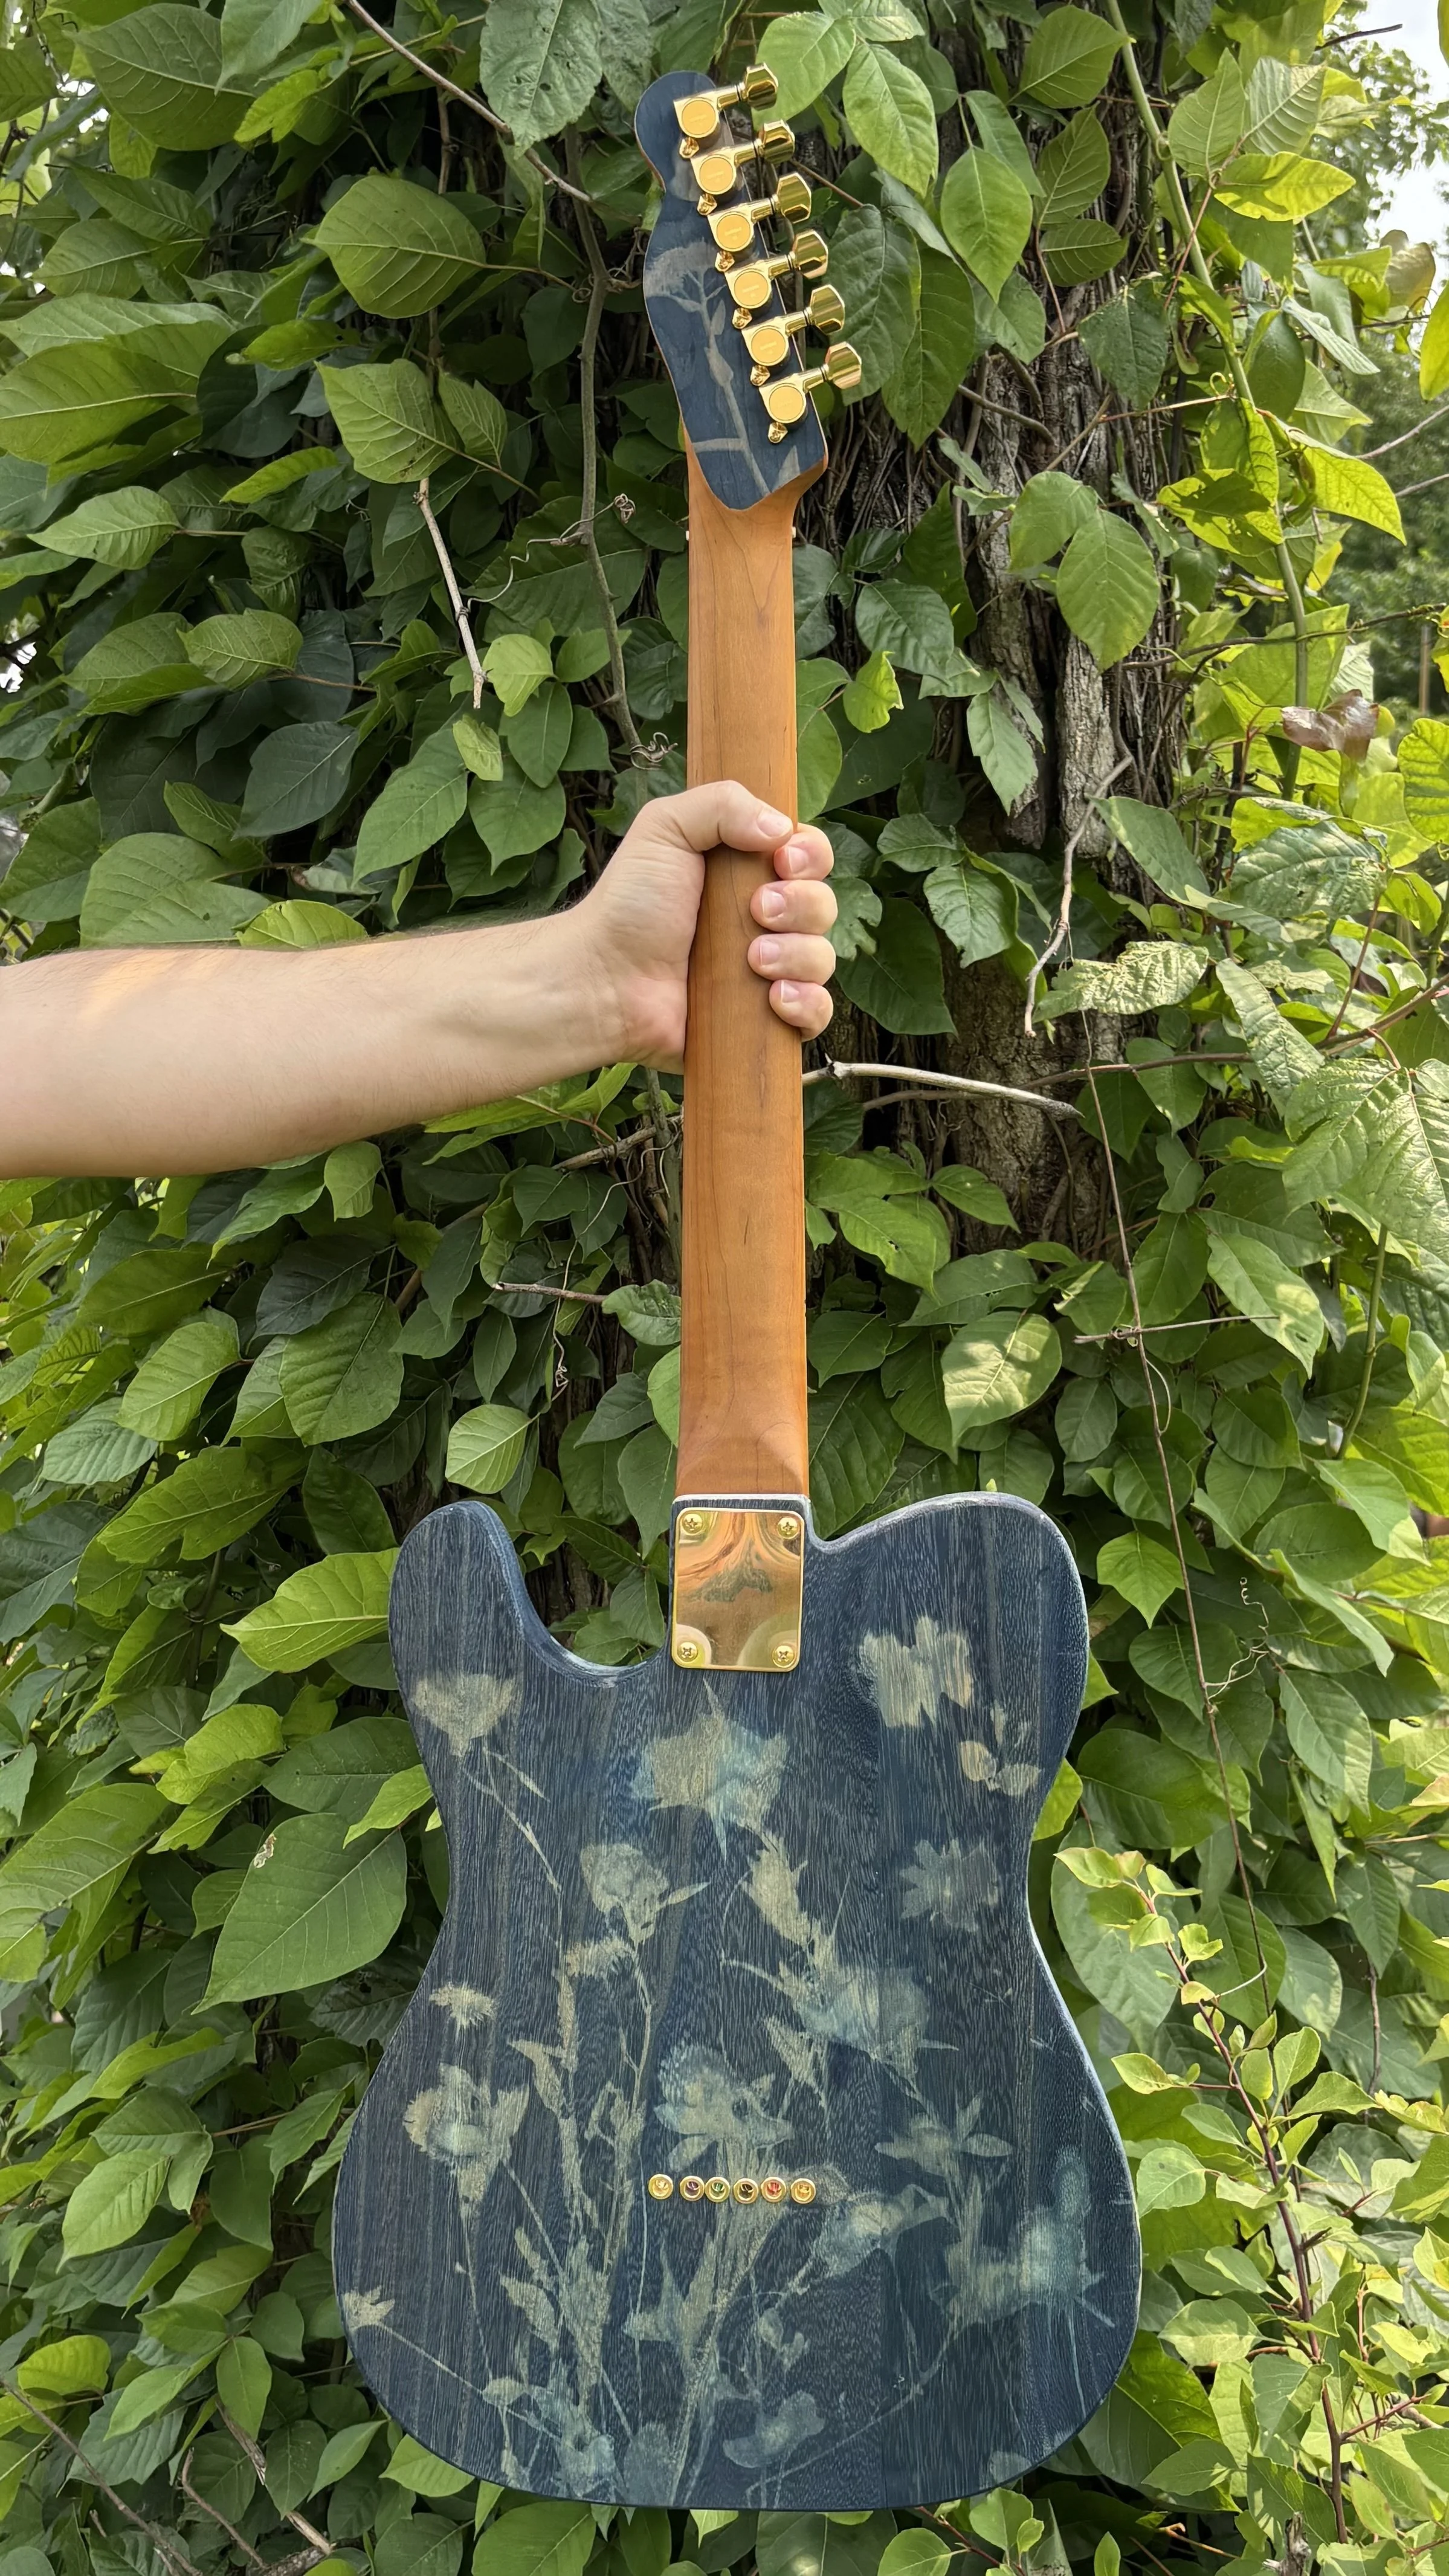
As you can see above, sanding before hand provided a much better contrast than not sanding (lesson learned). You’ll see in the following images the cyanotype contrast tends to decrease over time if you haven’t sealed the image. The next body I do will aim to cyanotype both sides and clear coat it as soon as possible in hopes of conserving the contrast.
Part III - Hardware installation/dry fit
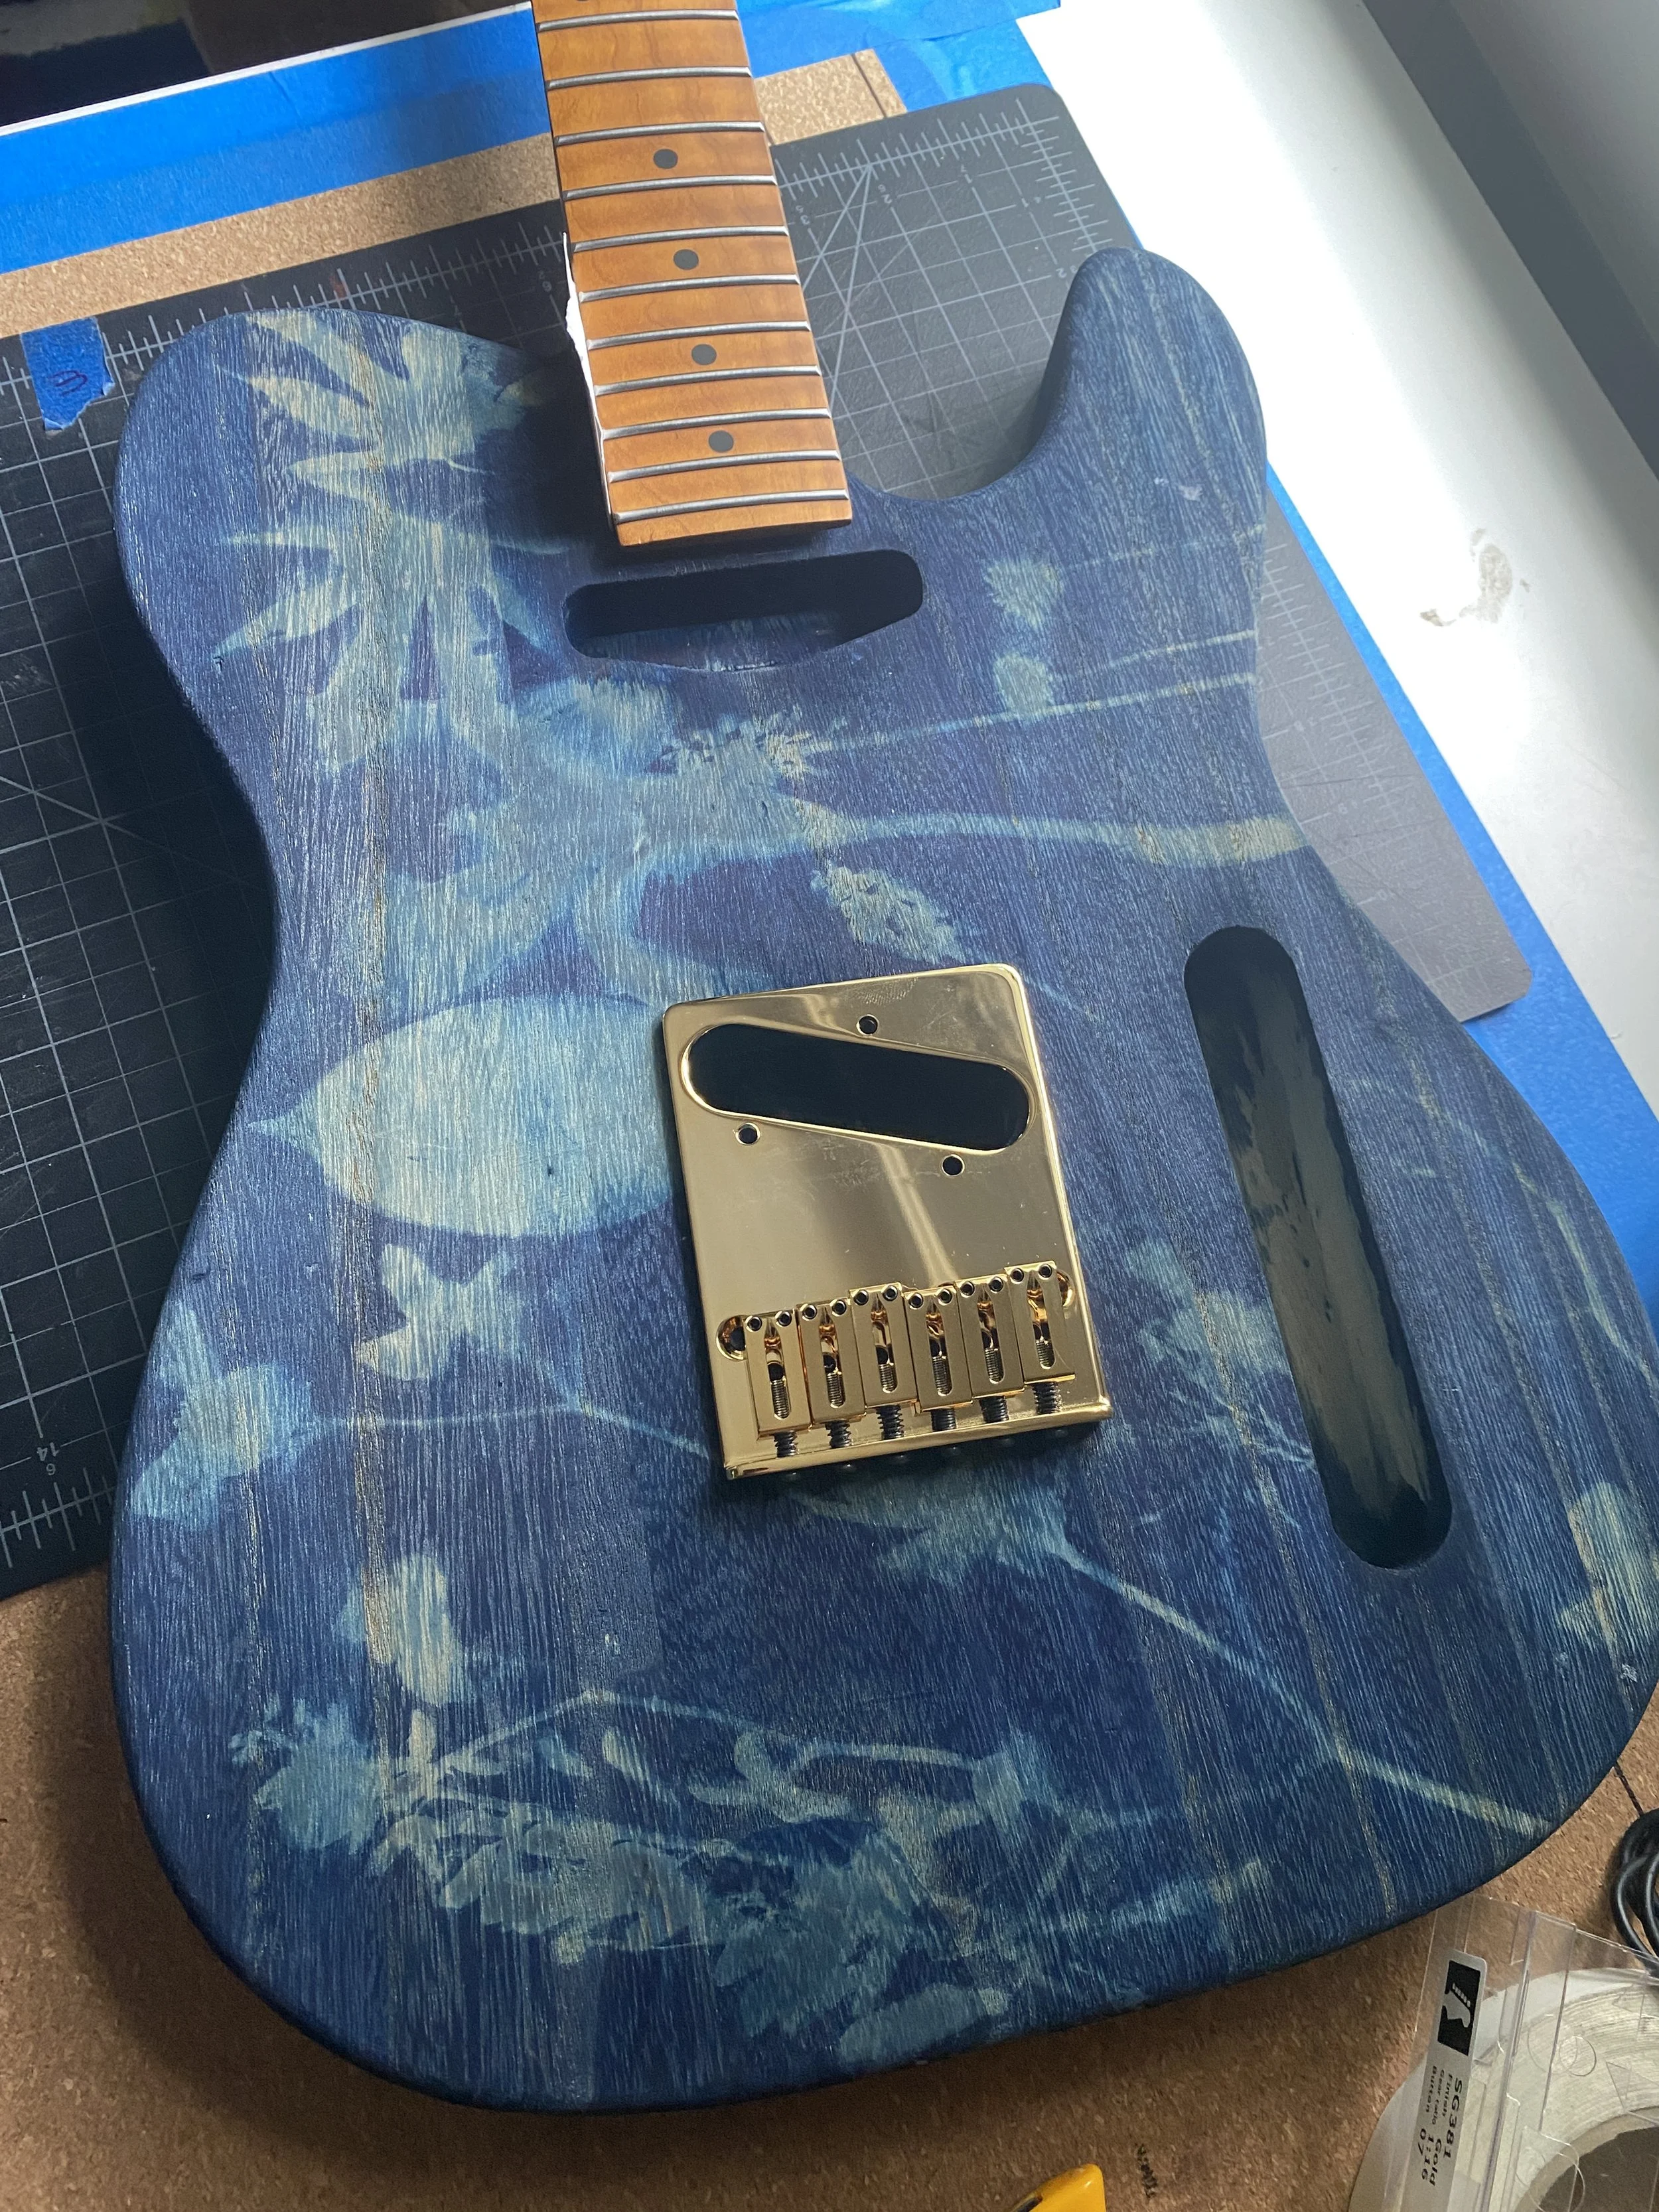
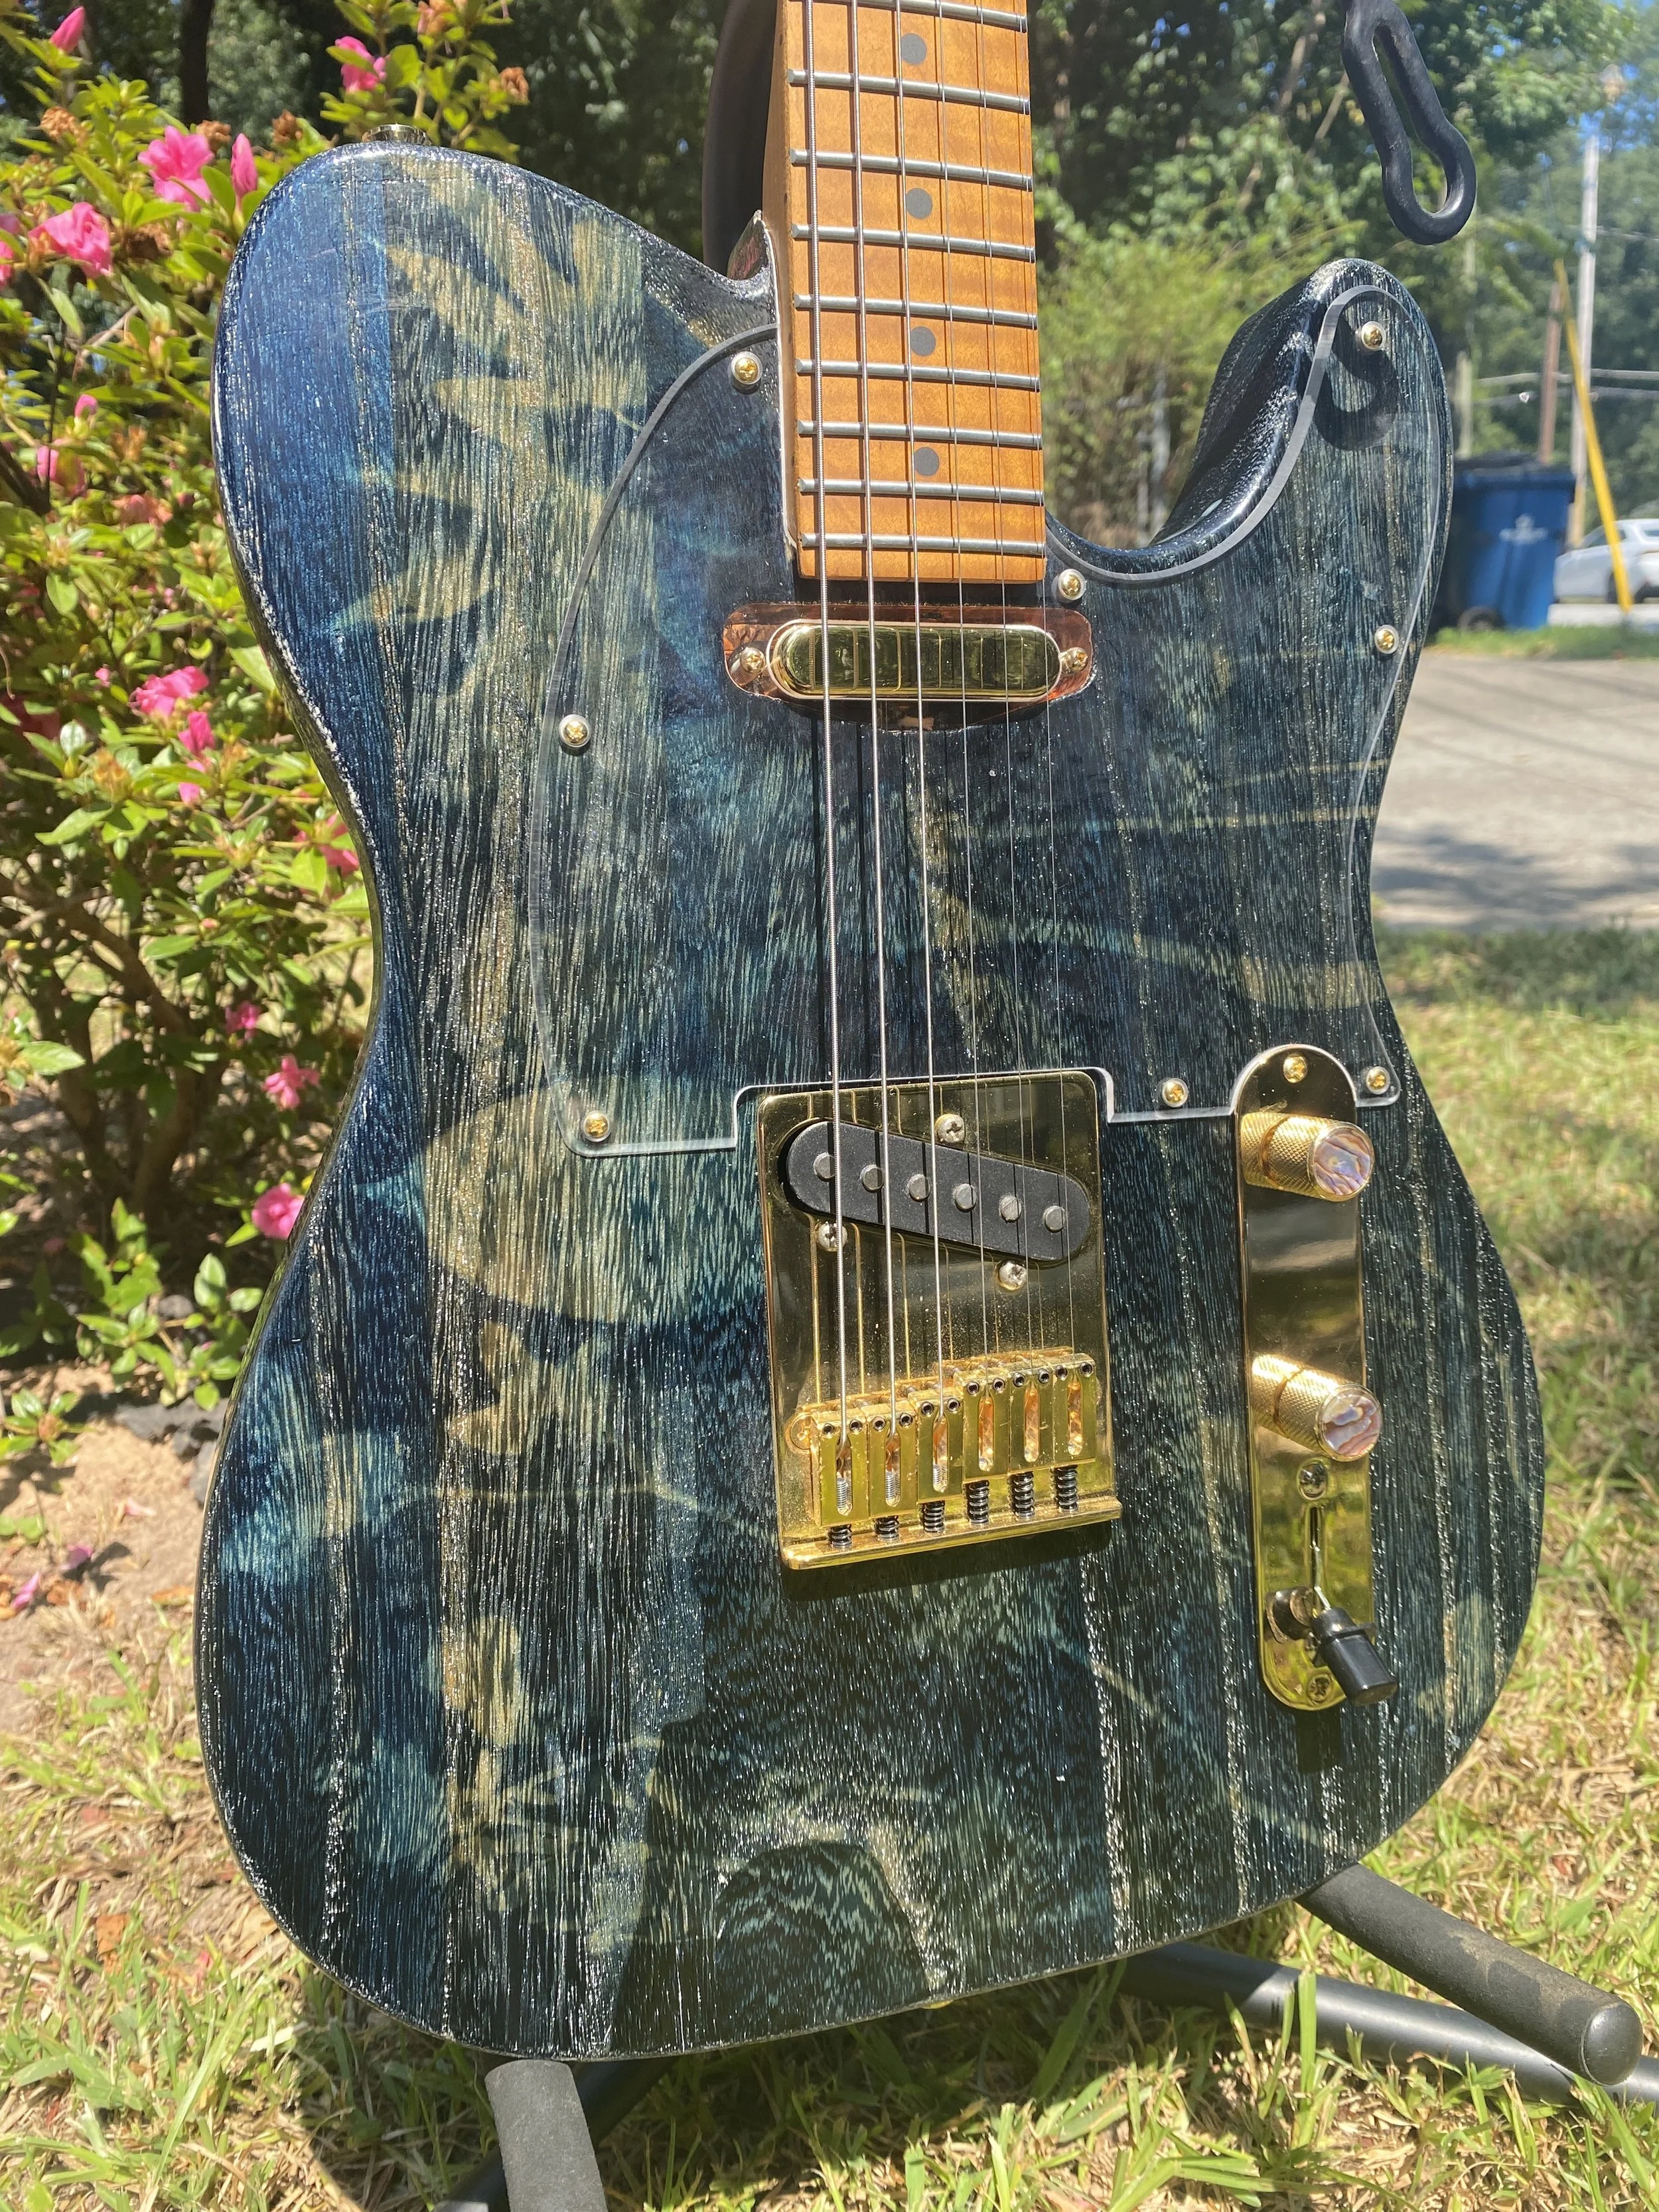
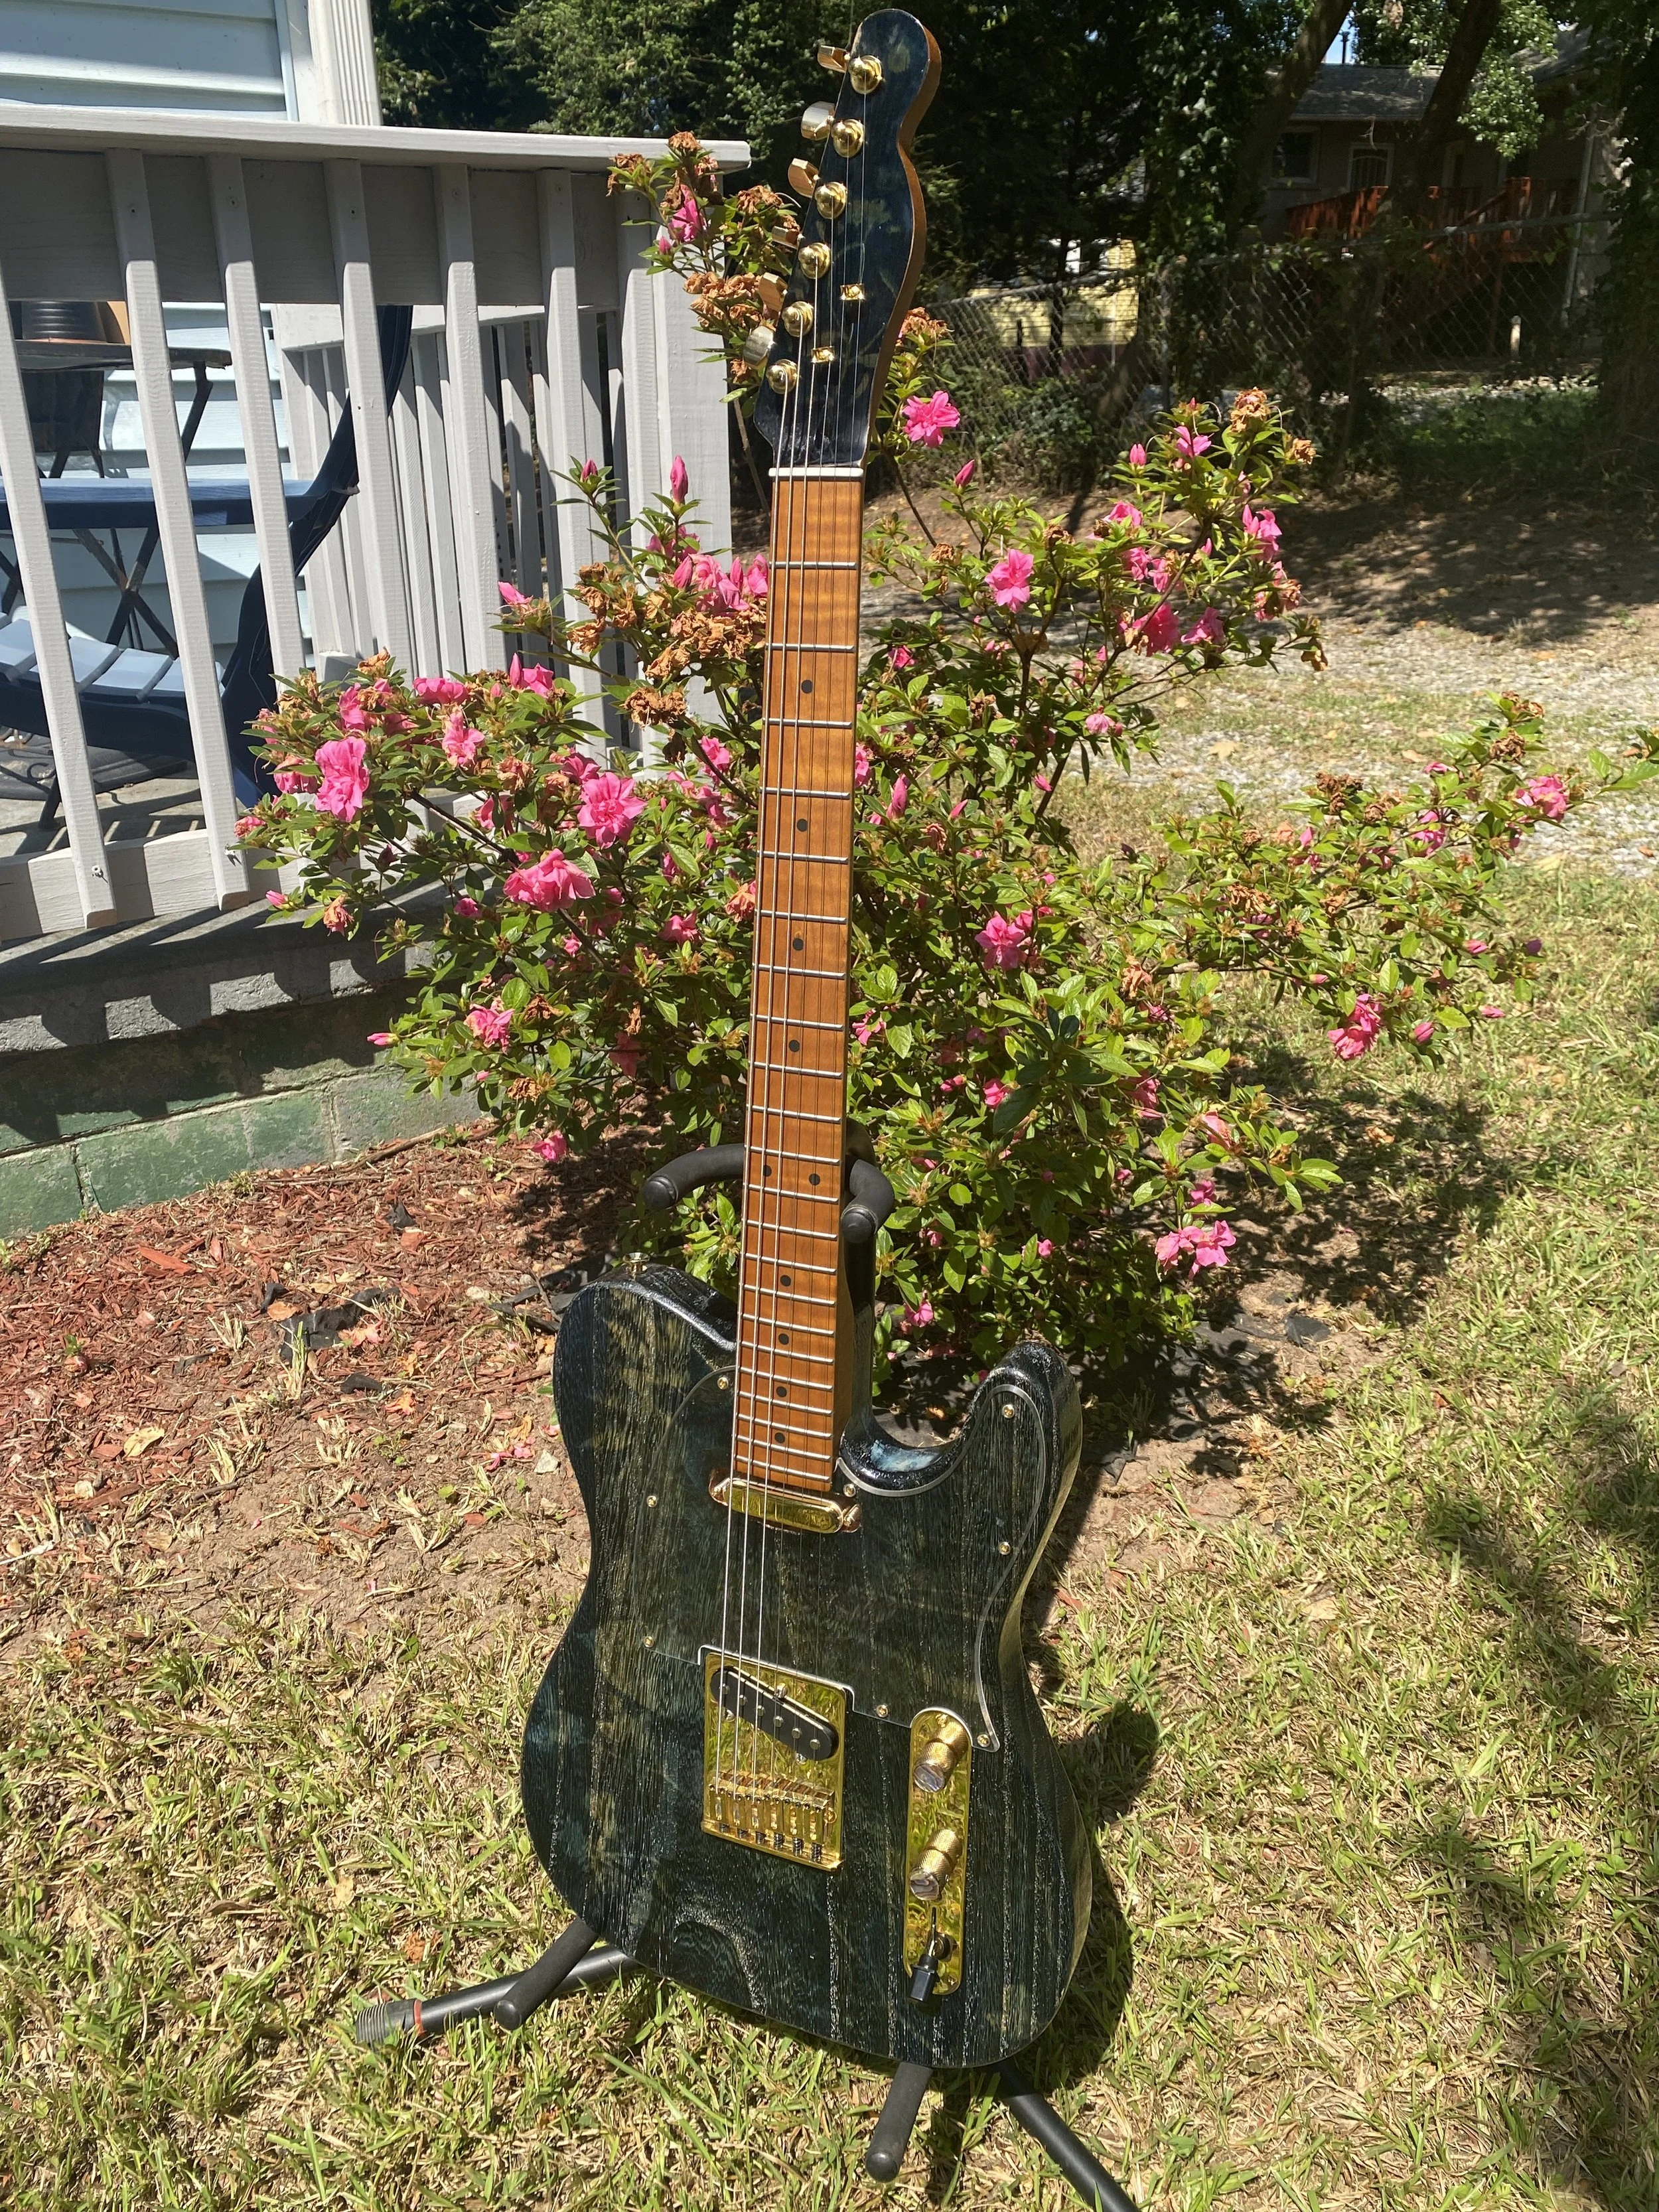
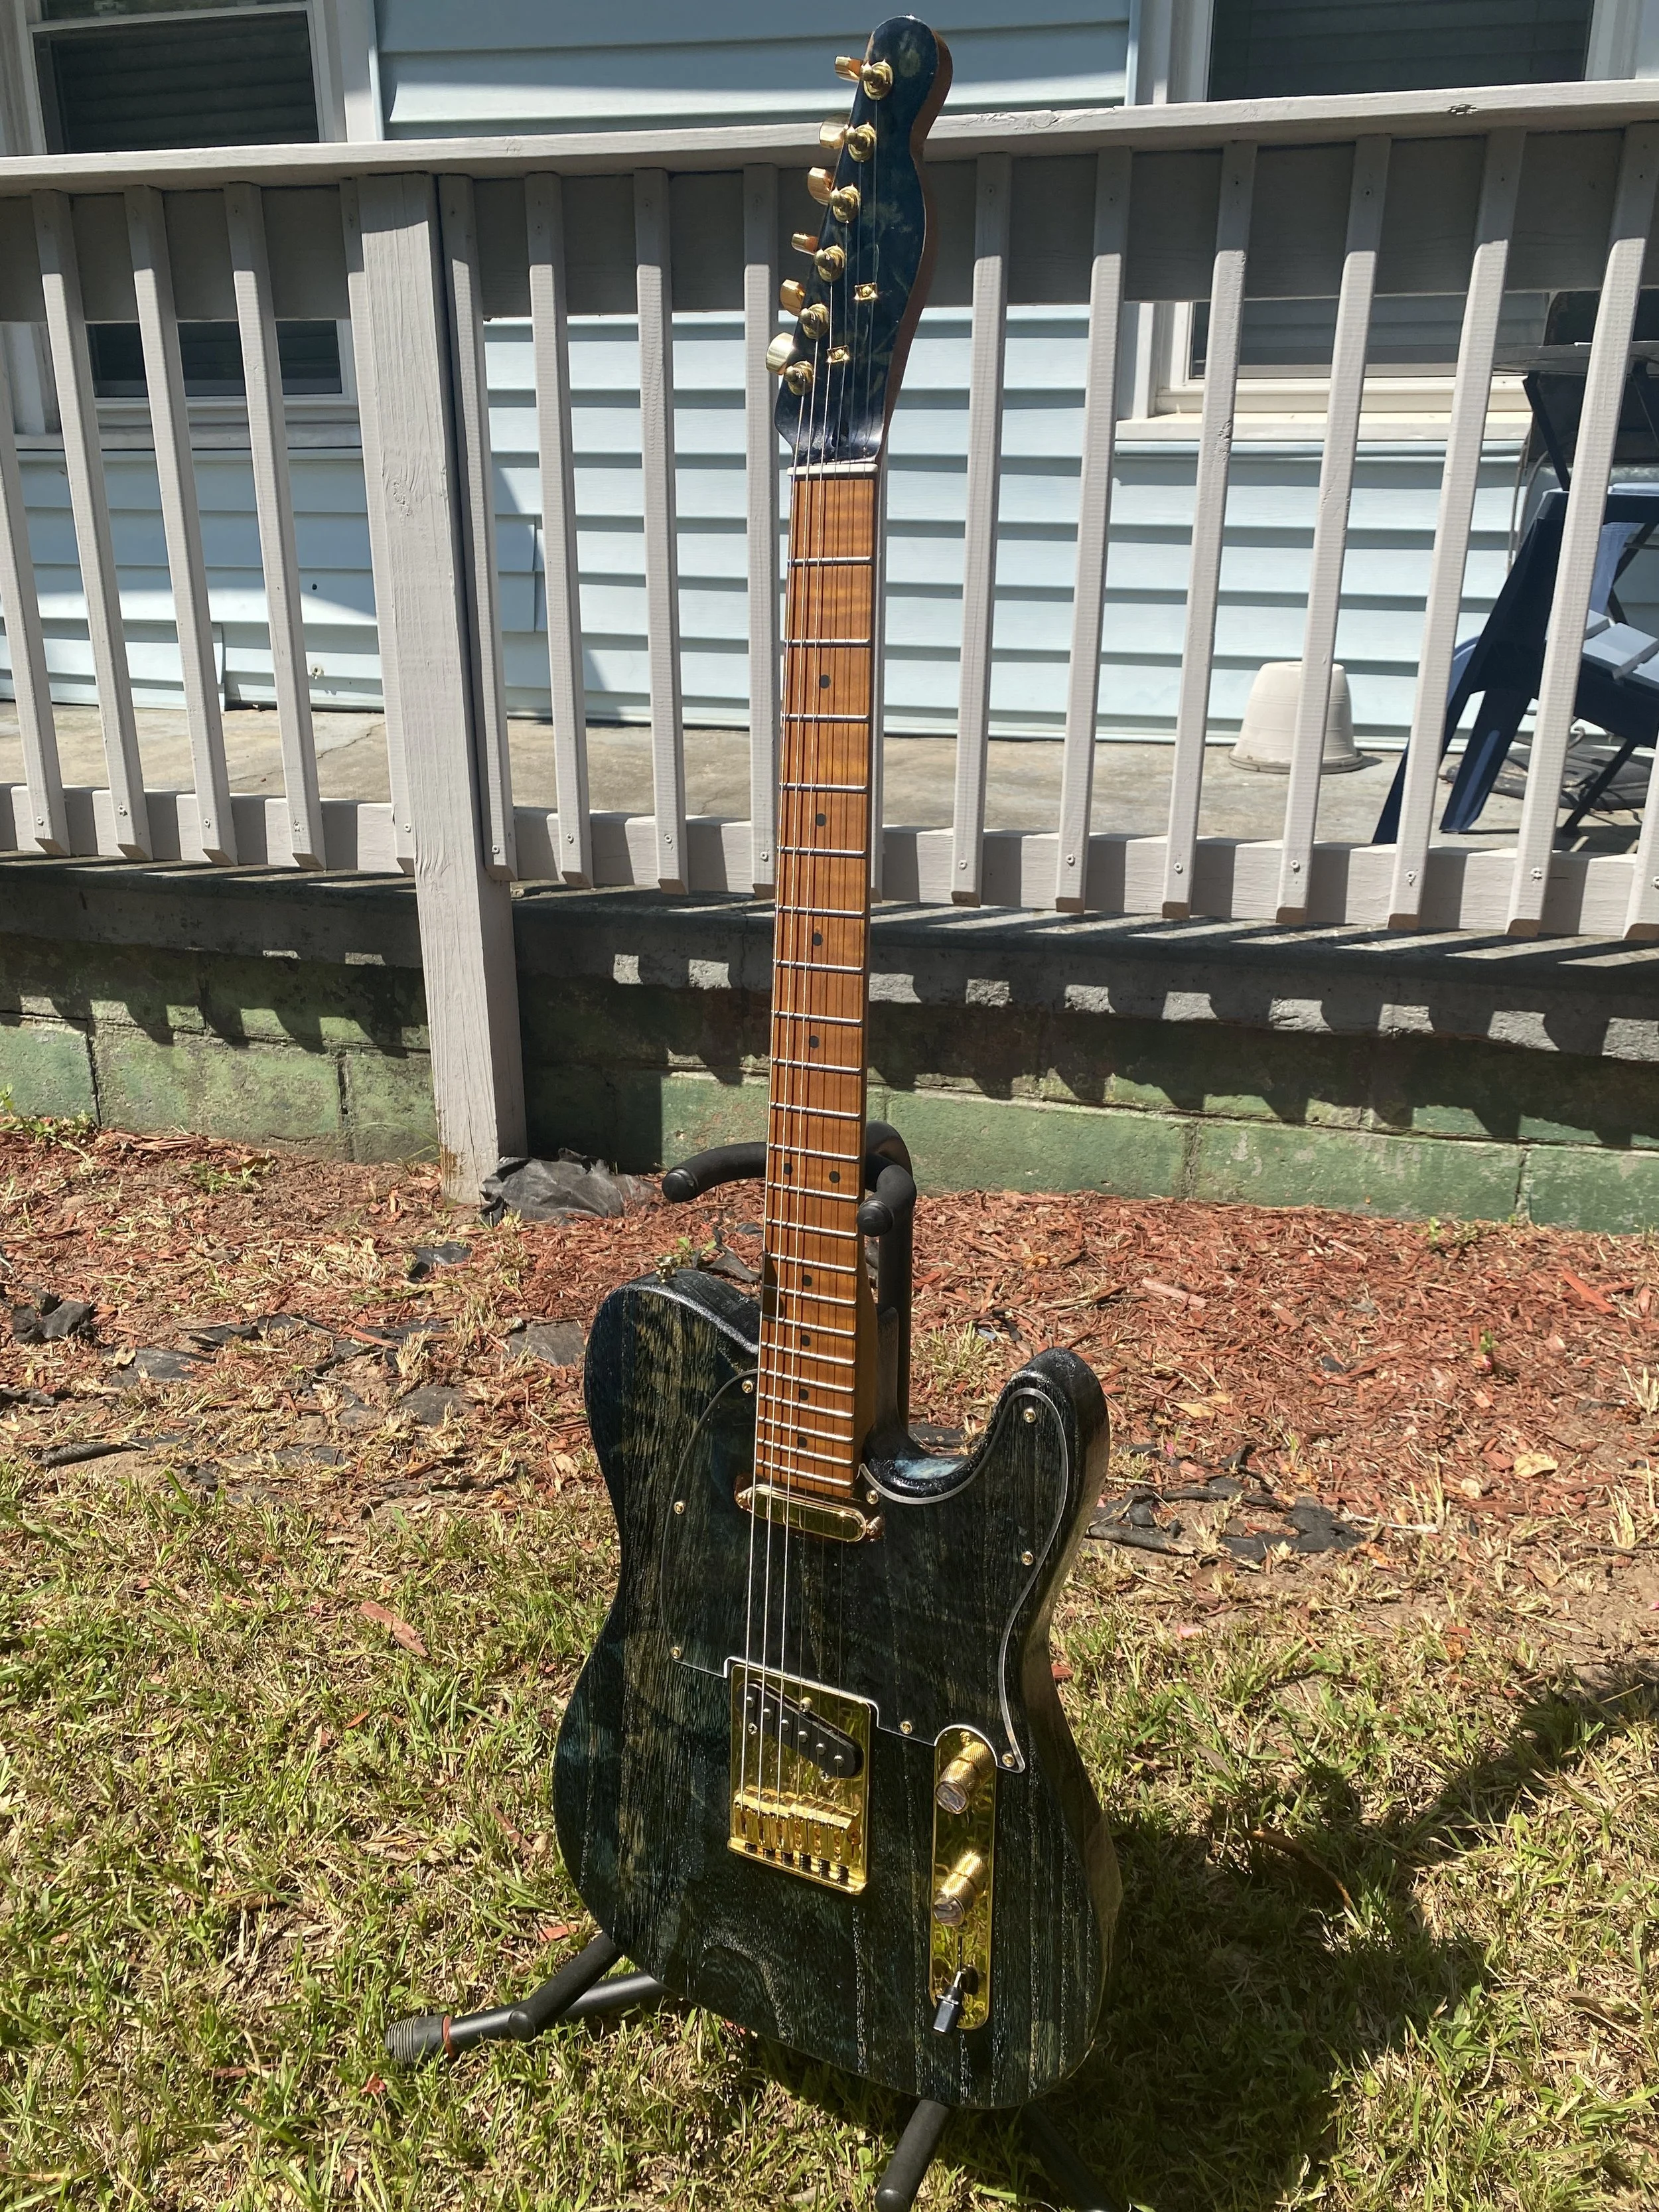
In the origianl vision, I imagined the Cyanotype Guitar with gold hardware as a nice compliment to the coolness of the blue cyanotype.
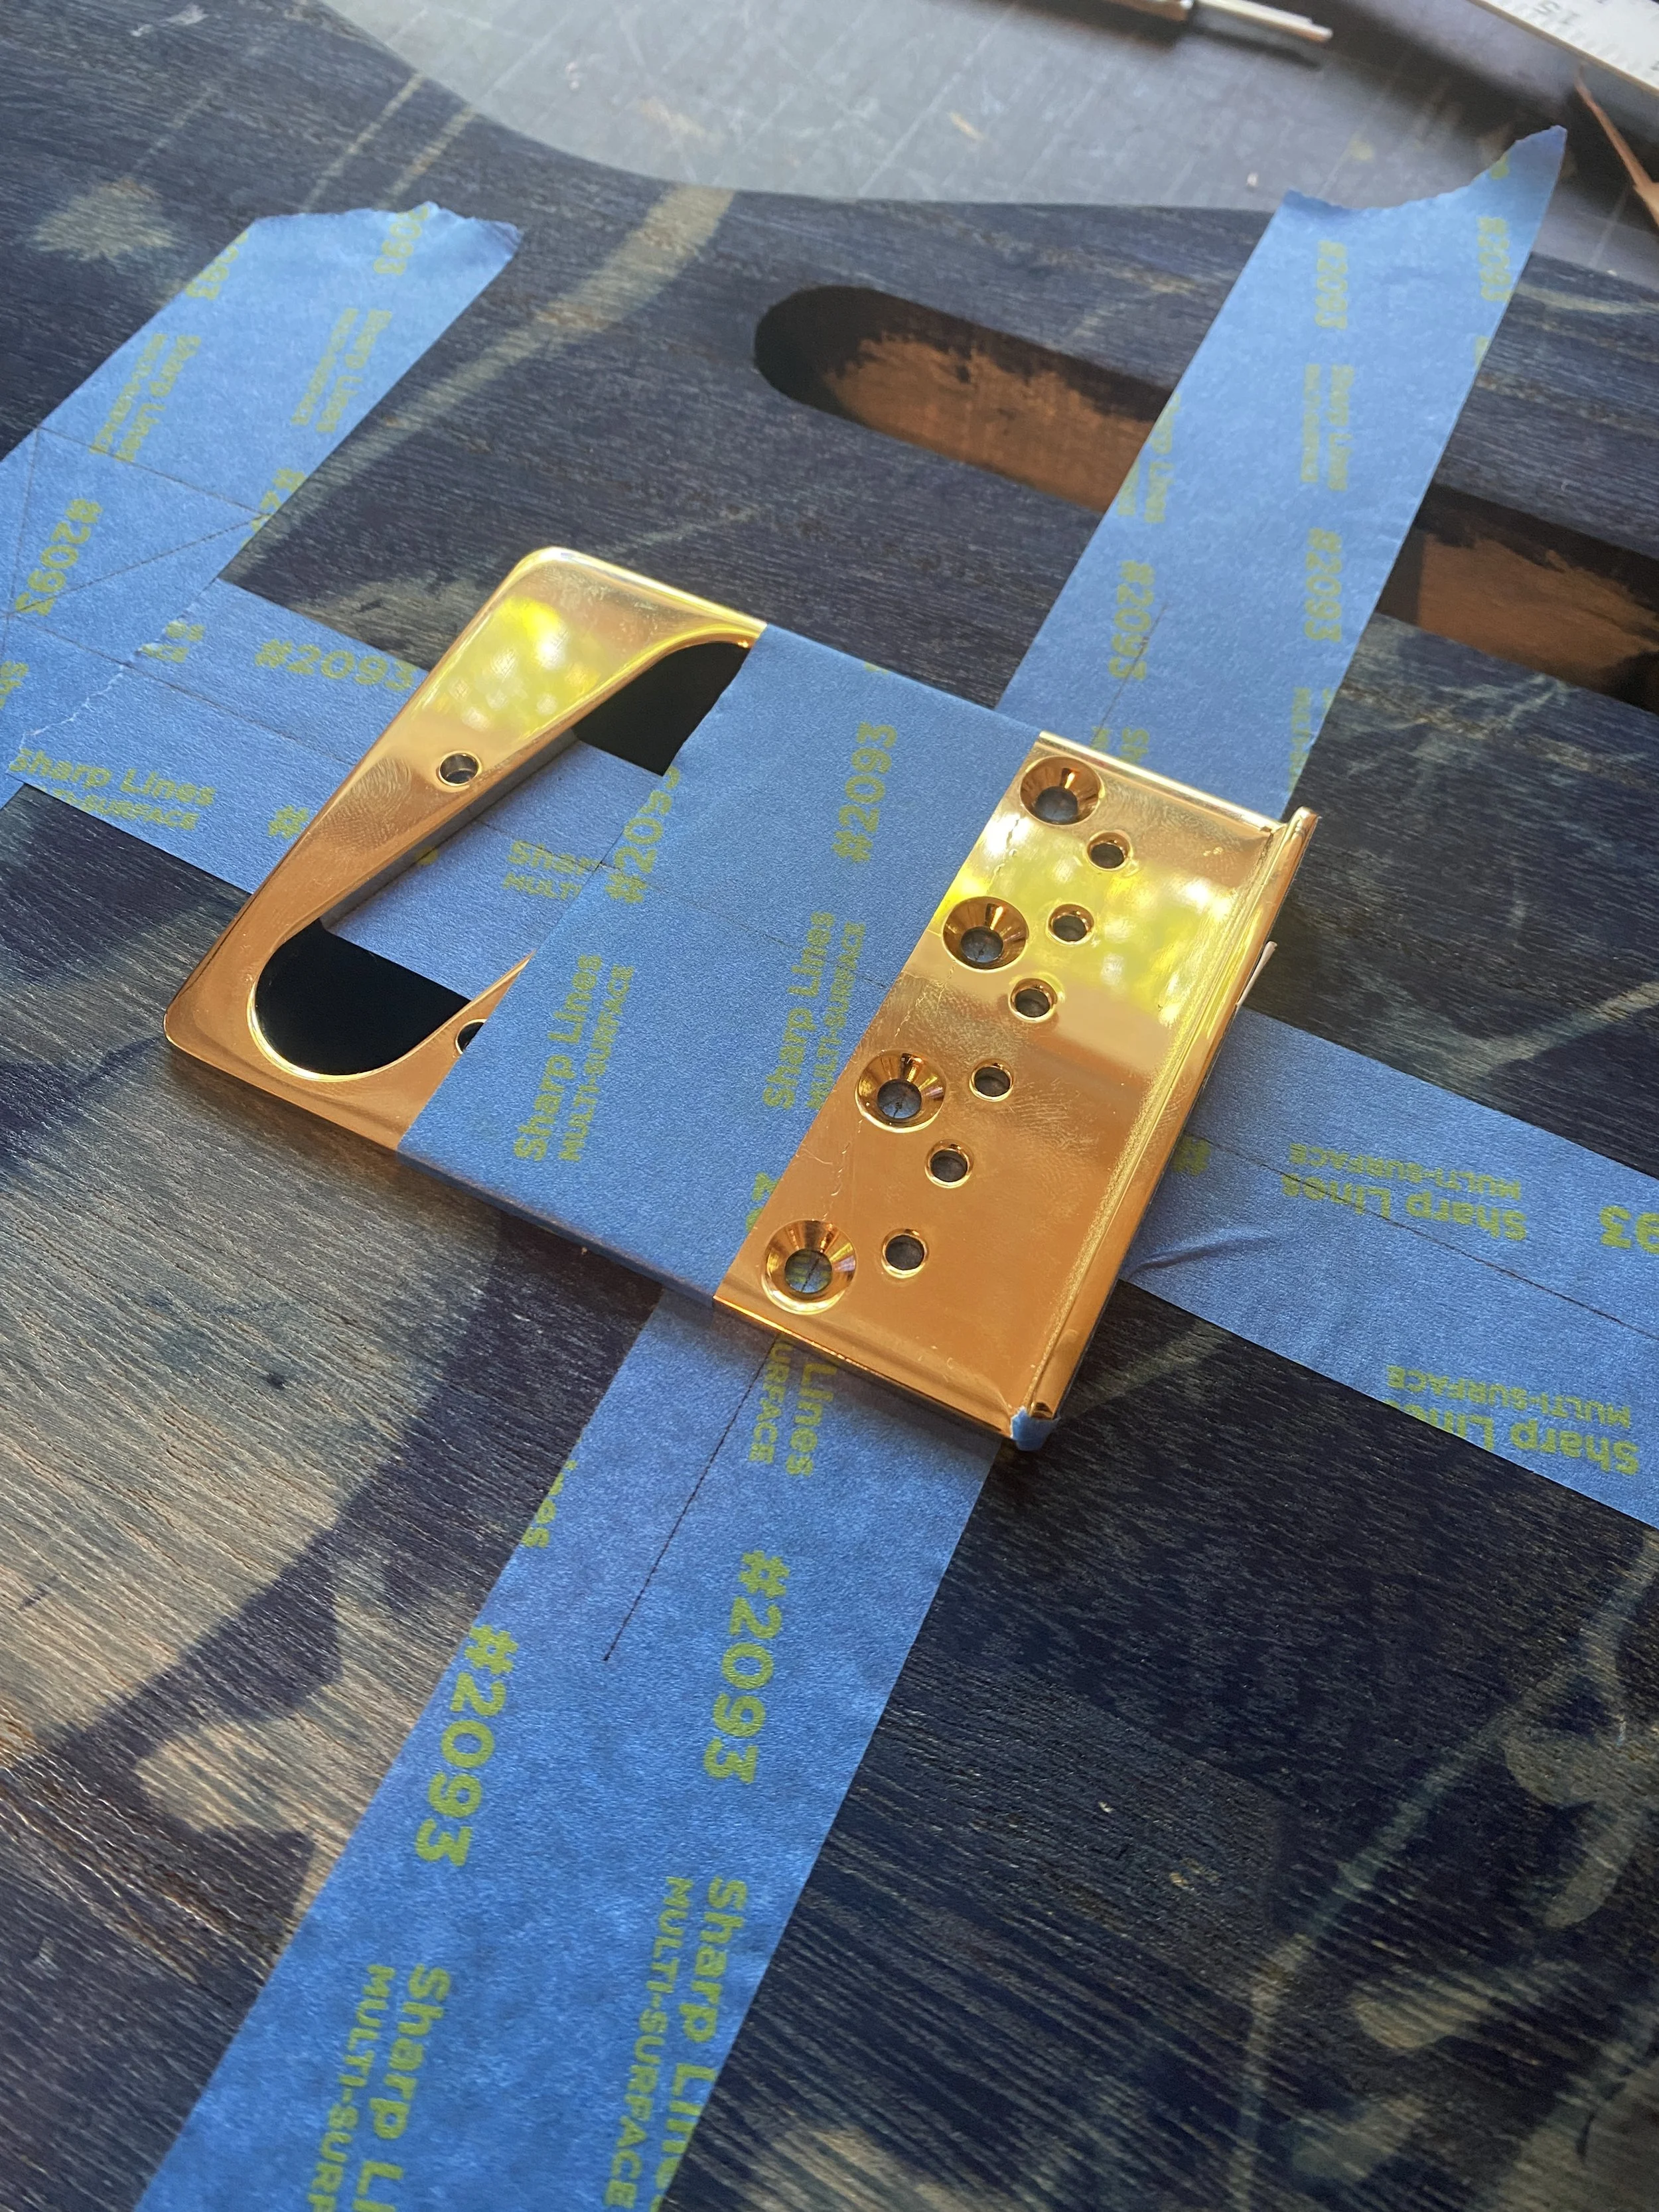
For the hardware, I chose to use a StewMac Gototh Modern Gold Tele Style Bridge and Gold Gotoh Schaller-Style 6-Inline Tuning Knob Machines.
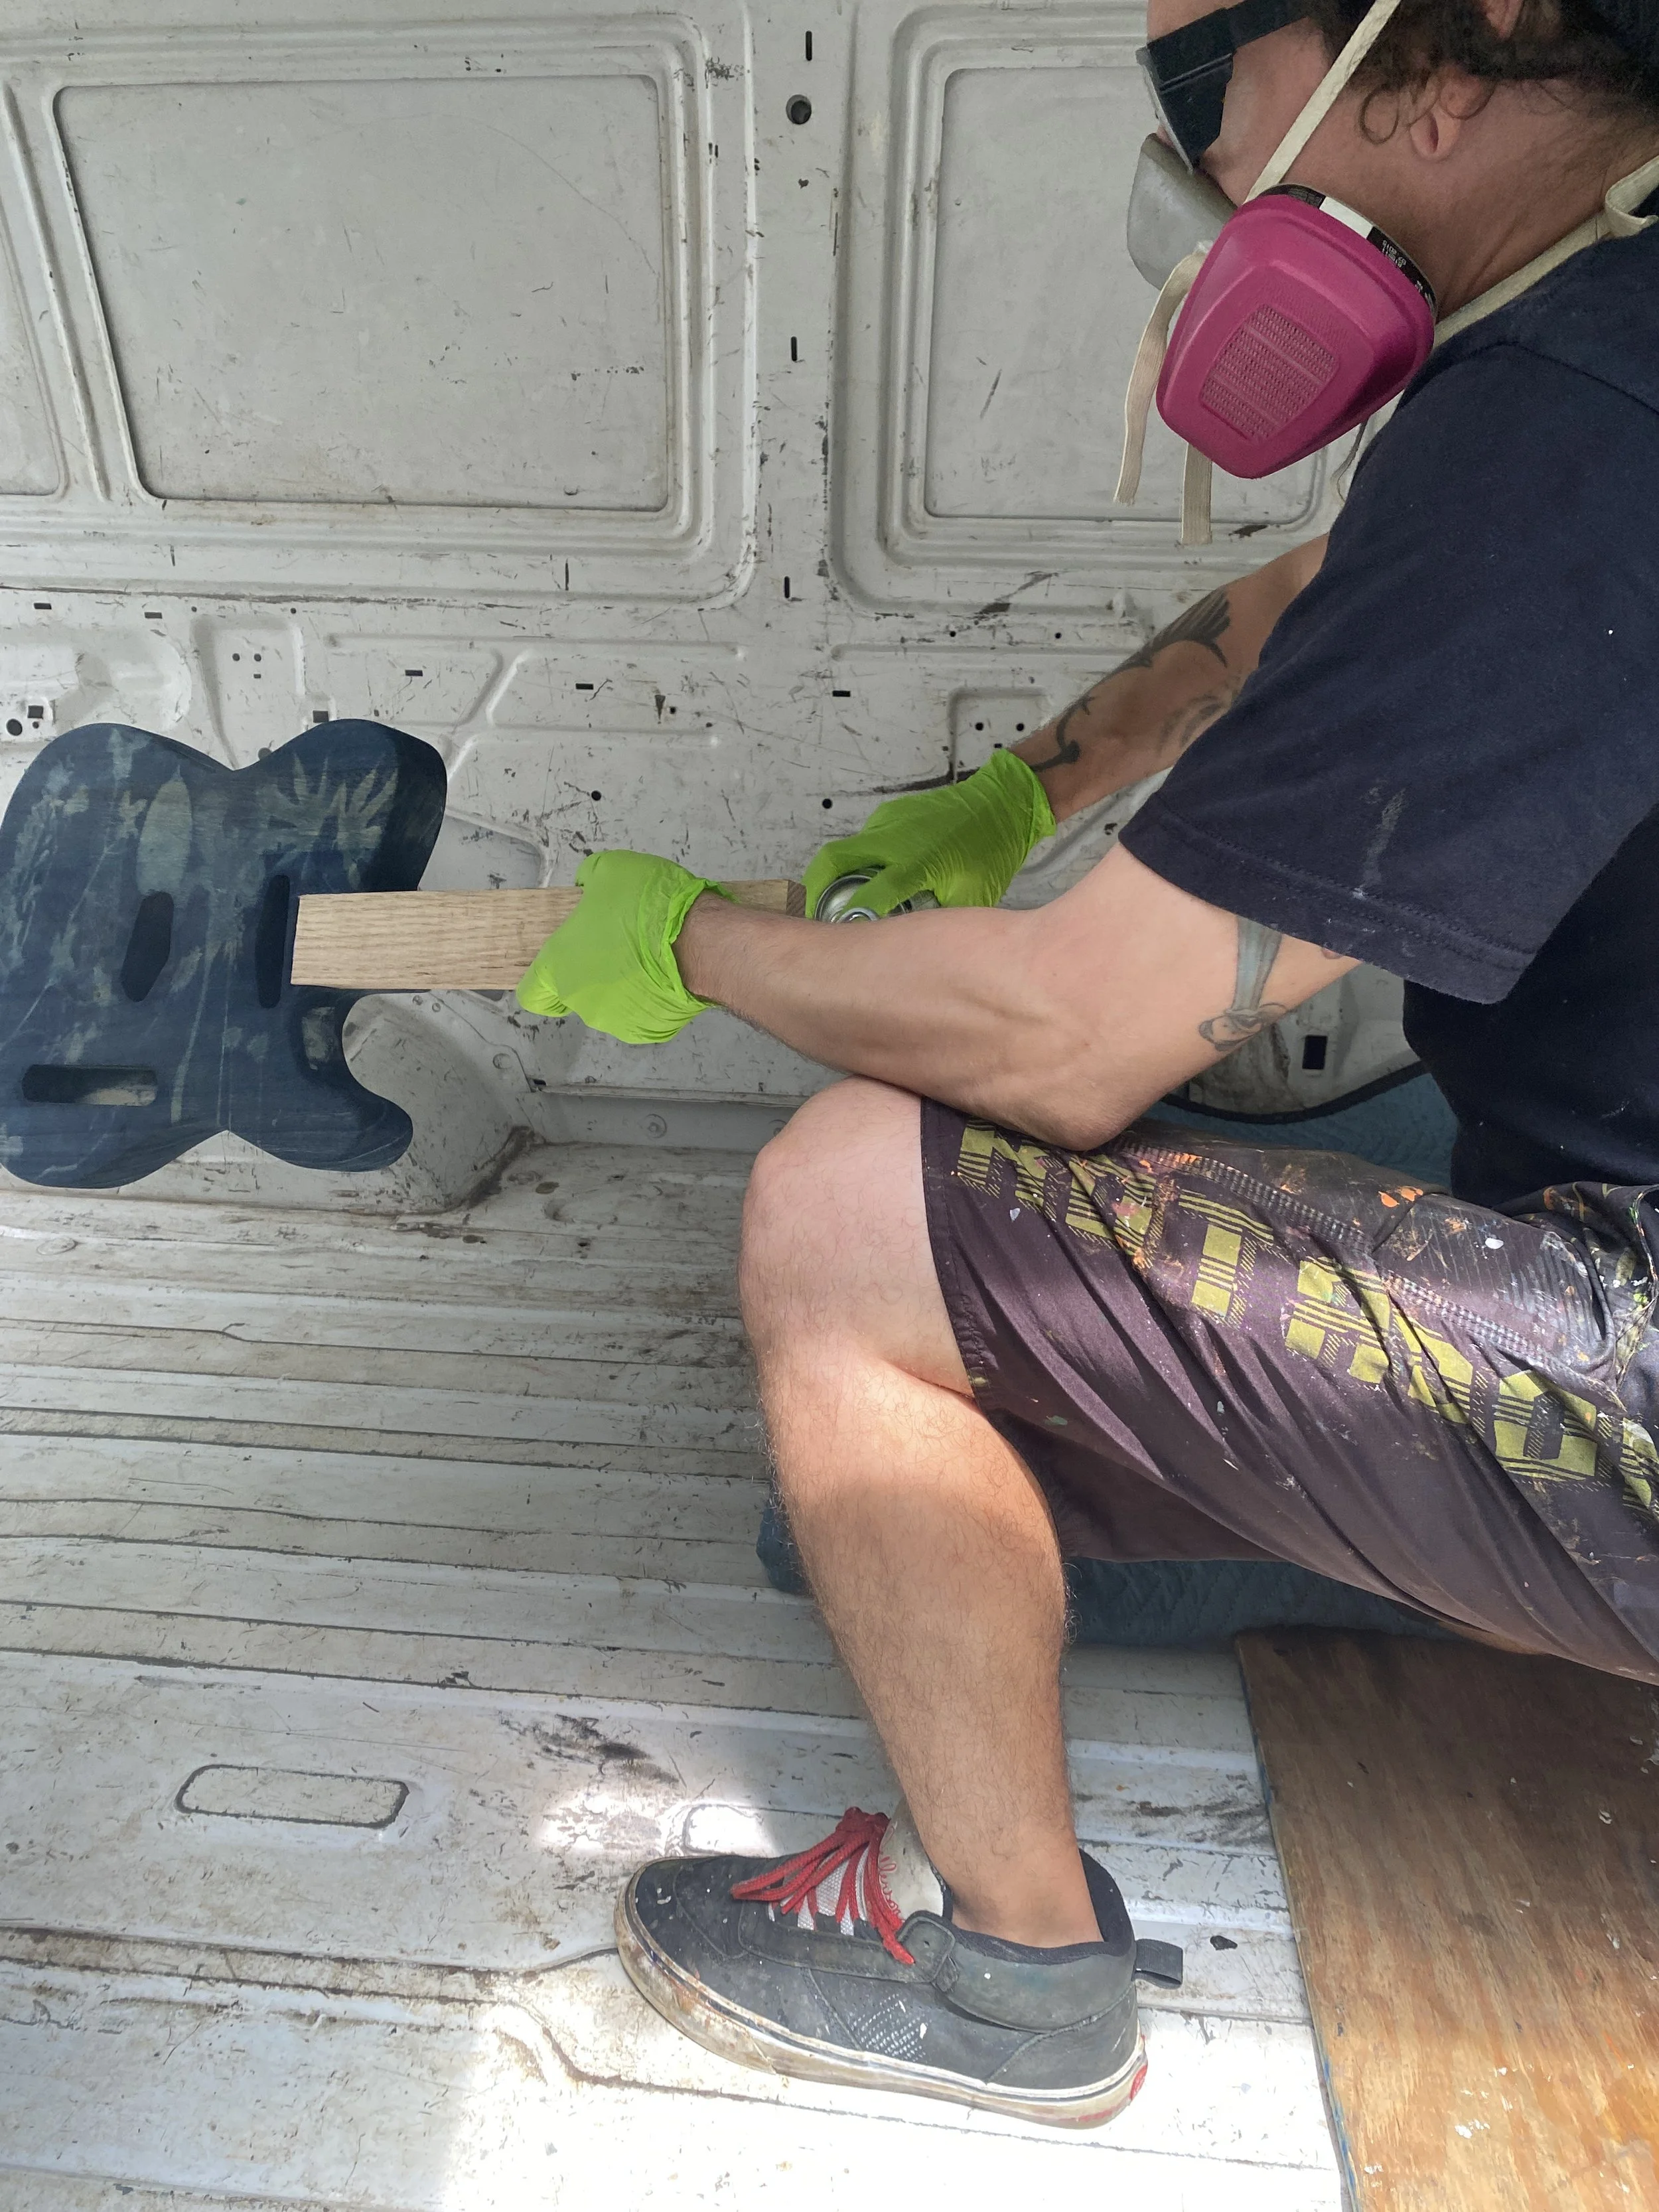
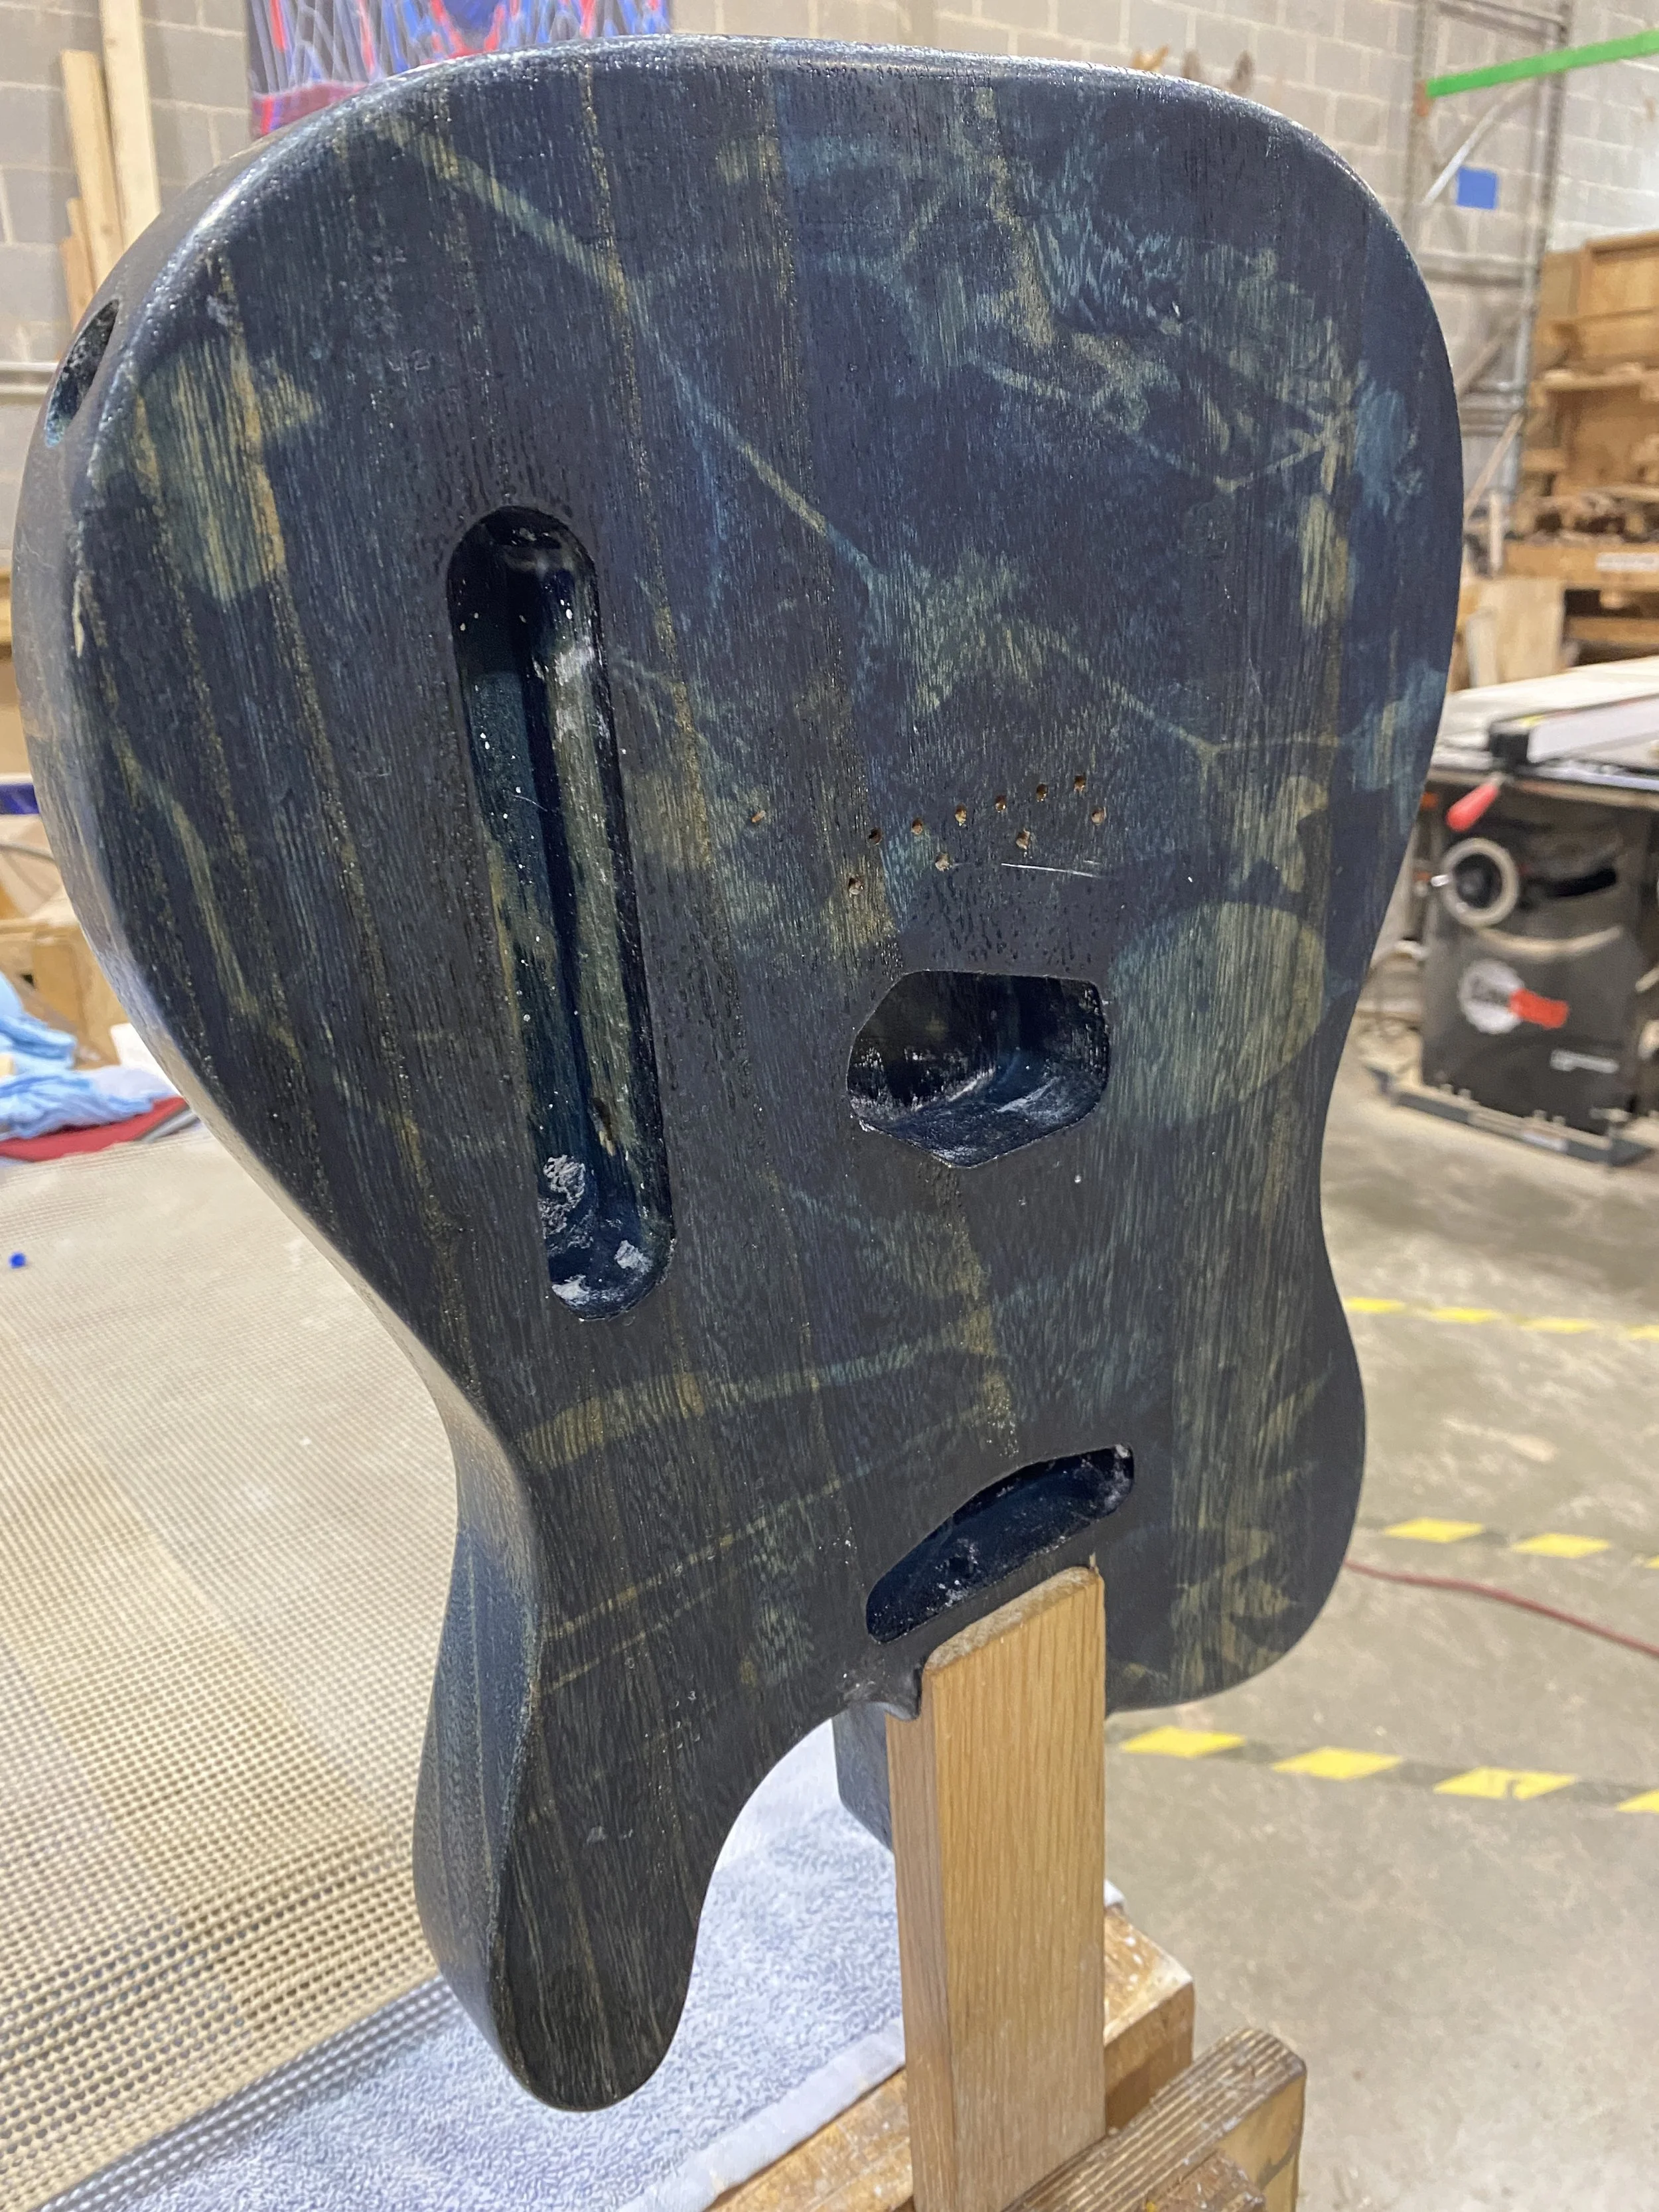
Installing the tuners was quite easy, however, the bridge was another story. I watched a few youtube videos and got the jist of finding the center between the width of the neck and at the correct length from the nut (25.75’’). I took me 4 tries before I got to a point where I felt comfortable with my measurements.
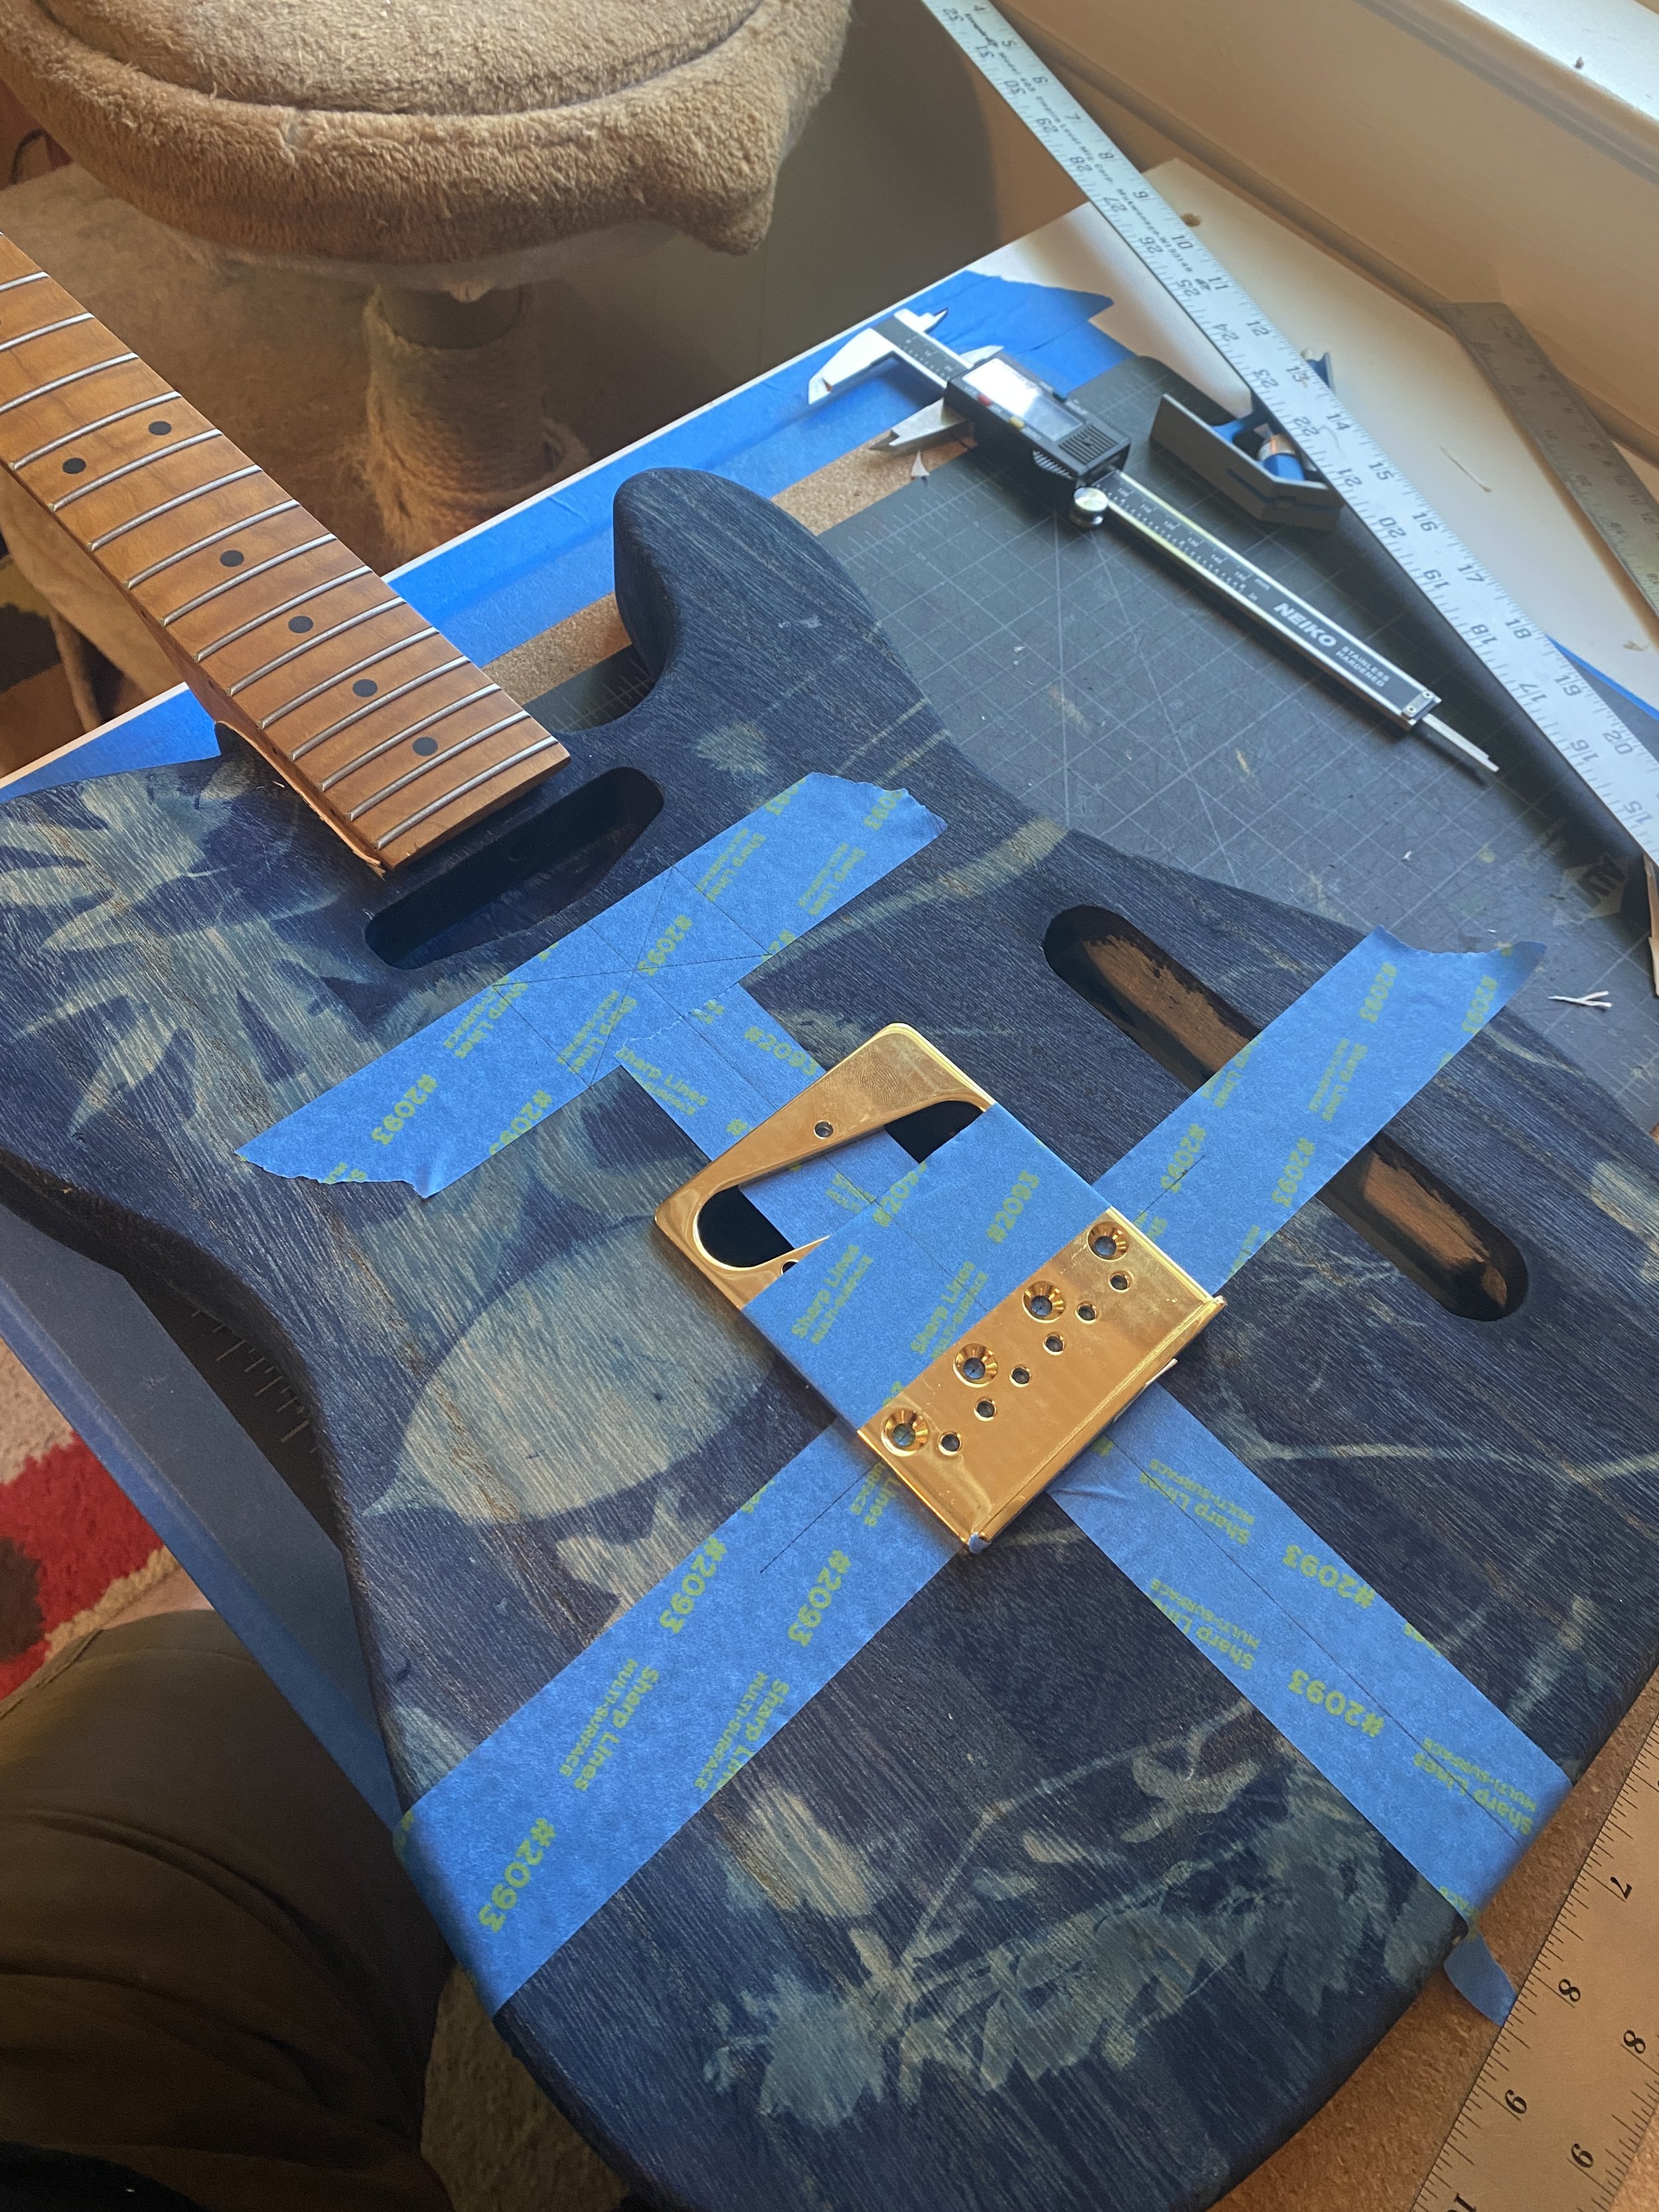


Once I got my measurements, I headed down to a local maker space FREESIDE where I have a membership. Freeside is a really cool place with a lot of cool people making really cool projects. As I work out of my apartment, its nice to have a dedicated space to go use a drill press when I need to.
Neck plate was easy to install. The body had pre-drilled neck holes but the neck did not, which was preferred. If you can tell, the neck plate isn’t perfectly straight as the pre drilled holes weren’t exactly where they needed to be, but damn close enough. I just had to work the neck screws in slowly and allow it to set as it was going to set as I applied pressure to each side. This was the first time I realized having predrilled stuff can have pros and cons, this con being absolutely manageable.


Whew! That was a little scary drilled the through-hole strings through the bridge and body at the same time. I had to make sure the drill press was lined up so they bit didn’t get pushed to the side by the strings holes.
The string ferrel holes were definitely a learning opportunity. I eyeballed these and got pretty close, but upon closer inspection, I can see where having a templated gauge would be so helpful.
I used a Tusq Synthetic Bone Nut but I didn’t take many photos, however, there is an hour long Instagram live post I made where you can watch me sand down the nut for 45 minutes while I listen to drum and bass mixes on youtube.
Video below shows the first strums!
A good friend suggested I get some nice photos in the green space at South River Art Studios. Thanks Jessie!


Part VI: Clear Coat
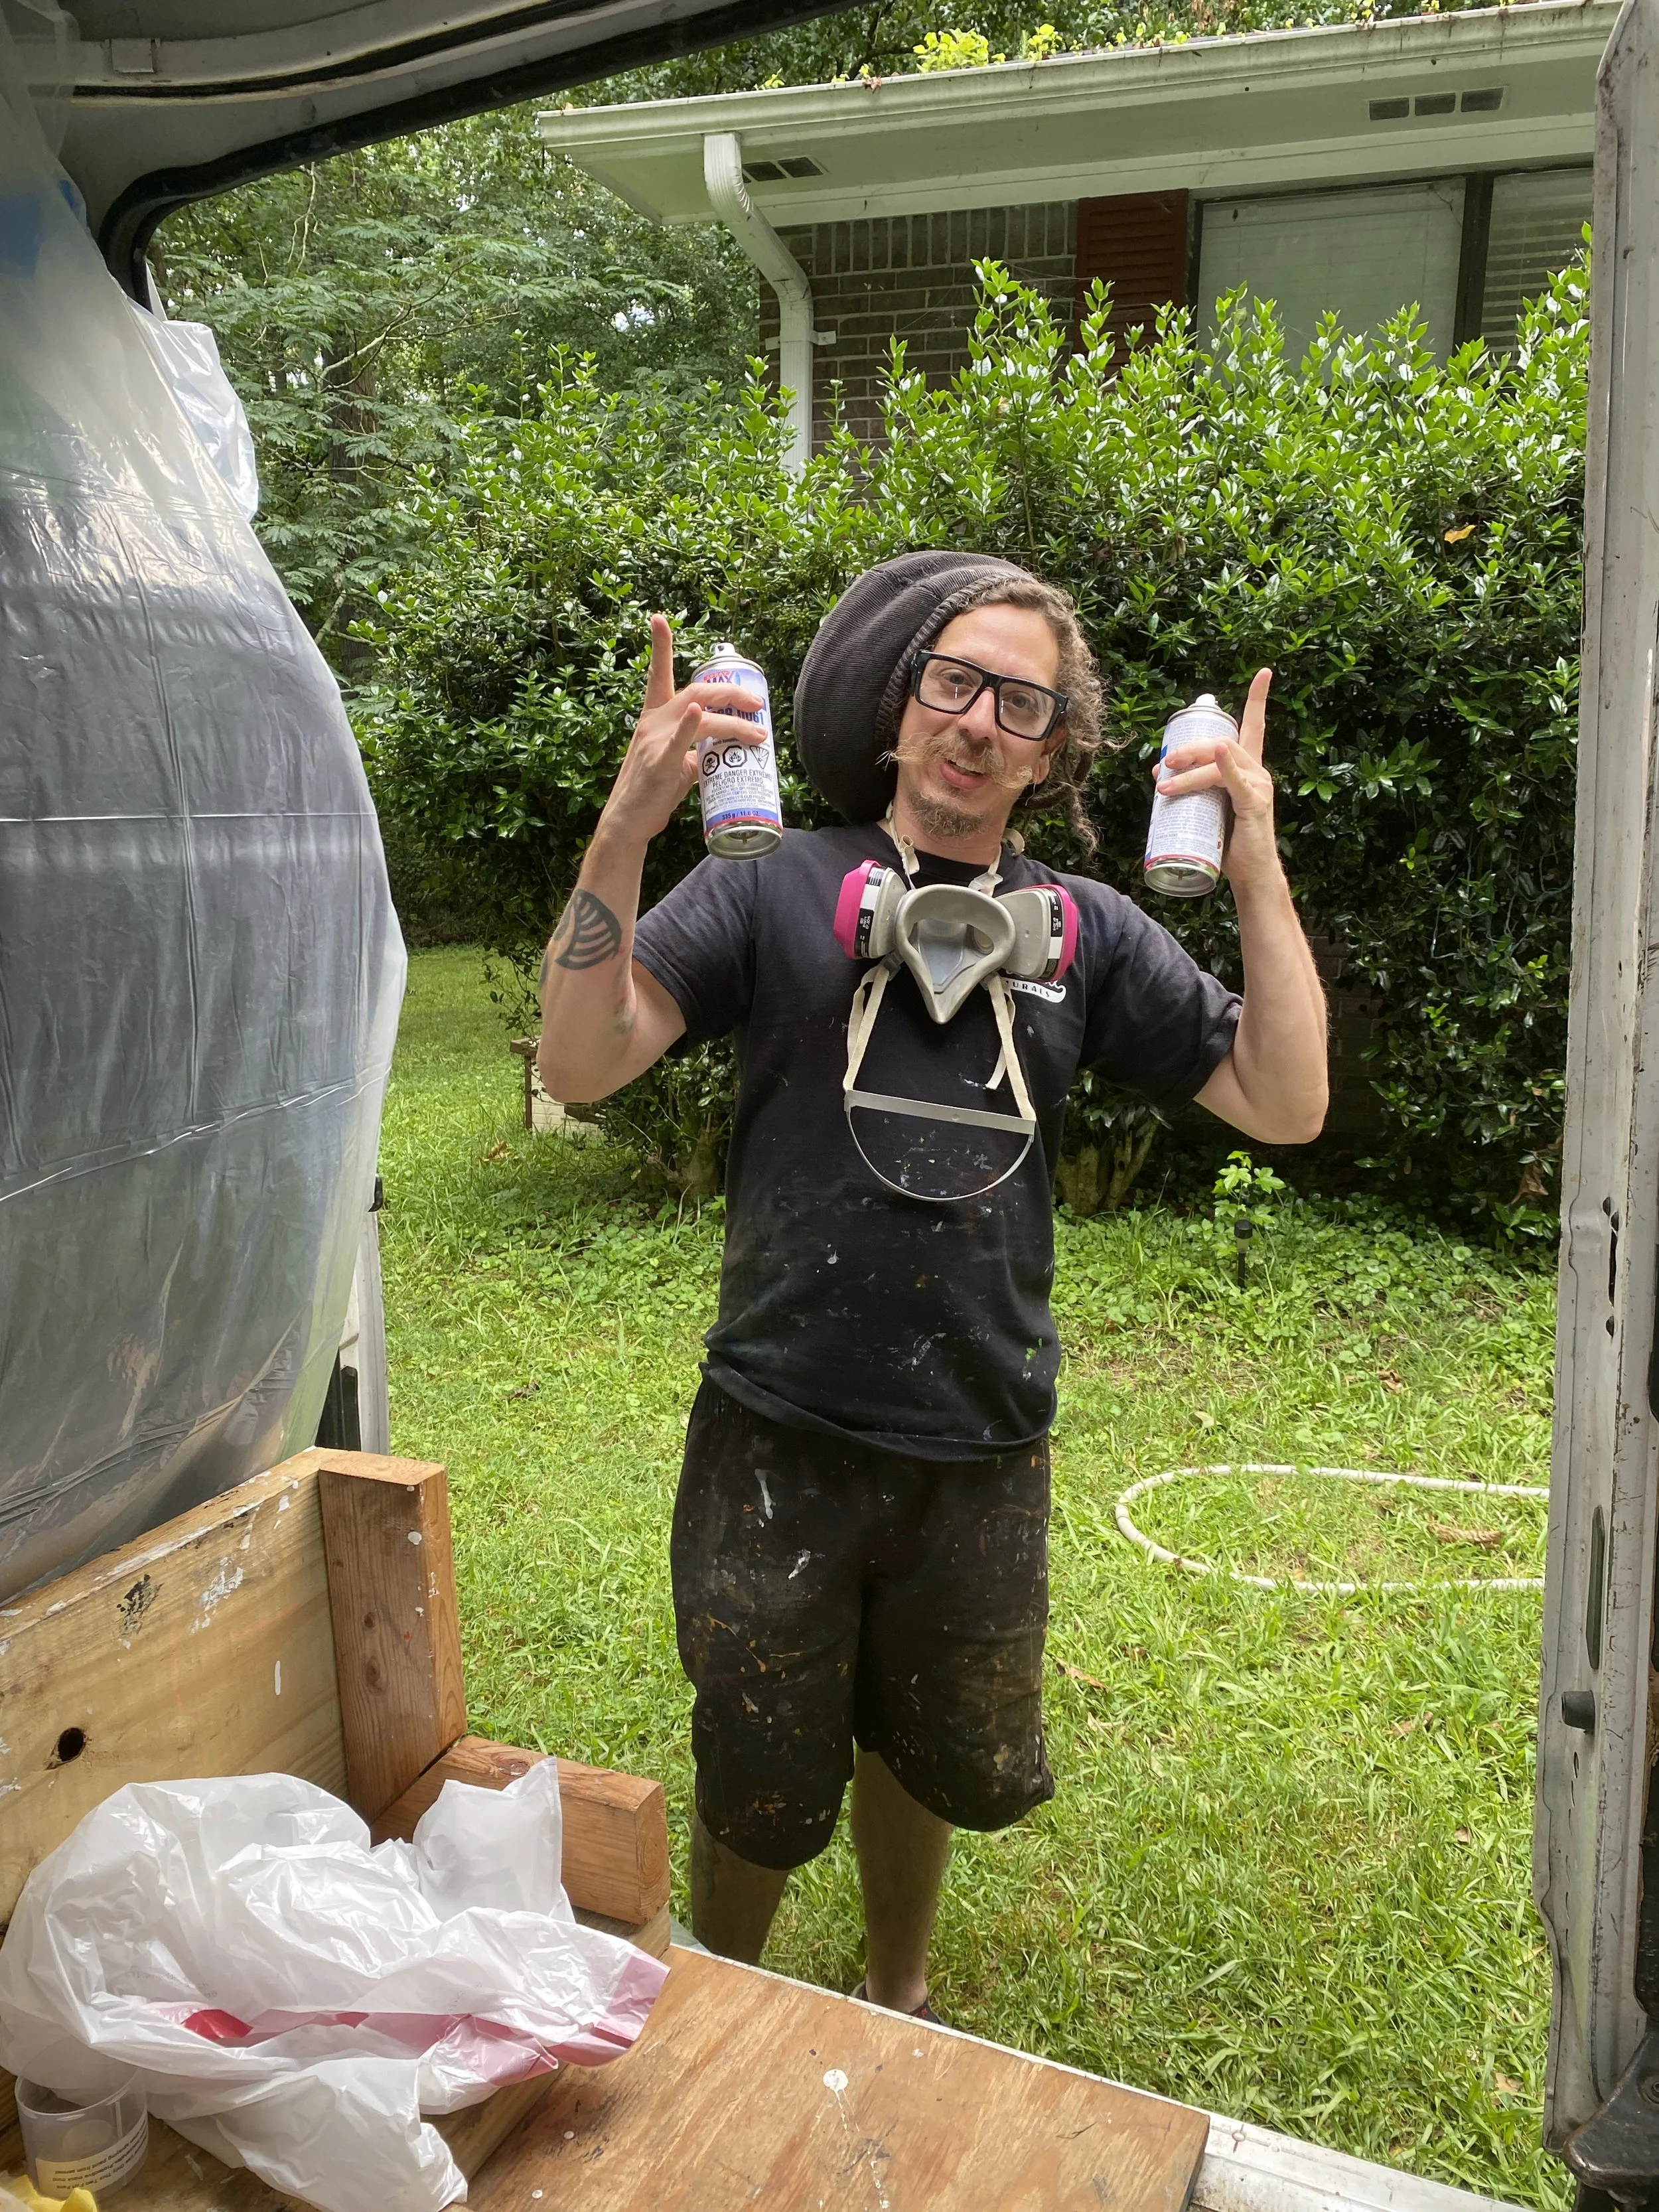
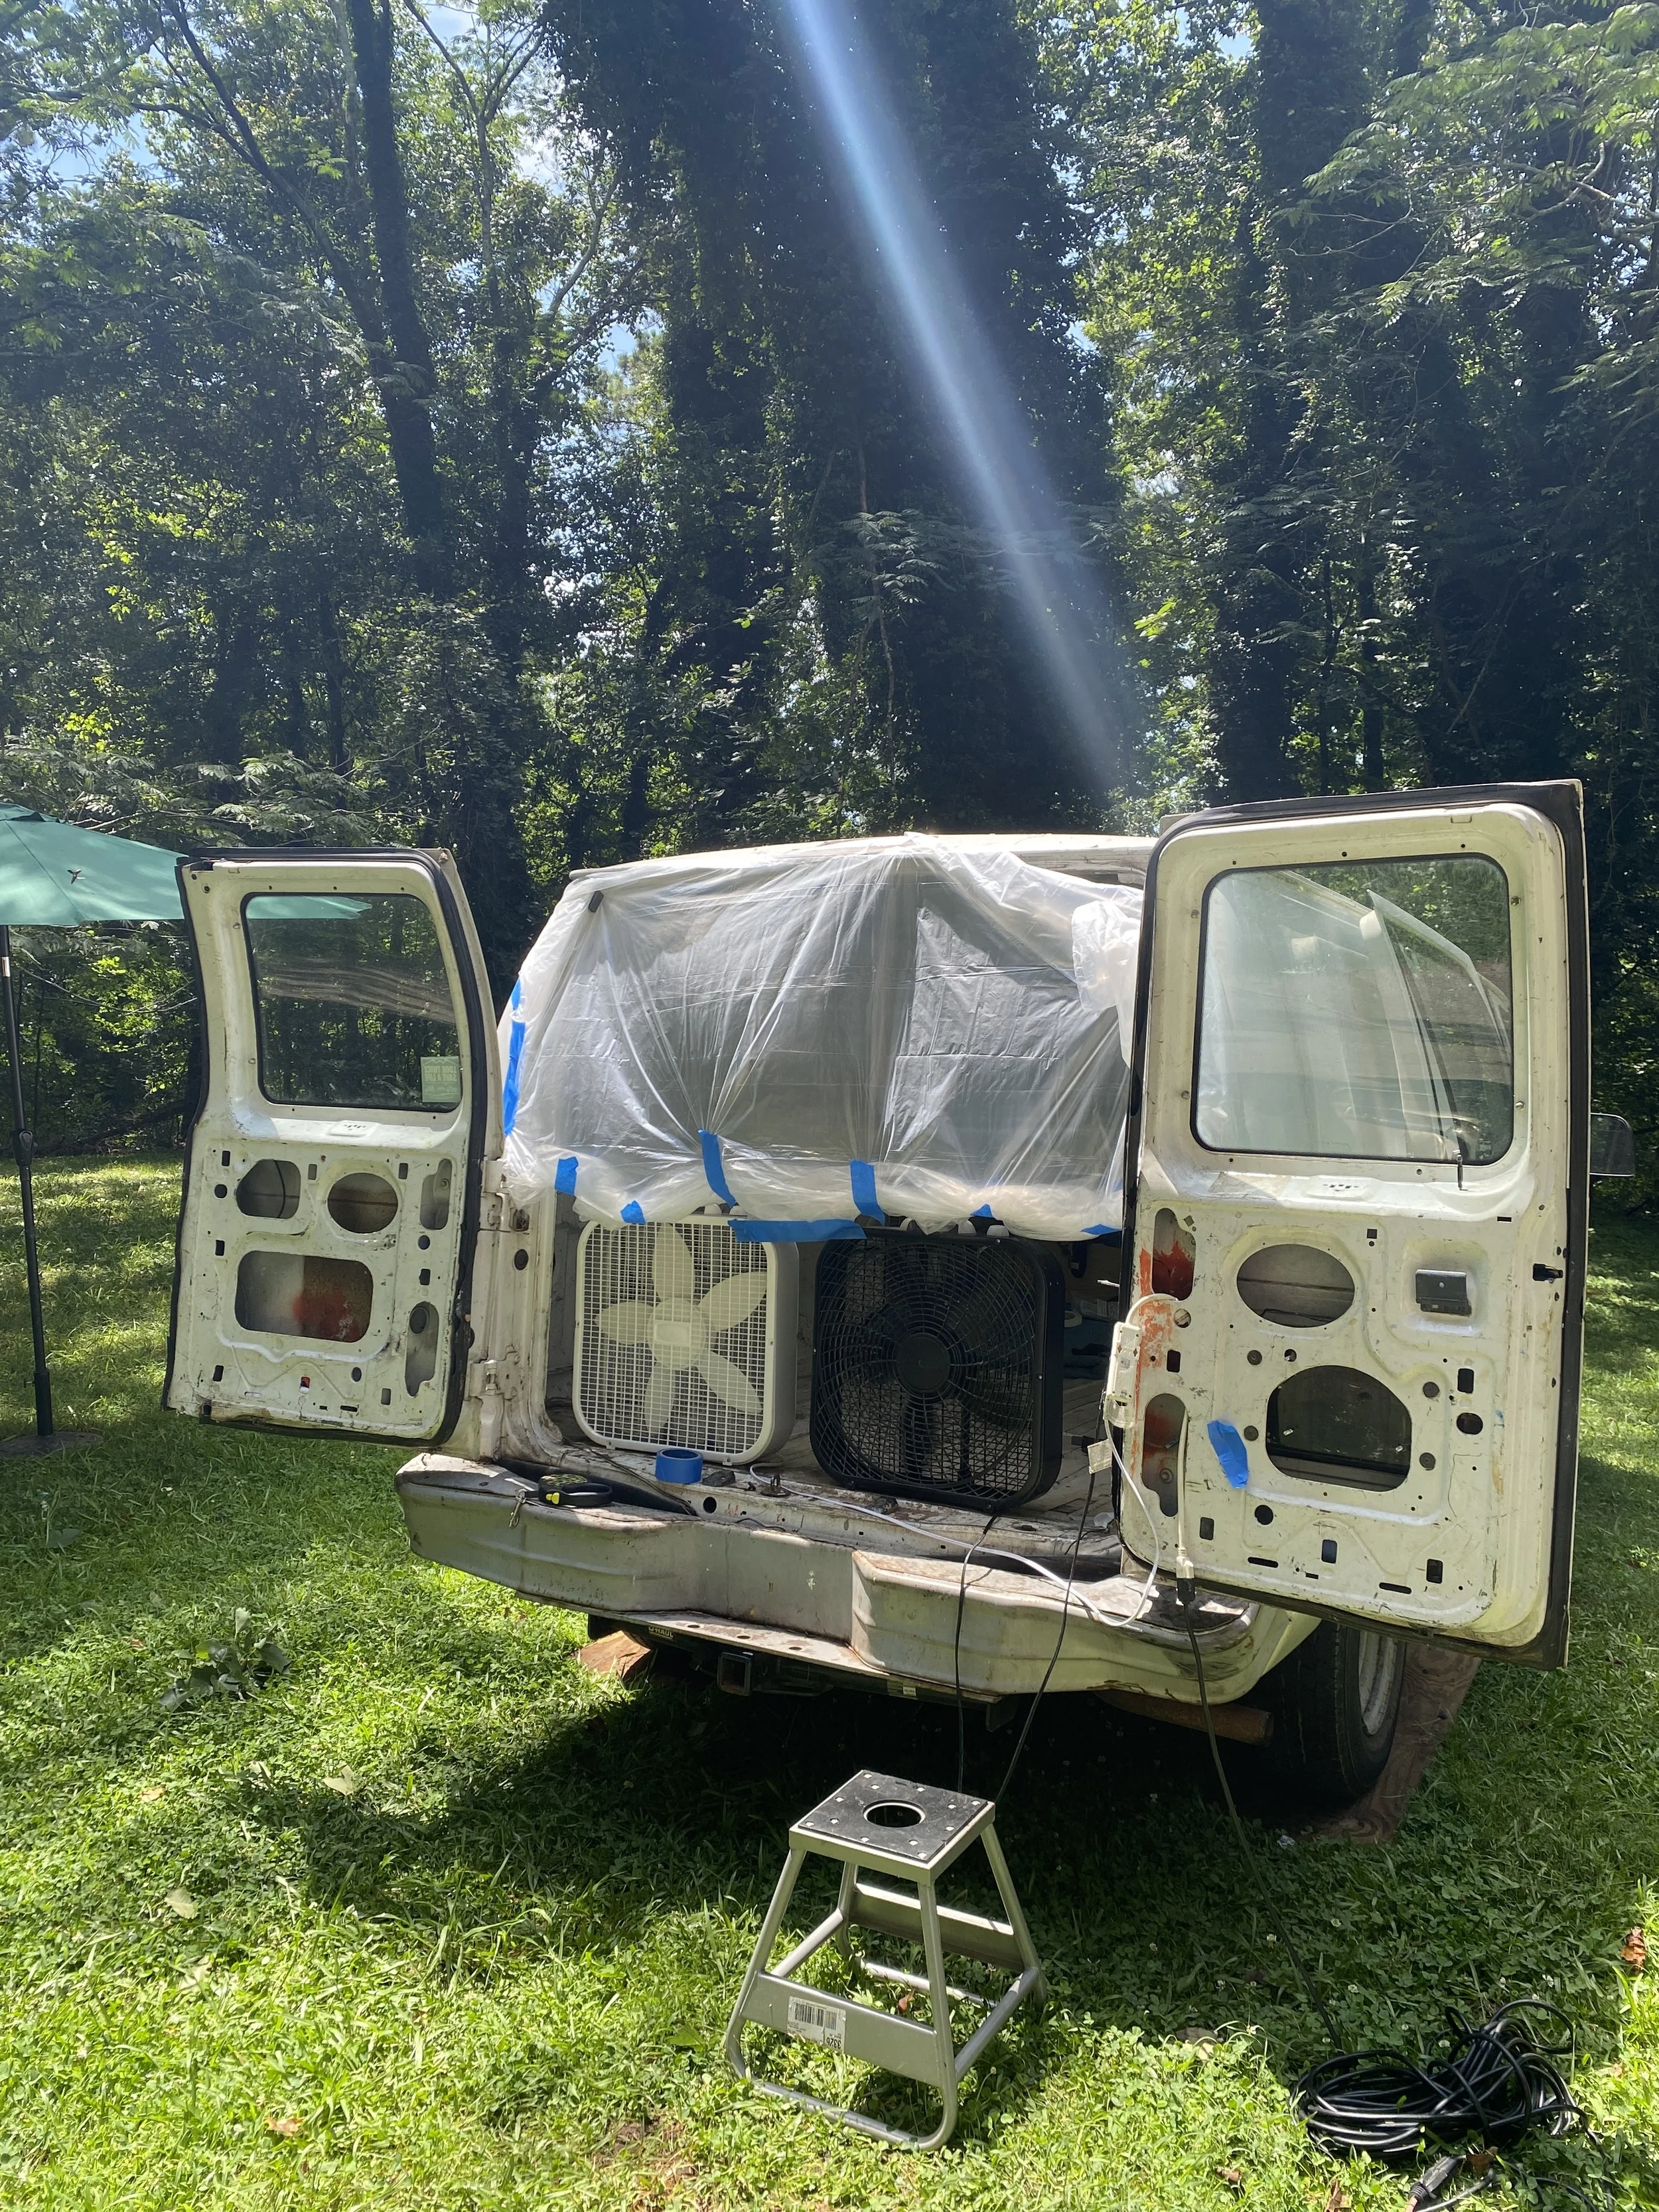
I reached out to good buddy and former GSU Art classmate Felipe C to help me apply the first layer of clear coat. He turned his paint van into a DIY spray-booth and it worked great! Per his suggestion, we used Spray Max 2K High Gloss Clearcoat. His pup, DeWalter, was close by making sure the vibes were set for the day.
After a week of curing, we noticed some bubbles had formed on some specific areas of the guitar body, possibly due to the different type of grain. The entire body was Paulownia (a dense, lightweight wood), however it was laminated with multiple pieces and Im considering that was the issue.
The high gloss looks great, I think we’re gonna do another session to get it nice and super smooth.


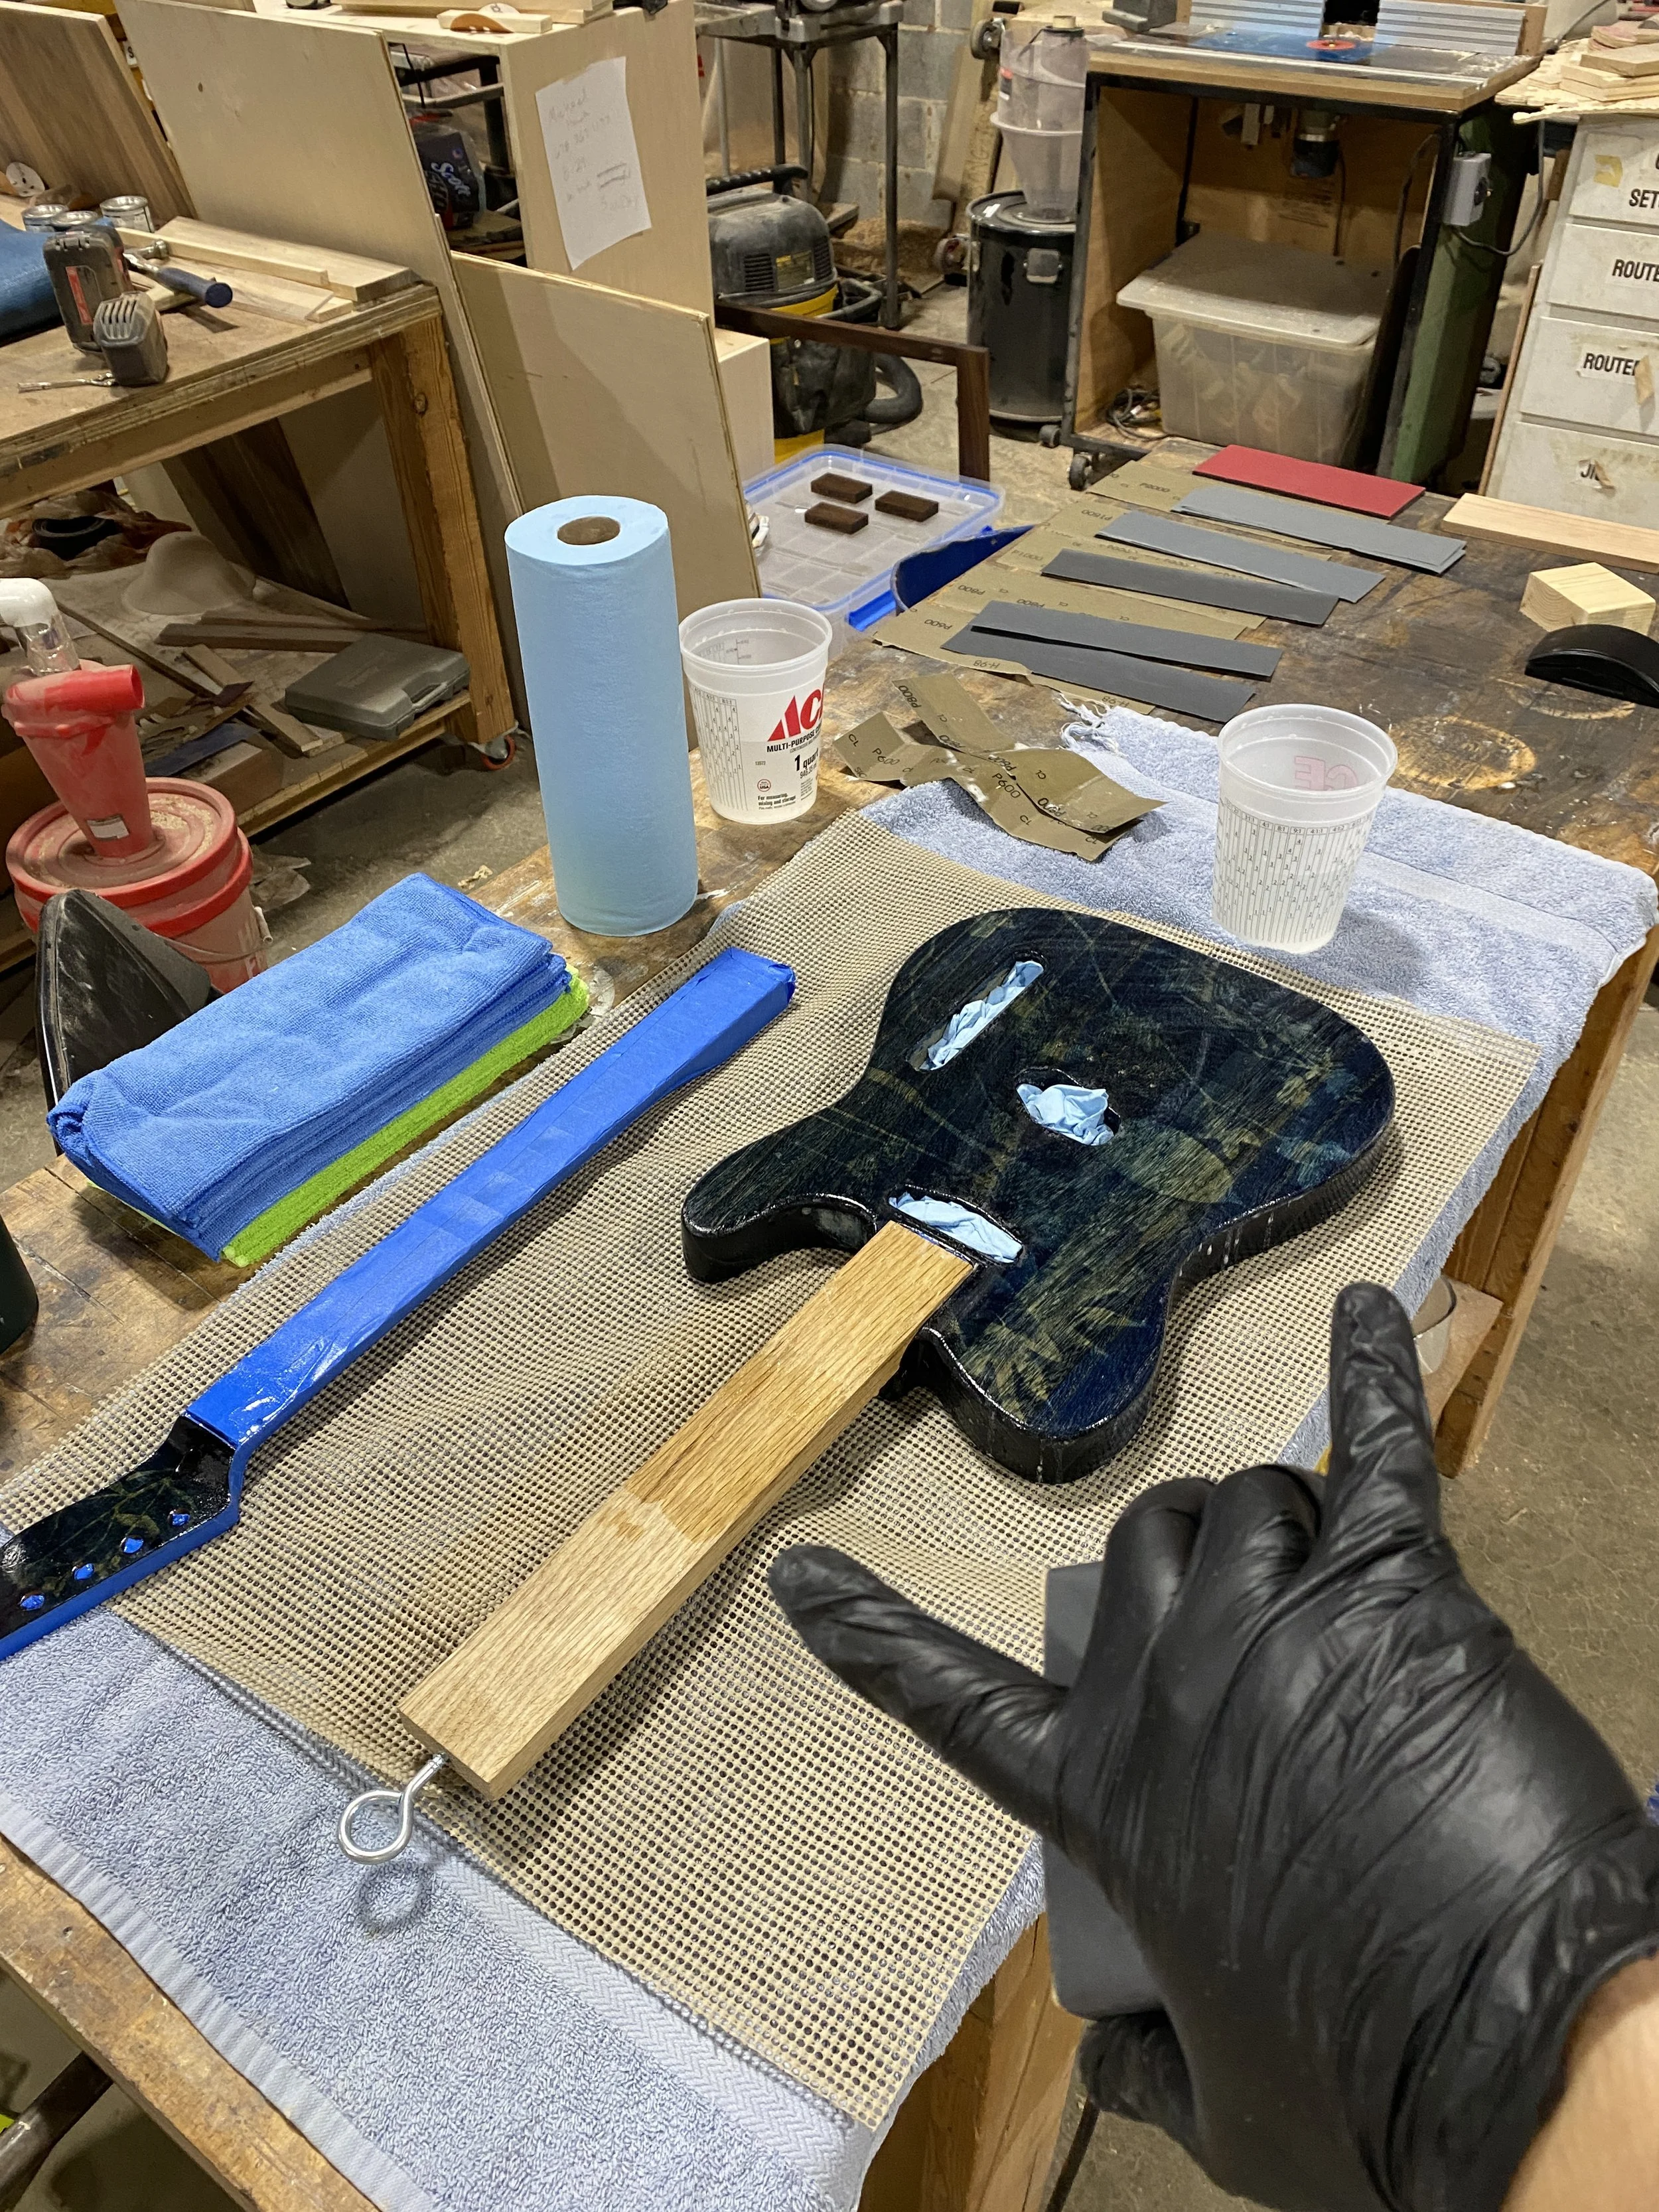
Part V: Wet Sand, Buff and Polish
After two cans of Spray Max 2K High Gloss Clearcoat the contrast of the cyanotype went down further than I had imagined, so I decided two can was enough.
I let the clear coat cure for around 3 months, although it didn’t need quite that long. Once I finally got around to setting up at Freeside, I set up, did some prep work (tearing down strips of sand paper in higher and higher ratings. I used a set of buffing and polishing paper from a kit at Autozone, something like 600-1000-1500-2000-2500, Then a 3000 grit sanding sponge, that was super helpful. I would definitely use all sanding sponges next time.
Since I used the spray max 4k for this, I essentially processed this like I would a part of a body component on a car.


Part V: Electronics and Hardware
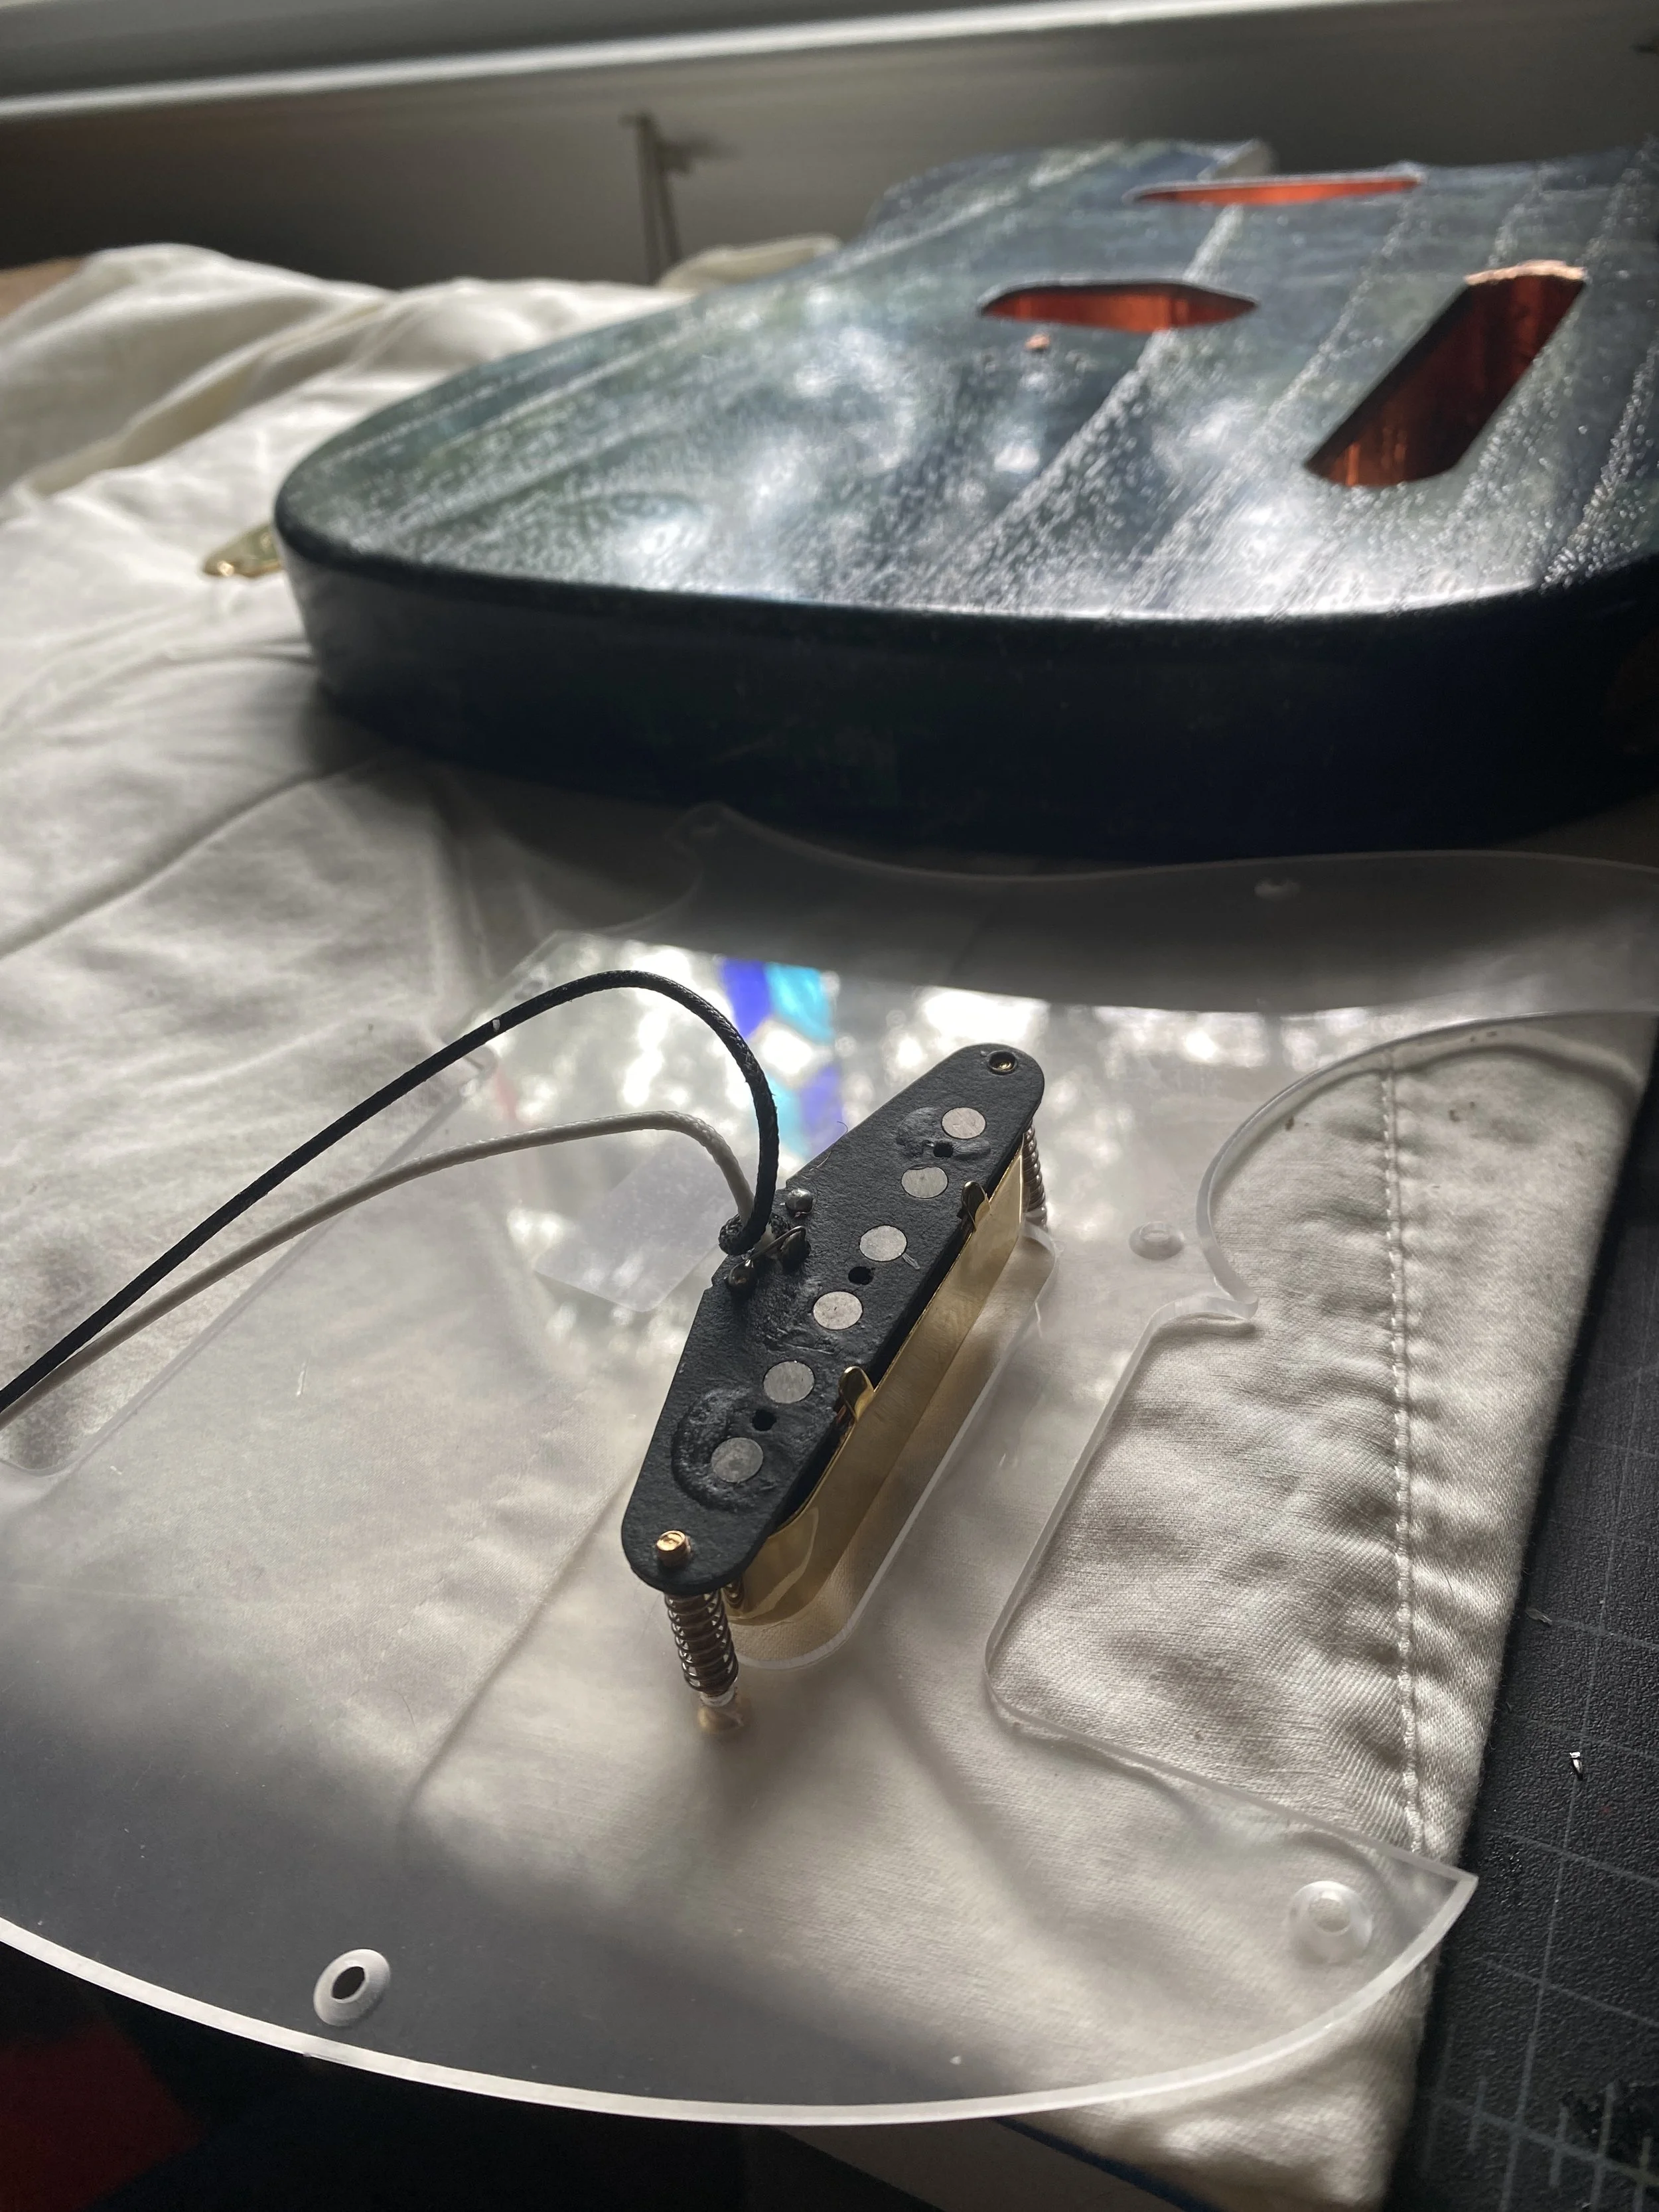
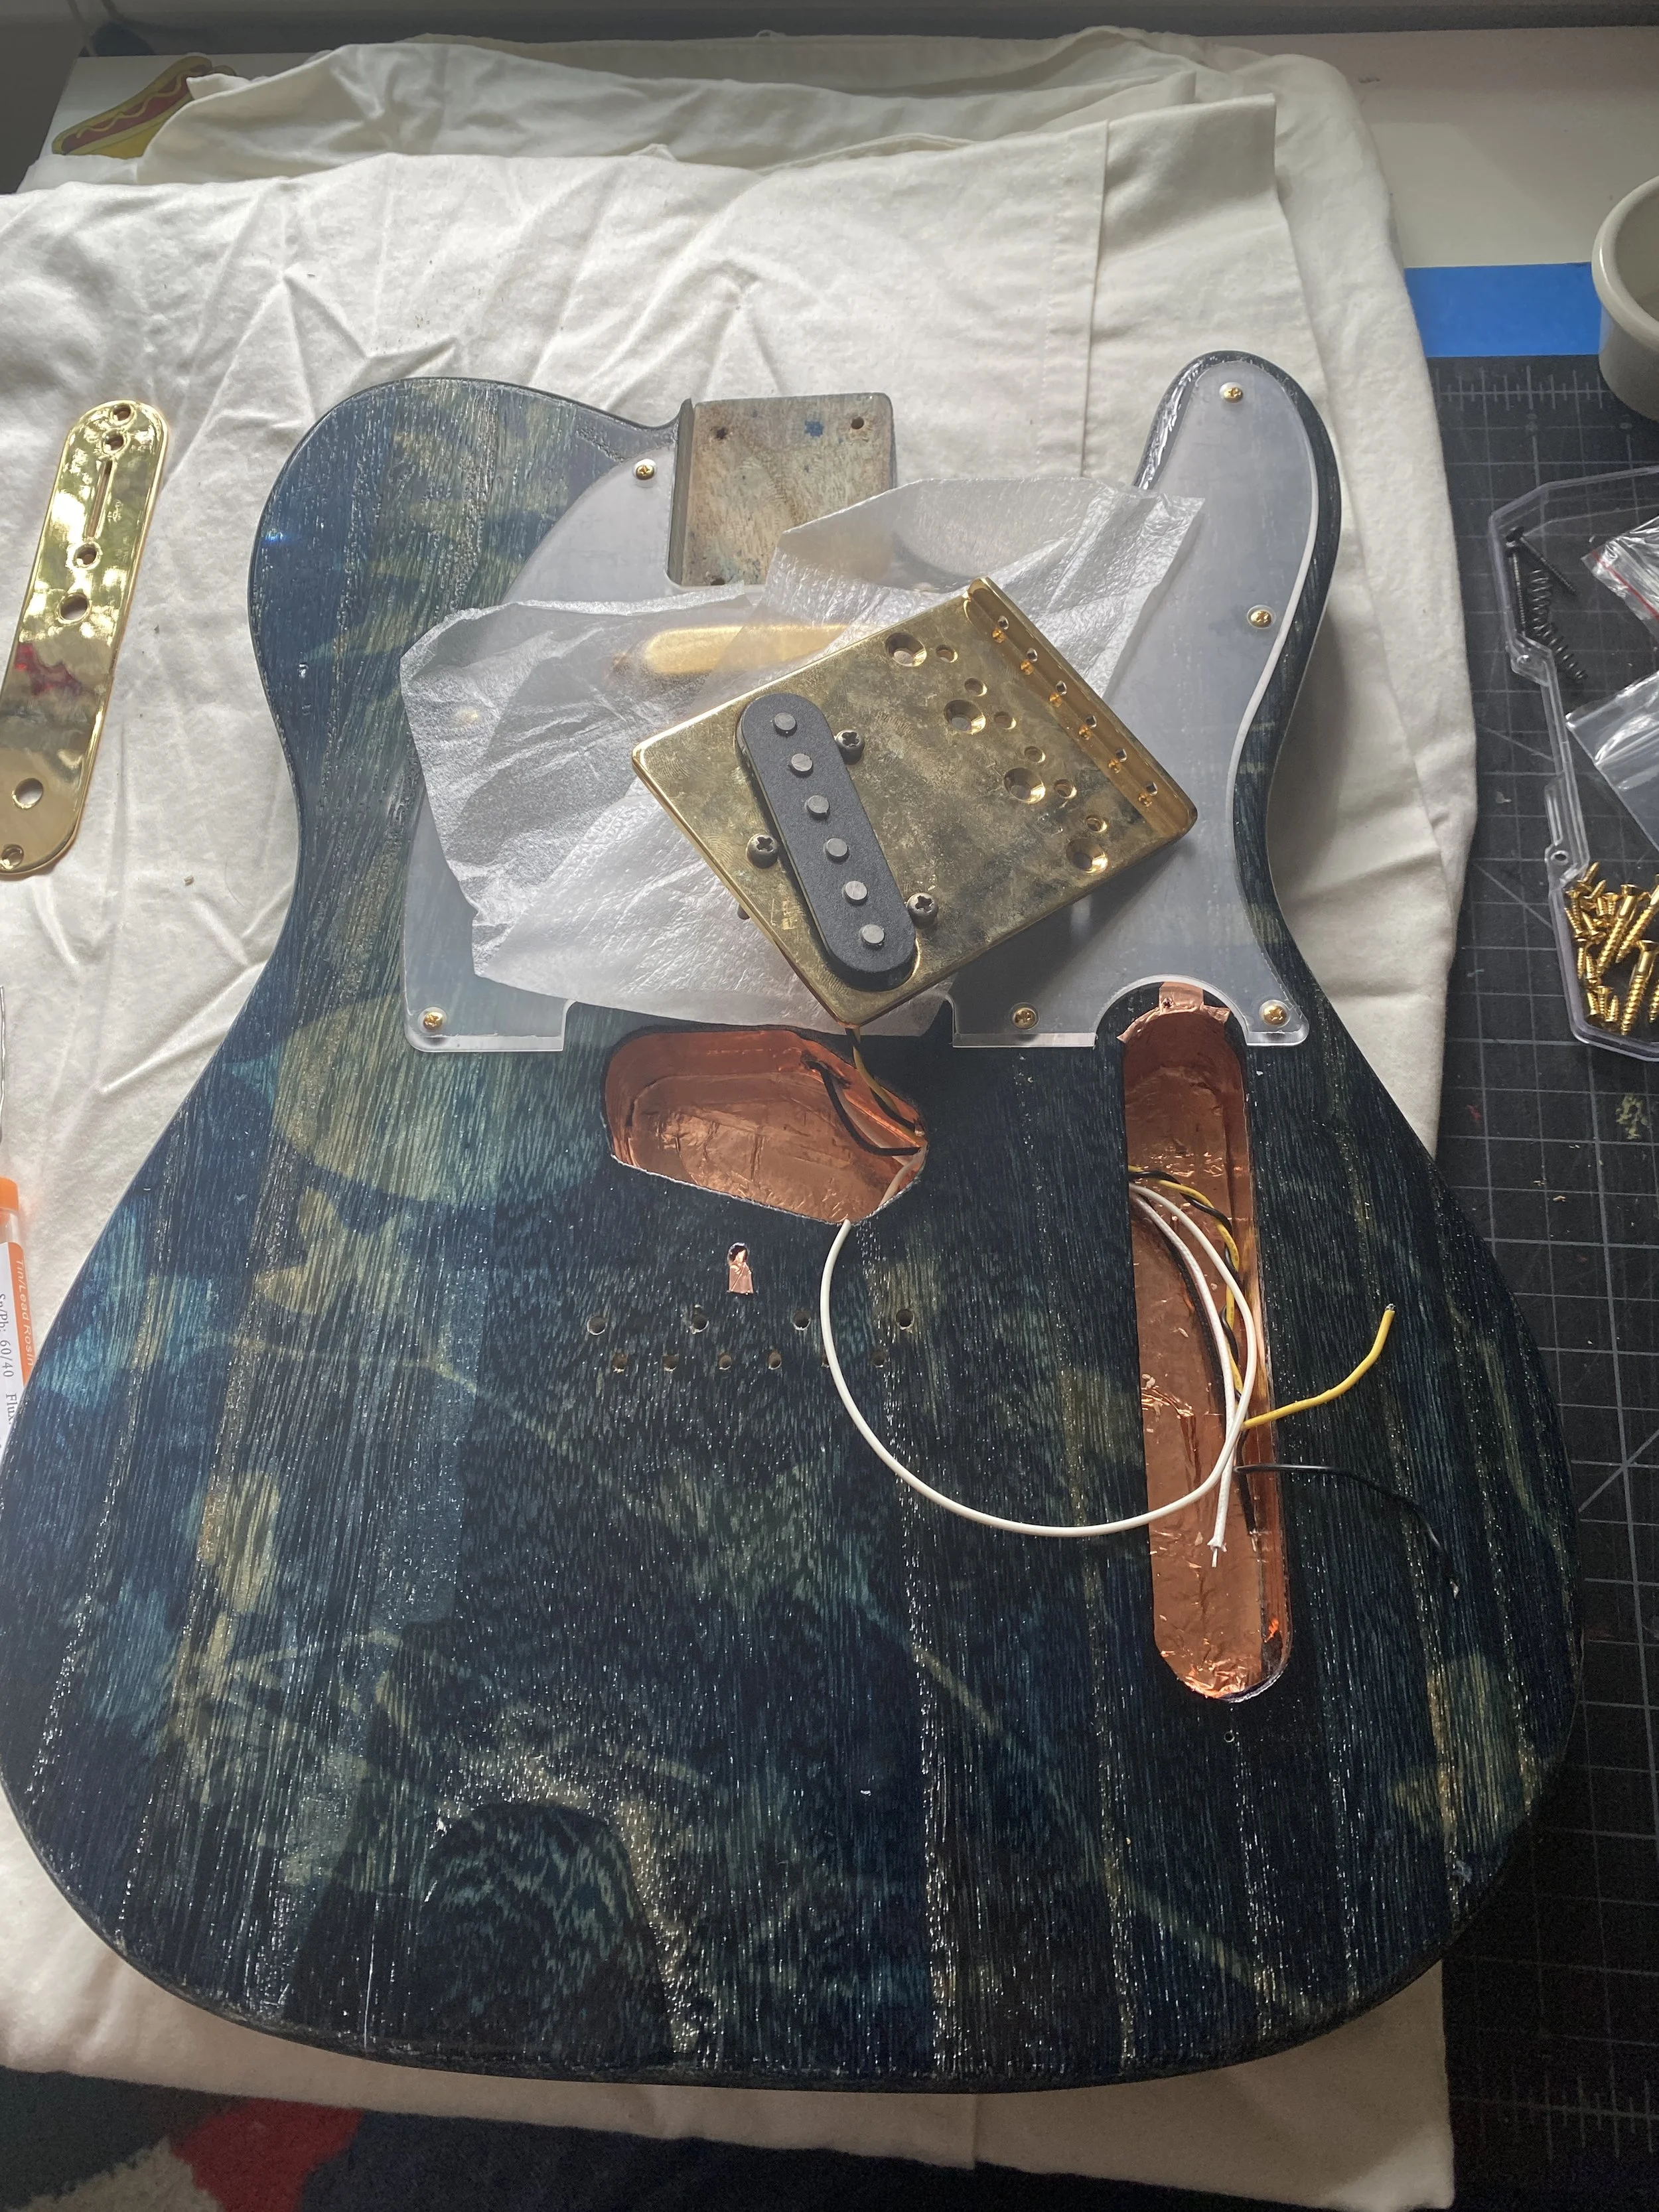
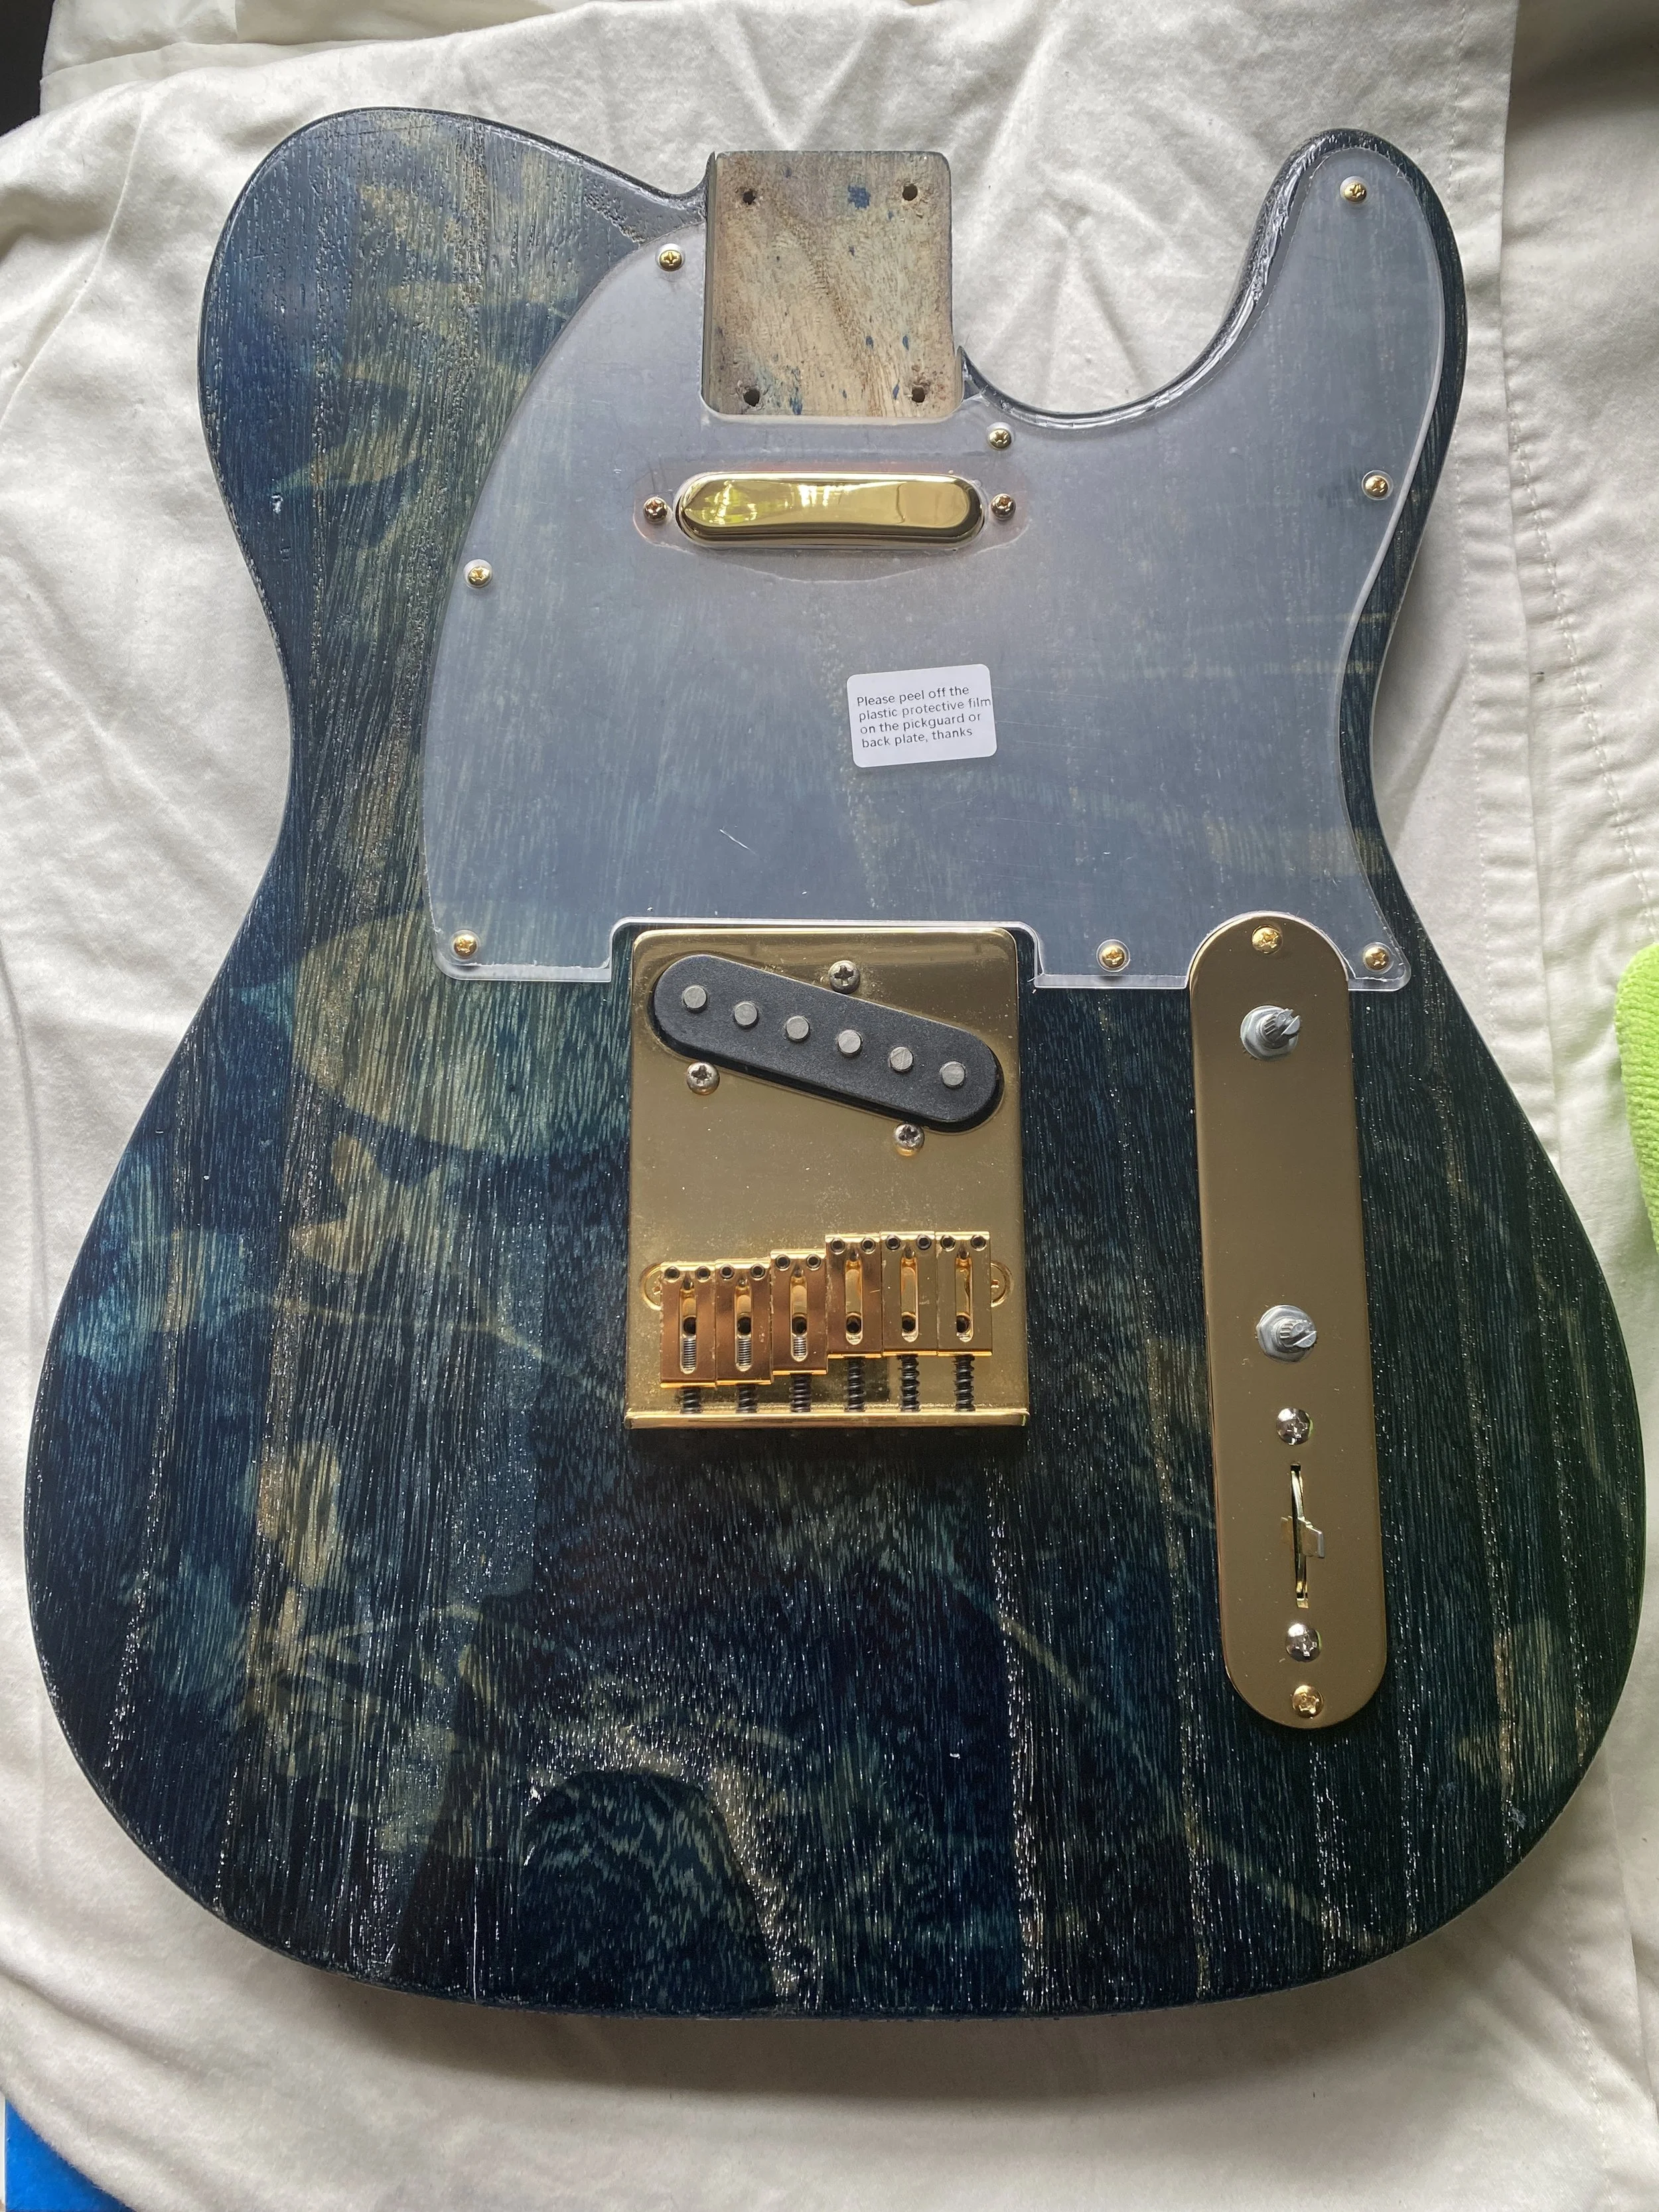
The electronics part of this build is s very standard 1 Volume, 1 Blend, 3 Way switch set up. I made sure to put in copper shielding tape to help prevent any feedback or grounding issues.. I learn recently you can use Corry's Slug and Snail Copper Foil Barrier as a cheaper alternative. The clear pick-guard came out really nice, a random one from Reverb.com.
I used Stew Mac for the more important pieces of hardware: The Tuners and The Bridge. Everything else (screws, string trees, knob plate, pick-guard screws, strap buttons) I ordered cheaper pieces from Guitar Fetish.
Clear pick-guard was an ebay find.
Electronics are a simple bridge humbucker I ripped out of another guitar, and a Gold AlNiCo 5 neck pickup from Reverb.


Complete


Things I learned:
Using a lightweight, LESS dense wood for the body presented a few problems:
Neck dive. The roasted maple neck isn’t weight matched, looks great though.
More air can exisit in the pored which might hold moisture.
Grain was hard to predict because of lamination in production.
Single coil pickups are noisy, bridge pick up feeds back a-lot, might need to sand the bridge down?
Using a temple to drill counter sunk holes for bridge through ferrels is a non-negoitable.
Larger areas of gold hardware are fingerprint magnets
Processing the nut was annoying, might have to retry it.
What I would do different next time:
I would clear coat the body as soon as possible after exposing with Cyanotype Emulsion. I suspect there was some bleed and fading occurring in the months leading up to clear coating it.
Im interested in an Oil and Wax mixture for the next surface treatment.
Could also be 6 or a 1/2 dozen on the pain in the ass scale.
I should do a proper fret job on any neck I buy as a standard.